1-7
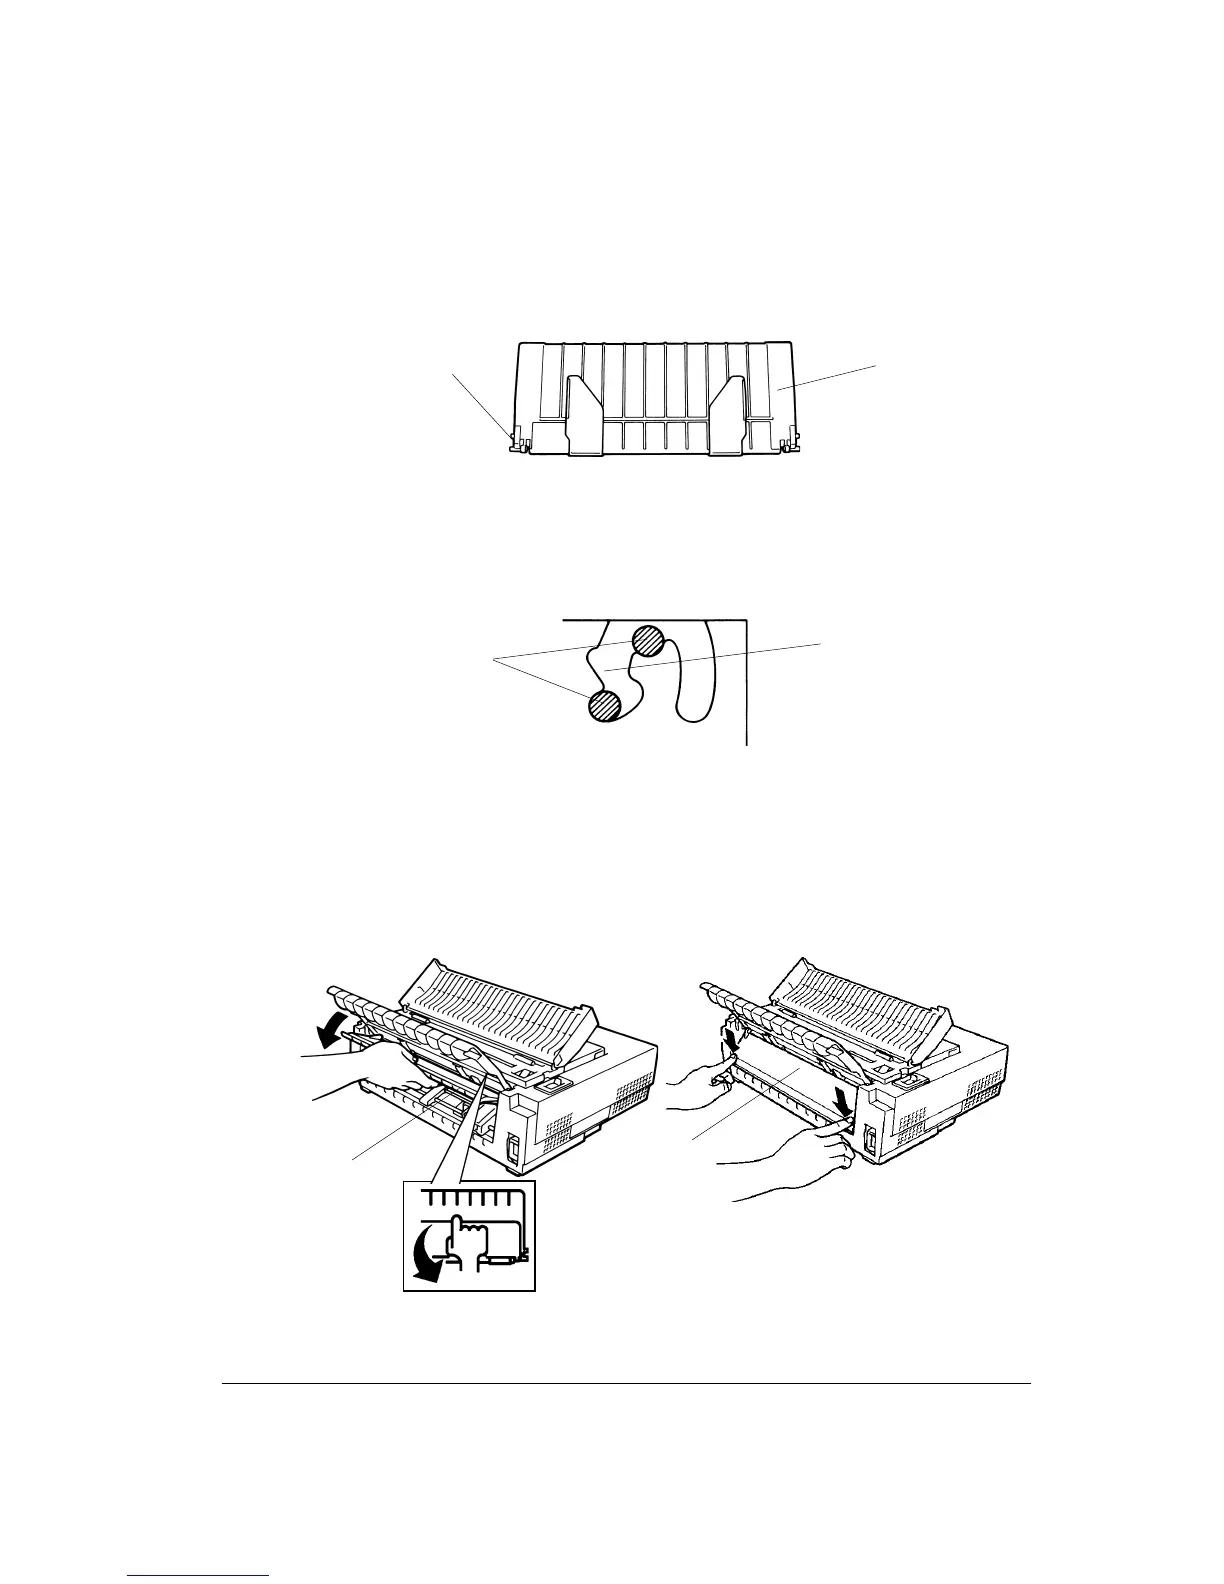
3. Locate the two mounting pins 3 on each side of the cut sheet stand 4.
Locating the Mounting Pins
4. Hold the cut sheet stand vertically over the top of the printer. Slide the mounting pins 3
into the long, front grooves 2 so that the cut sheet stand is mounted on the printer. This
is the cut sheet stand’s up position, used for printing single sheets.
Positioning the Mounting Pins (Example: Left Side)
5. The back cover 5 is locked at the rear of the cut sheet stand. Acoustic foam is stuck on
that movable plastic part. Pull the center of the top edge of the back cover 5 so that the
back cover is unlatched from the cut sheet stand (at its rear you can see the symbol) and
tilt down the back cover. Lock the back cover 5 to the printer by clicking both of its
sides to the casing.
Locking the Back Cover
6. Return the acoustic cover 1 towards the back of the printer.
3
4
5
5
3
2
 Loading...