1-14
Step 5
Testing the Printer
At this point, you are now ready to load paper and run the printing test. The printing test is
a built-in function for checking printer performance and print quality before you connect the
printer to the computer. This section describes the test procedure using single sheets.
The printing test function (mode), available in the Set-Up mode, prints the characters
available from the ASCII character set. Use a standard Letter or A4 size paper lengthwise
(portrait orientation) to carry out an 80-column print test.
Note: To test the print on 136 columns of the LA36W model, the print test should be
performed with 136-column continuous forms. See Chapter 2, “Paper
Handling,” in the User Manual to know how to load continuous forms. The 80-
column test on cut sheet paper is nevertheless valid for a quick check of your
LA36W model.
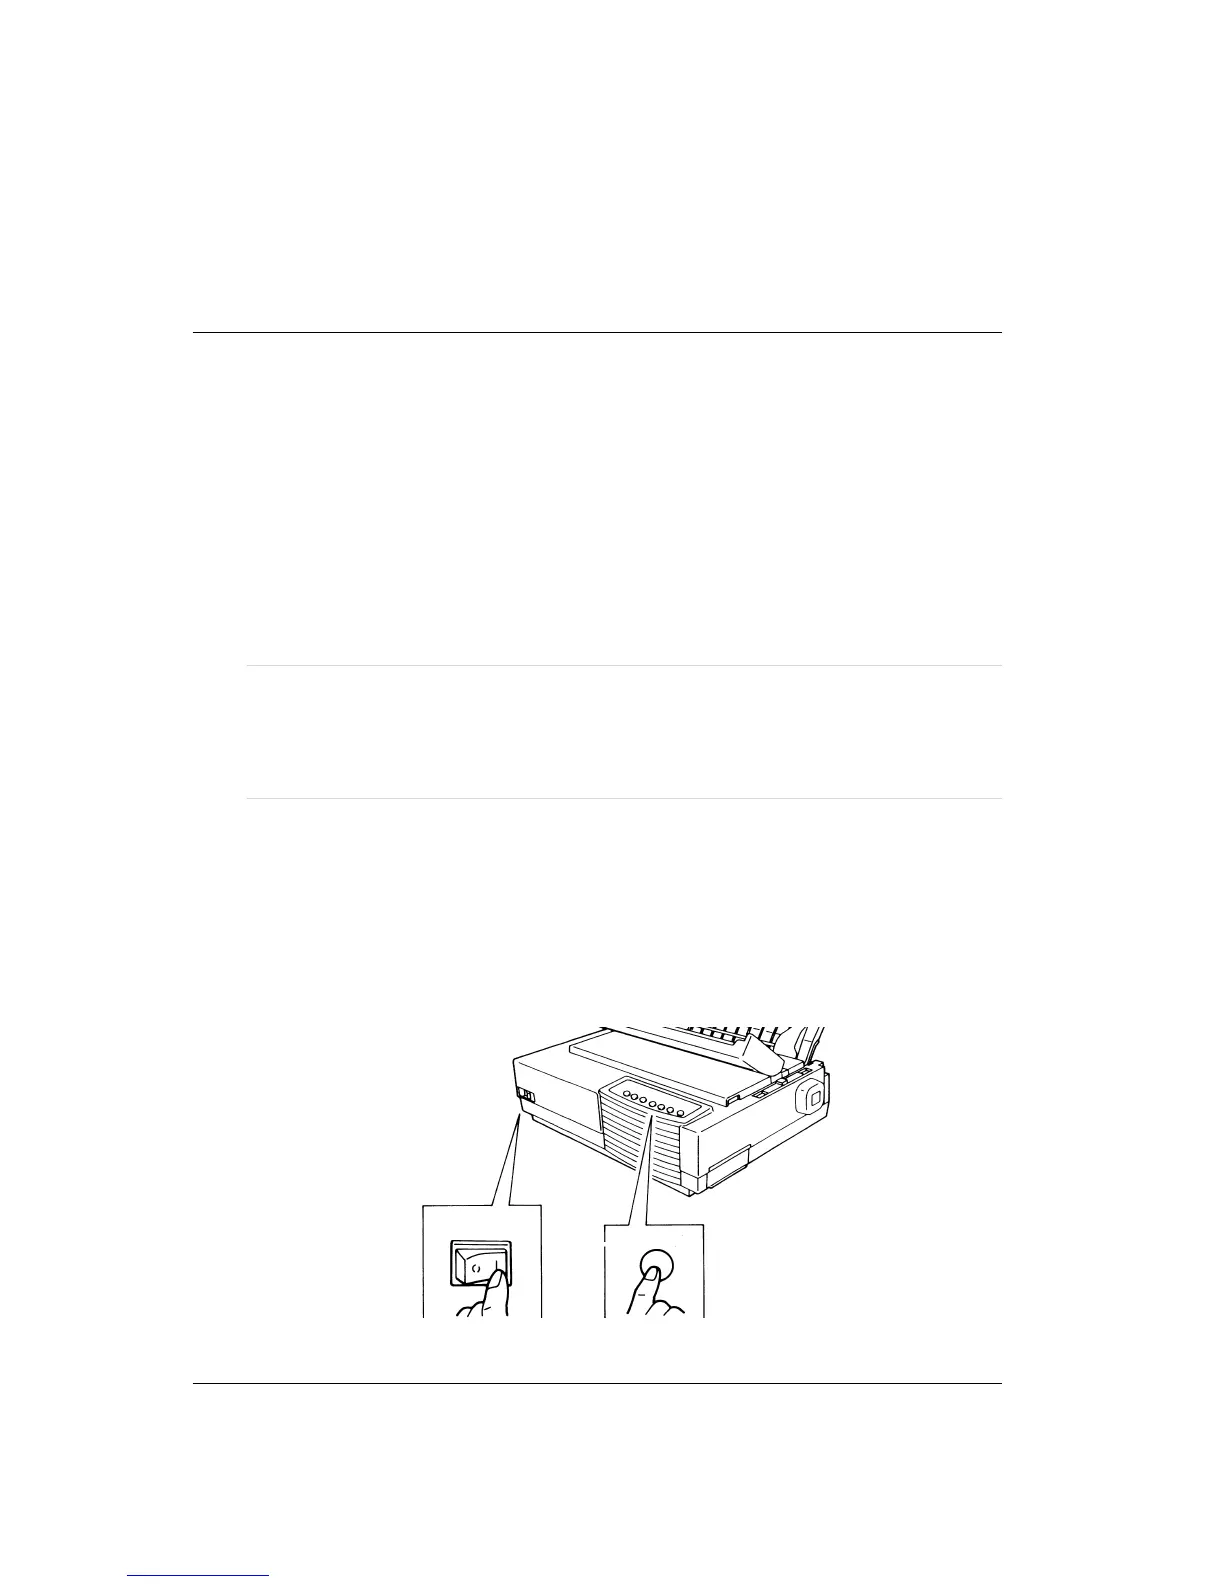
Entering the Printing Test Mode
1. Turn the printer off.
2. While pressing the FF/LOAD button on the control panel, turn the printer on. The
printer enters the printing test mode and waits for paper loading. The Fault indicator is
lit because there is no paper in the printer.
Entering the Printing Test Mode
FF/LOAD
OFF
ON