Sec-3.6
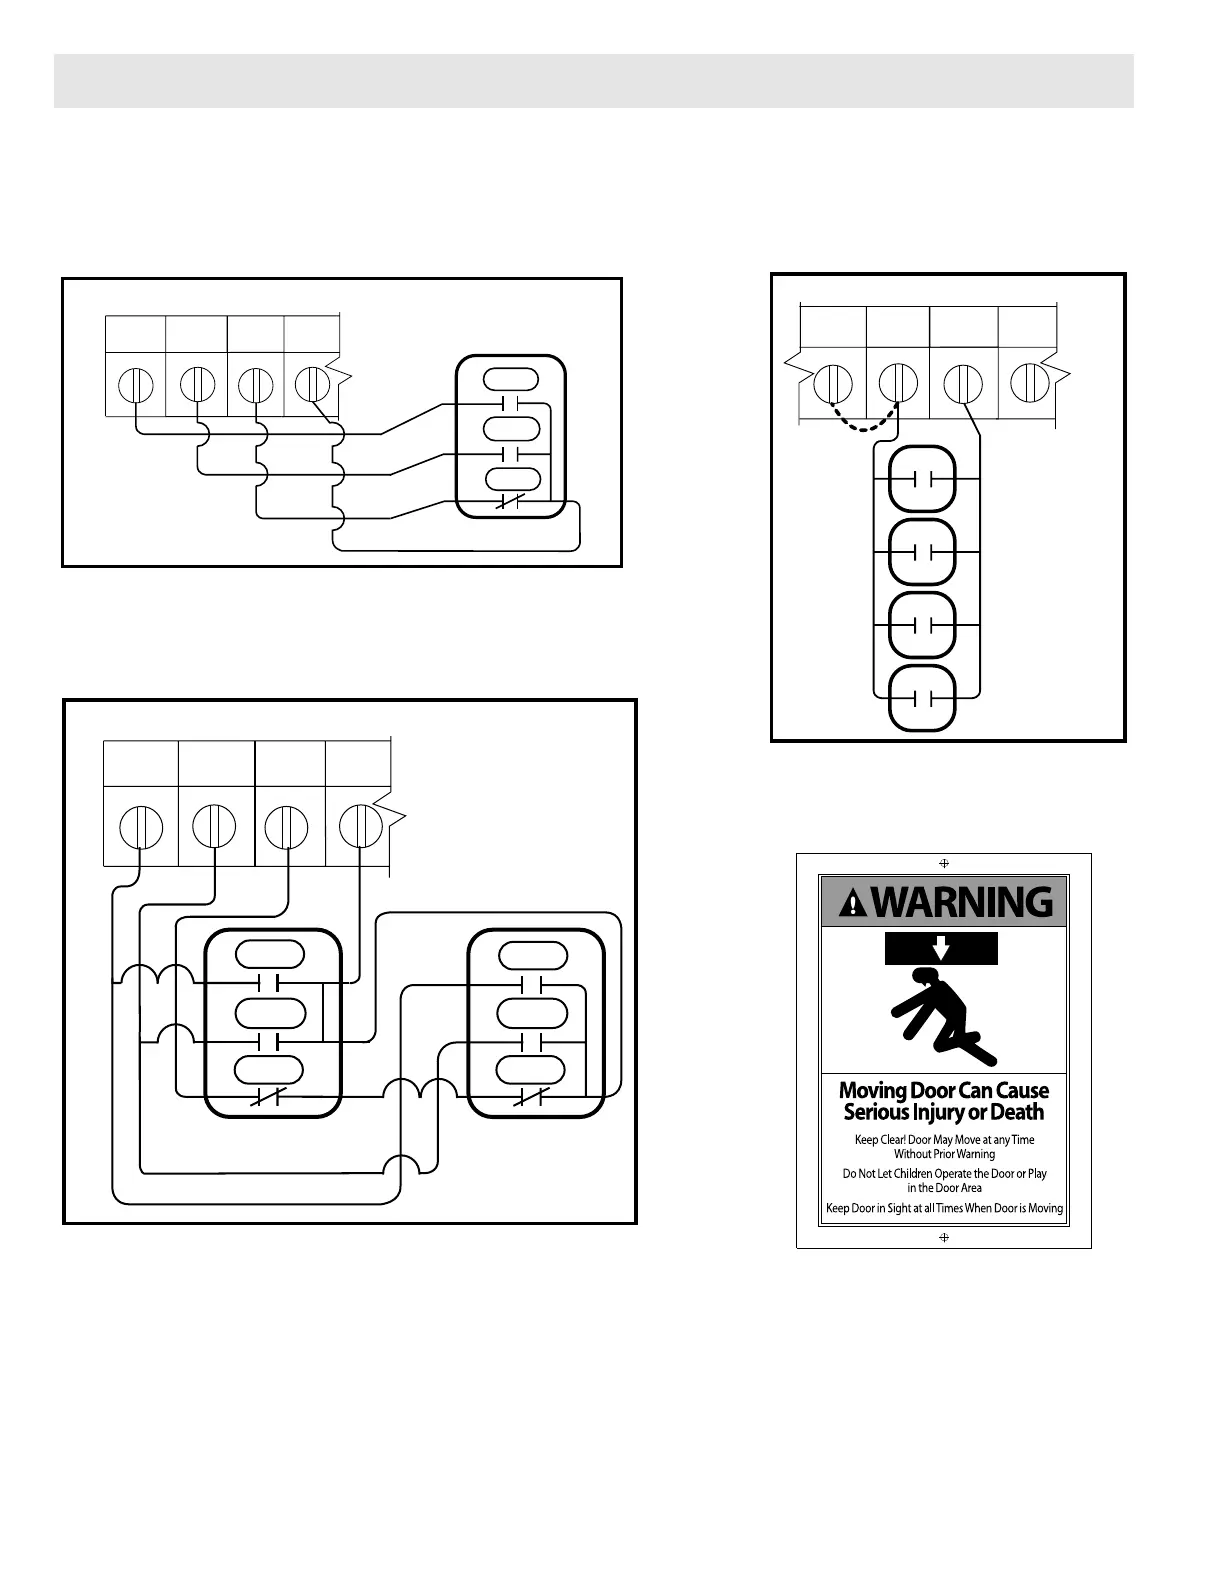
1. For a single open/close/stop installation, make connections as shown in FIG. 1.
2. For single button accessory controls, make connections as shown in FIG. 2.
3. For a multiple open/close/stop installations, make connections as shown in FIG. 3.
4. Install WARNING placard next to control station. FIG. 4
OPEN
CLOSE
STOP
CONTROL SIGNAL TERMINAL STRIP
NOTE:
JUMPER BETWEEN
STOP AND GND
TERMINALS MUST
BE REMOVED
OPEN CLOSE STOP GND
3-BTN
Station
Entrapment Warning
Placard
CONTROL SIGNAL TERMINAL STRIP
1-BTN
Station
Key
Switch
Station
Card
Reader
Open/Close
Pull Switch
STOP GND 1-BTN
ODC
STB
CONTROL SIGNAL TERMINAL STRIP
OPEN
CLOSE
STOP
OPEN
CLOSE
STOP
OPEN CLOSE STOP GND
NOTE: JUMPER
BETWEEN STOP
AND GND TERMINALS
MUST BE REMOVED
3-BTN
STATION
3-BTN
STATION
NOTE: If an External STOP button is NOT being installed, a jumper wire must be installed between the “STOP” and
“GND” terminals as shown.
NOTE: Low voltage wiring can be run a maximum of 1000 feet. DO NOT use long distance wiring kits on this
operator.
FIG. 1
FIG. 2
FIG. 3
FIG. 4
Section 3: Wiring
 Loading...