Getting Started
9
3
3.3 Basic Installation
This section describes basic installation required to program and operate the GV-NVR
System Lite V2.
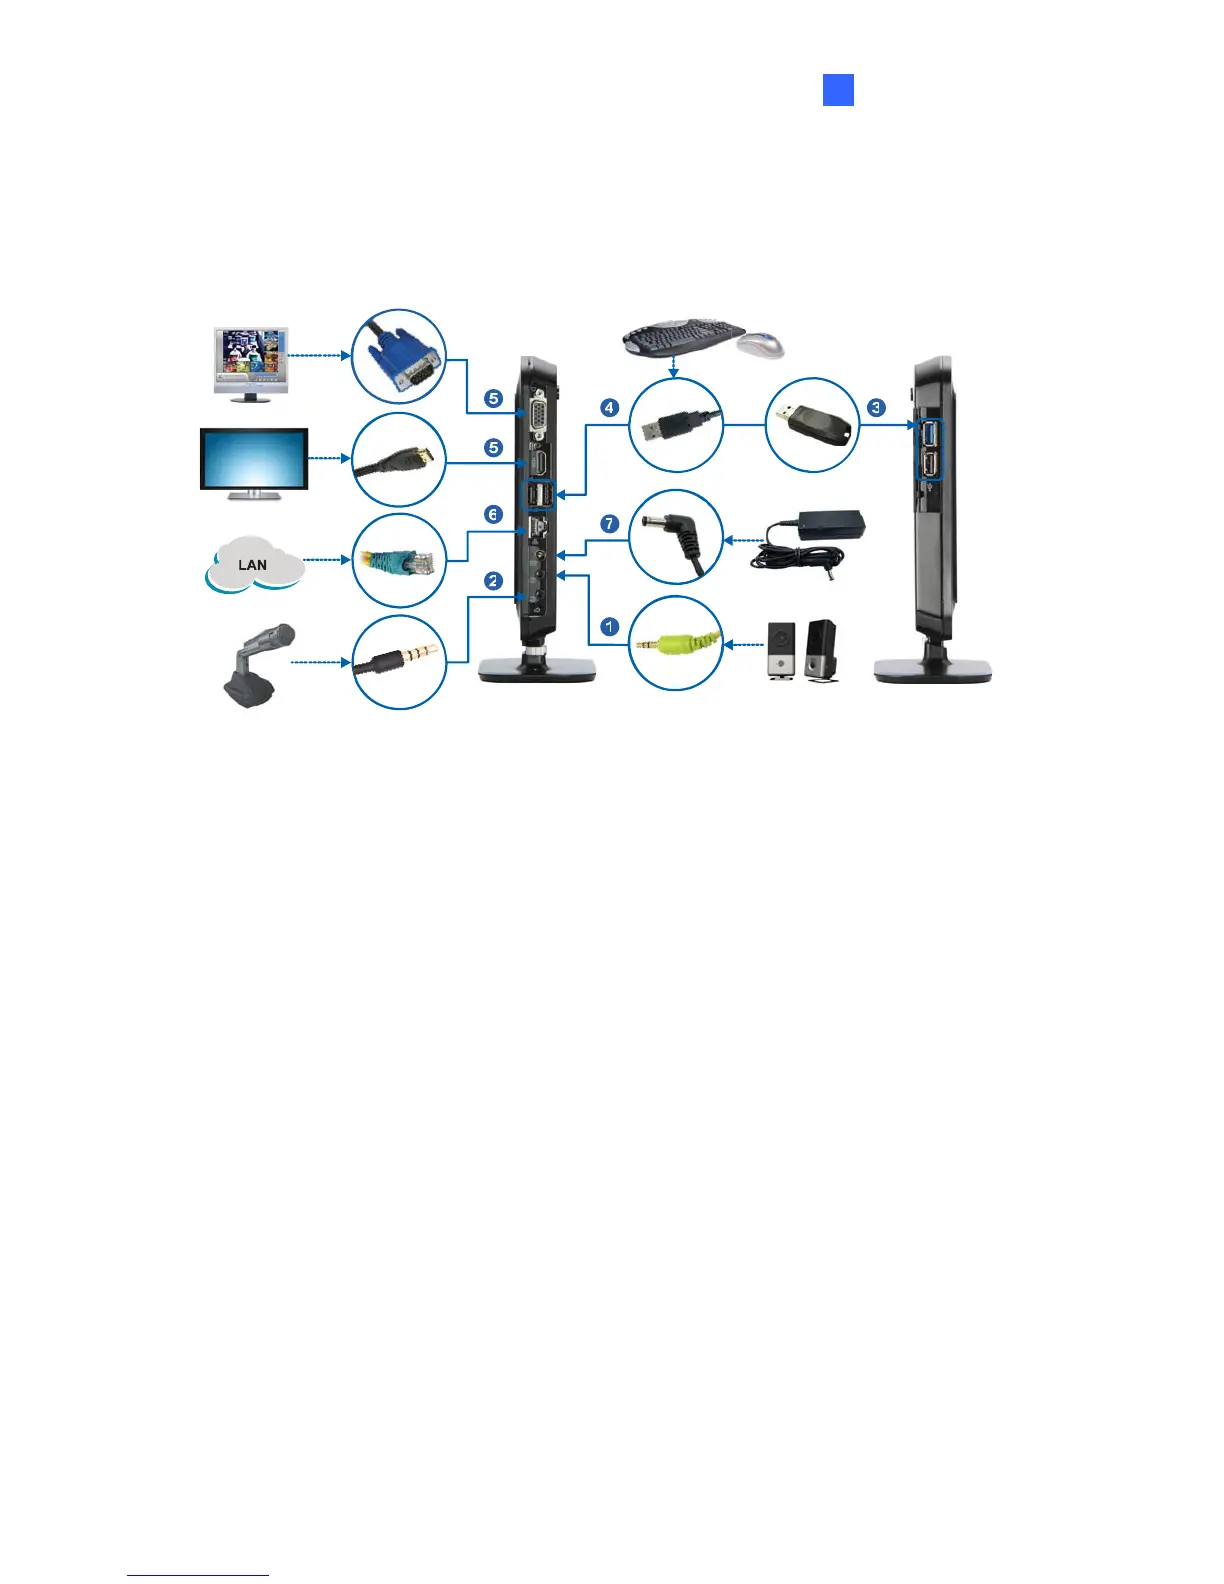
Figure 3-5
1. Connect the speakers to the GV-NVR System Lite V2.
2. Connect the microphone to the GV-NVR System Lite V2.
3. Optionally connect the GV-USB Dongle for third-party IP cameras' connection.
4. Using the USB cables, connect a keyboard and a mouse to the GV-NVR System Lite V2.
5. There are two ways to connect the monitor to the GV-NVR System Lite V2.
• Using the VGA cable, connect the computer monitor to the GV-NVR System Lite
V2.
• Using HDMI cable, connect the HDTV to the GV-NVR System Lite V2.
6. Using the RJ-45 cable, connect a switch or a hub to the GV-NVR System Lite V2.
7. Using the supplied power adapter, connect the GV-NVR System Lite V2 to the power
outlet.
For automatic setup, connect GV IP cameras under the same LAN with the GV-NVR System
Lite V2.After the power is turned on, the GV-NVR System Lite V2 will search for GV IP
cameras with the default IP address, ID and password. The GV IP cameras will be displayed
on the main screen without any further configuration.
 Loading...