Do you have a question about the Gericom M510C and is the answer not in the manual?
Details unpacking procedures and lists the items included in the notebook PC package.
Highlights key features and benefits of the notebook PC, including CPU, wireless, USB, etc.
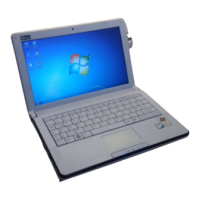
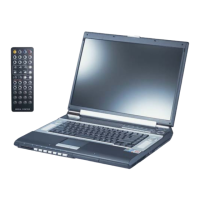
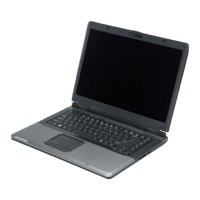
Introduces the notebook PC's components through various views.
Presents a view of the notebook PC with the top cover open, showing the main operating area.
Details the components located on the right side of the notebook PC.
Details the components located on the left side of the notebook PC.
Details the input/output ports and components on the rear panel of the notebook PC.
Details the core components located on the bottom of the notebook PC.
Guides on how to connect the notebook PC to a power source.
Step-by-step instructions for connecting the AC adapter and power cord to the notebook PC.
Instructions on how to safely disconnect the AC adapter from the notebook PC.
Explains how to open the notebook lid and prepare to turn on the computer.
Instructions on how to open the notebook's top cover using the cover button.
Guides on powering on the notebook PC and the POST process.
Provides instructions on how to properly shut down the notebook PC using the Windows OS.
Offers advice for setting up a safe and comfortable workspace for notebook use.
Provides guidelines for creating an ergonomic and well-lit workspace.
Offers tips for maintaining good posture and taking breaks during prolonged computer use.
Introduces the notebook PC's keyboard layout and key categories.
Explains the primary function keys and lock keys (Num, Caps, Scroll Lock) on the keyboard.
Describes the arrow keys and navigation keys for cursor movement and editing.
Explains the use of the numeric keypad and its function when Num Lock is active.
Details the Windows keys and the [Fn] key for accessing special functions and hot keys.
Describes the function of the dedicated quick launch buttons for Internet, Email, etc.
Guides on assigning a specific application to the user-defined quick launch button.
Introduces the touchpad as a pointing device and its basic functions.
Provides tips on positioning, moving the cursor, point-and-click, and drag-and-drop operations.
Explains how to customize touchpad settings like button functions, speed, and shape.
Describes the 2.5-inch IDE hard disk drive and its function as storage.
Introduces various optical drive types (CD-ROM, DVD-ROM, etc.) and their capabilities.
Details the functions of CD-ROM, DVD-ROM, CD-RW, DVD Combo, and DVD Dual drives.
Step-by-step instructions for inserting a CD into the optical drive.
Provides instructions on how to safely remove a CD from the optical drive.
Explains how to manually eject the CD tray if the standard method fails.
Introduces the notebook's video subsystem, including the graphics controller and LCD screen.
Details the features of the ATI Mobility Radeon video controller.
Presents tables showing resolution/color support and CRT monitor refresh rates.
Guides on changing screen resolution and color quality via Display Properties.
Explains how to select different display output devices like CRT monitors or TVs.
Describes connecting external audio devices and the functions of audio-out and microphone jacks.
Provides guidance on connecting speakers, headphones, and external microphones to the notebook.
Explains how to adjust the system volume using the Volume Control icon or Control Panel.
Explains when and how to use the software CD for installing drivers and applications.
Lists scenarios where using the software CD is necessary.
Details the procedure for inserting the CD and starting the setup program.
Introduces the Search Key utility for customizing quick launch buttons.
Explains how to use the Search Key utility to define or redefine applications for launch buttons.
Explains the notebook's power sources: AC adapter and battery pack.
Describes the universal AC adapter, its function, and its components.
Details the Li-ion battery pack, its capacity, and charging information.
Provides instructions and tips for charging the notebook's battery pack.
Step-by-step instructions on how to remove the notebook's battery pack.
Instructions on how to install a new or additional battery pack into the notebook.
Explains how to use ACPI and Power Options to manage system power for optimal performance.
Guides on setting up power schemes and related configurations for battery life.
Describes how Intel SpeedStep technology manages processor performance for power efficiency.
Explains when and how to access the BIOS Setup Utility for system configuration.
Lists reasons for entering BIOS Setup, like error messages or setting changes.
Provides the key combination ([Del]) to enter BIOS Setup during POST.
Details the keyboard keys used for navigating and making selections within the BIOS Setup Utility.
Describes the BIOS Main menu screen, which displays system information.
Covers I/O configuration settings in the BIOS, including USB support.
Explains how to enable or disable support for USB 1.1/2.0 devices in the BIOS.
Details the BIOS setting for enabling or disabling USB 2.0 device support.
Describes enabling/disabling Intel SpeedStep technology in BIOS for power saving or performance.
Explains how to enable remote boot-up via the onboard LAN function in BIOS.
Outlines the security settings in BIOS, including password protection and virus protection.
Displays the status of Supervisor Password and User Password settings.
Guides on setting, changing, or clearing BIOS supervisor and user passwords.
Instructions for removing a previously set User Password in BIOS.
Explains the BIOS setting for protecting against boot sector viruses.
Describes how to set a password for the primary master HDD in BIOS.
Contains settings for peripheral devices, specifically parallel port configuration.
Allows setting the address for the parallel port.
Lets you select the operation mode for the onboard parallel port.
Provides settings for configuring the system's boot-up sequence and options.
Option to show or hide the vendor logo during the boot-up screen.
Allows enabling or disabling the network boot-up function.
Sets the sequence of devices from which the system attempts to boot.
Allows setting a specific date and time for the system to wake from suspend mode.
Contains options for saving changes, discarding changes, and exiting the BIOS Setup Utility.
Exits the BIOS Utility after saving all modified settings.
Exits the BIOS Utility without saving any changes made.
Resets BIOS settings to their optimal factory default values.
Explains how to connect various peripheral devices to the notebook PC.
Shows diagrams illustrating connections for external devices like monitors and printers.
Guides on connecting an external monitor via the VGA port for a larger display.
Explains how to connect the notebook to a TV using the S-Video connector.
Describes connecting USB devices like mice, keyboards, and printers via USB 2.0 ports.
Details connecting high-speed devices using the IEEE 1394 port.
Provides instructions for connecting a printer via the parallel port.
Explains how to connect to a Local Area Network (LAN) using the RJ-45 connector.
Describes connecting to a network via the RJ-45 port and the built-in LAN module.
Explains how to connect to the internet or communicate using the built-in 56Kbps modem.
Provides basic instructions for installing a PC card into the notebook's slot.
Guides on how to safely remove a PC card from the notebook.
Explains the procedure for safely removing connected peripheral devices from the system.
Lists ways to upgrade the notebook, such as adding memory or replacing components.
Offers suggestions to protect the notebook PC and its stored data.
Explains how to secure the notebook using a Kensington lock in public areas.
Guides on setting up boot passwords and operating system passwords for security.
Details how to set a password in BIOS to prevent unauthorized startup.
Explains setting login and screen saver passwords within the operating system.
Provides information about computer viruses and the importance of anti-virus software.
Offers advice for notebook users who travel frequently, including battery and luggage tips.
Provides guidelines for placing, operating, and protecting the computer from damage.
Details proper environmental conditions, placement, and handling of the notebook during operation.
Instructions on how to clean the notebook's exterior, LCD panel, keyboard, and touchpad.
Provides essential battery safety tips and guidelines for handling and disposal.
Offers tips to optimize battery life and avoid sudden power loss.
Provides notes on charging the battery pack, including charging times and removal.
| Weight | 2.8 kg |
|---|---|
| Wireless | 802.11b/g |
| RAM | 256 MB (expandable to 2 GB) |
| Operating System | Windows XP |
| Battery | Li-Ion |
| Ports | VGA |