1-3-C:Installation2G/3G/4G Module:
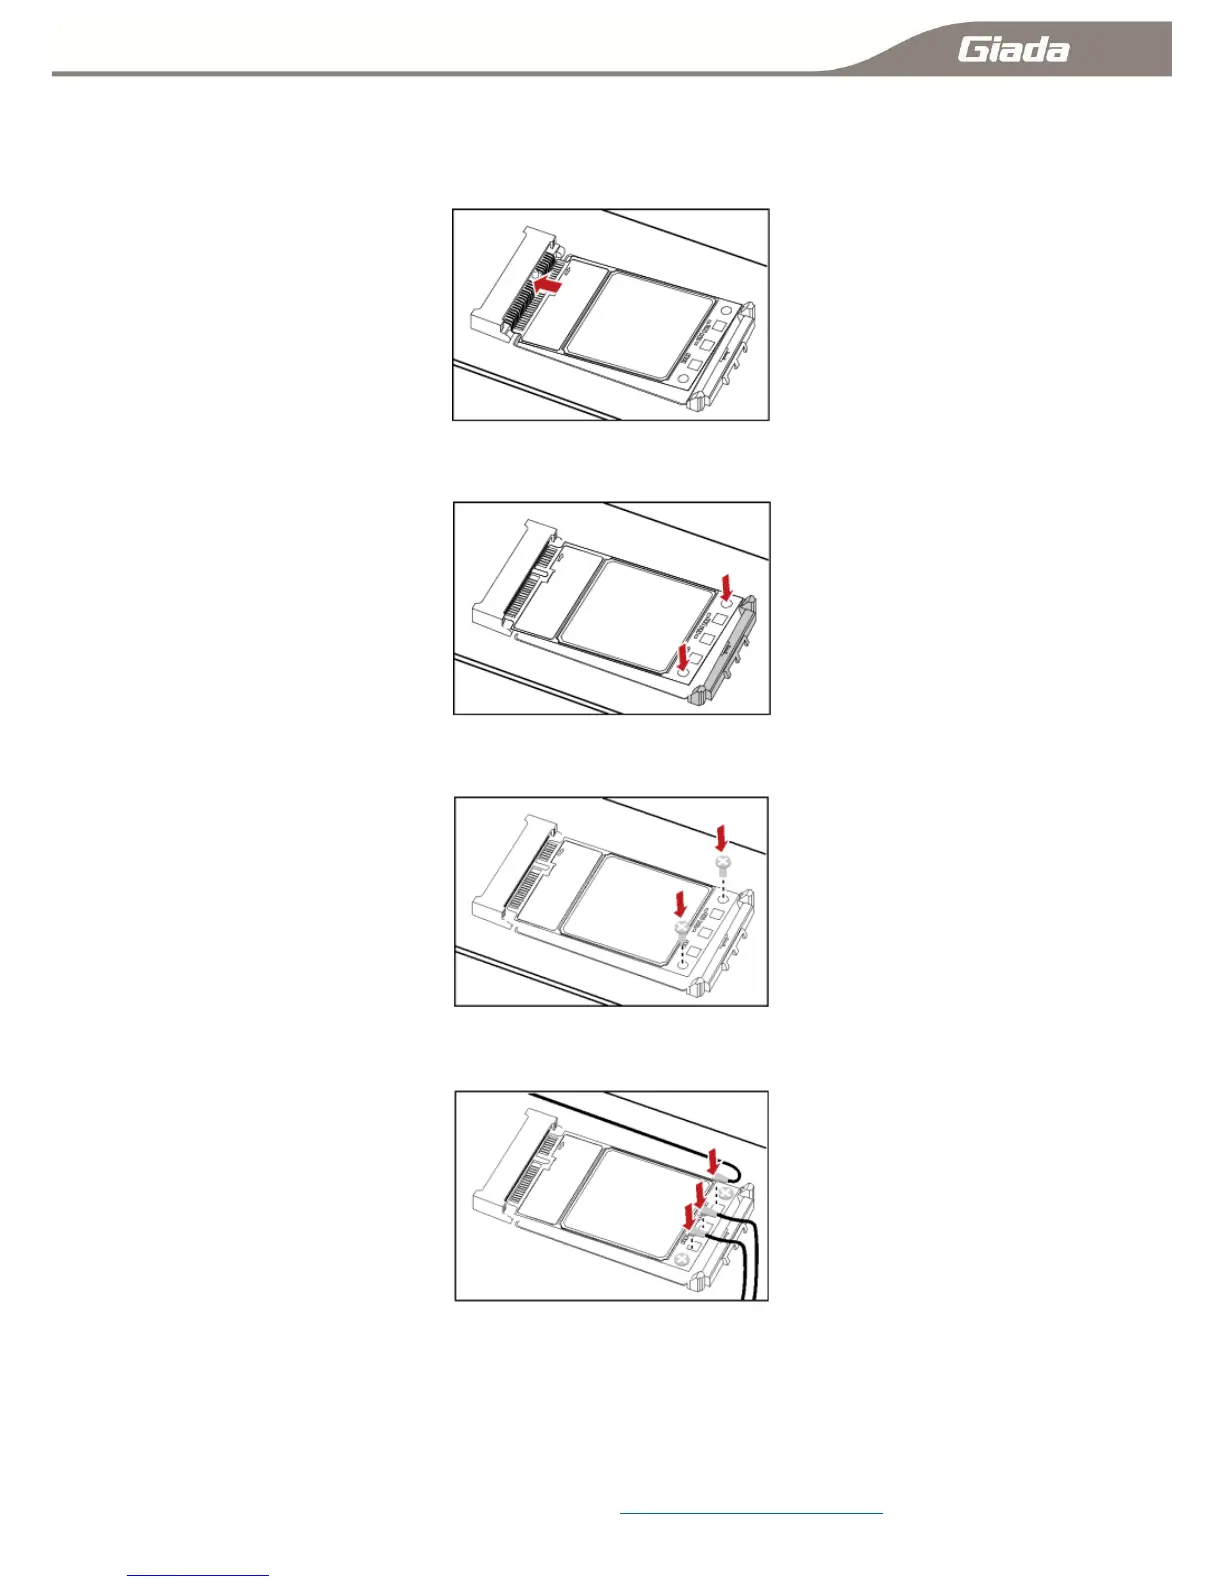
Step 1 Insert the Mini PCIe 2G/3G/4G Module into the Mini PCI Express connector on the main board.
Step 2 Press downwards to fix the Mini PCIe 2G/3G/4G Module in the module slot.
Step 3 Use a screwdriver to fix the Mini PCIe 2G/3G/4G Module on the main board with one screws
provided in the Mini PCIe packing box.
Step 4 Insert the connector of the main antenna into the MAIN antenna interface (M) of the Mini PCIe
Adapter according to the indication on the label of the Mini PCIe 2G/3G/4G Module.
NOTE:
Do not press or squeeze the antenna cable or damage the connectors. Otherwise, the wireless
performance of the Mini PCIe 2G/3G/4G Module may be reduced or the Mini PCIe 2G/3G/4G
Module cannot work normally.
Ensure that the antenna cables are routed through the channel in the frame of the PC and do not lay
the cables across the raised edges of the frame.
Mobile networks Settings connecting method :11-5:Mobile networks Settings