2-12
Installation 2
Valve Installation or Replacement
Valve Installation or Replacement
Follow these directions to replace the currently
installed valve or to install a valve if it was not
factory-installed by Gilson. VALVEMATE-
compatible valves are listed in Appendix A.
IMPORTANT! Valve installation and
replacement is done with power turned ON to
the VALVEMATE.
Before You Begin
Locate the following:
• replacement valve
• valve adapter - may have been factory-installed
to the valve
• 7/64" Allen (or hex) wrench, supplied with the
VALVEMATE
If the valve adapter is not installed, also locate the
following:
• 9/64" Allen (or hex) wrench, supplied with a
Rheodyne high-pressure valve, or the Gilson-
manufactured adapter wrench supplied with
the valve adapter for a Hamilton low-pressure
valve.
Placing Replacement Valve In Its
Home Position
Before you install the replacement valve, ensure that
it is in its home position. Refer to the appropriate
instructions.
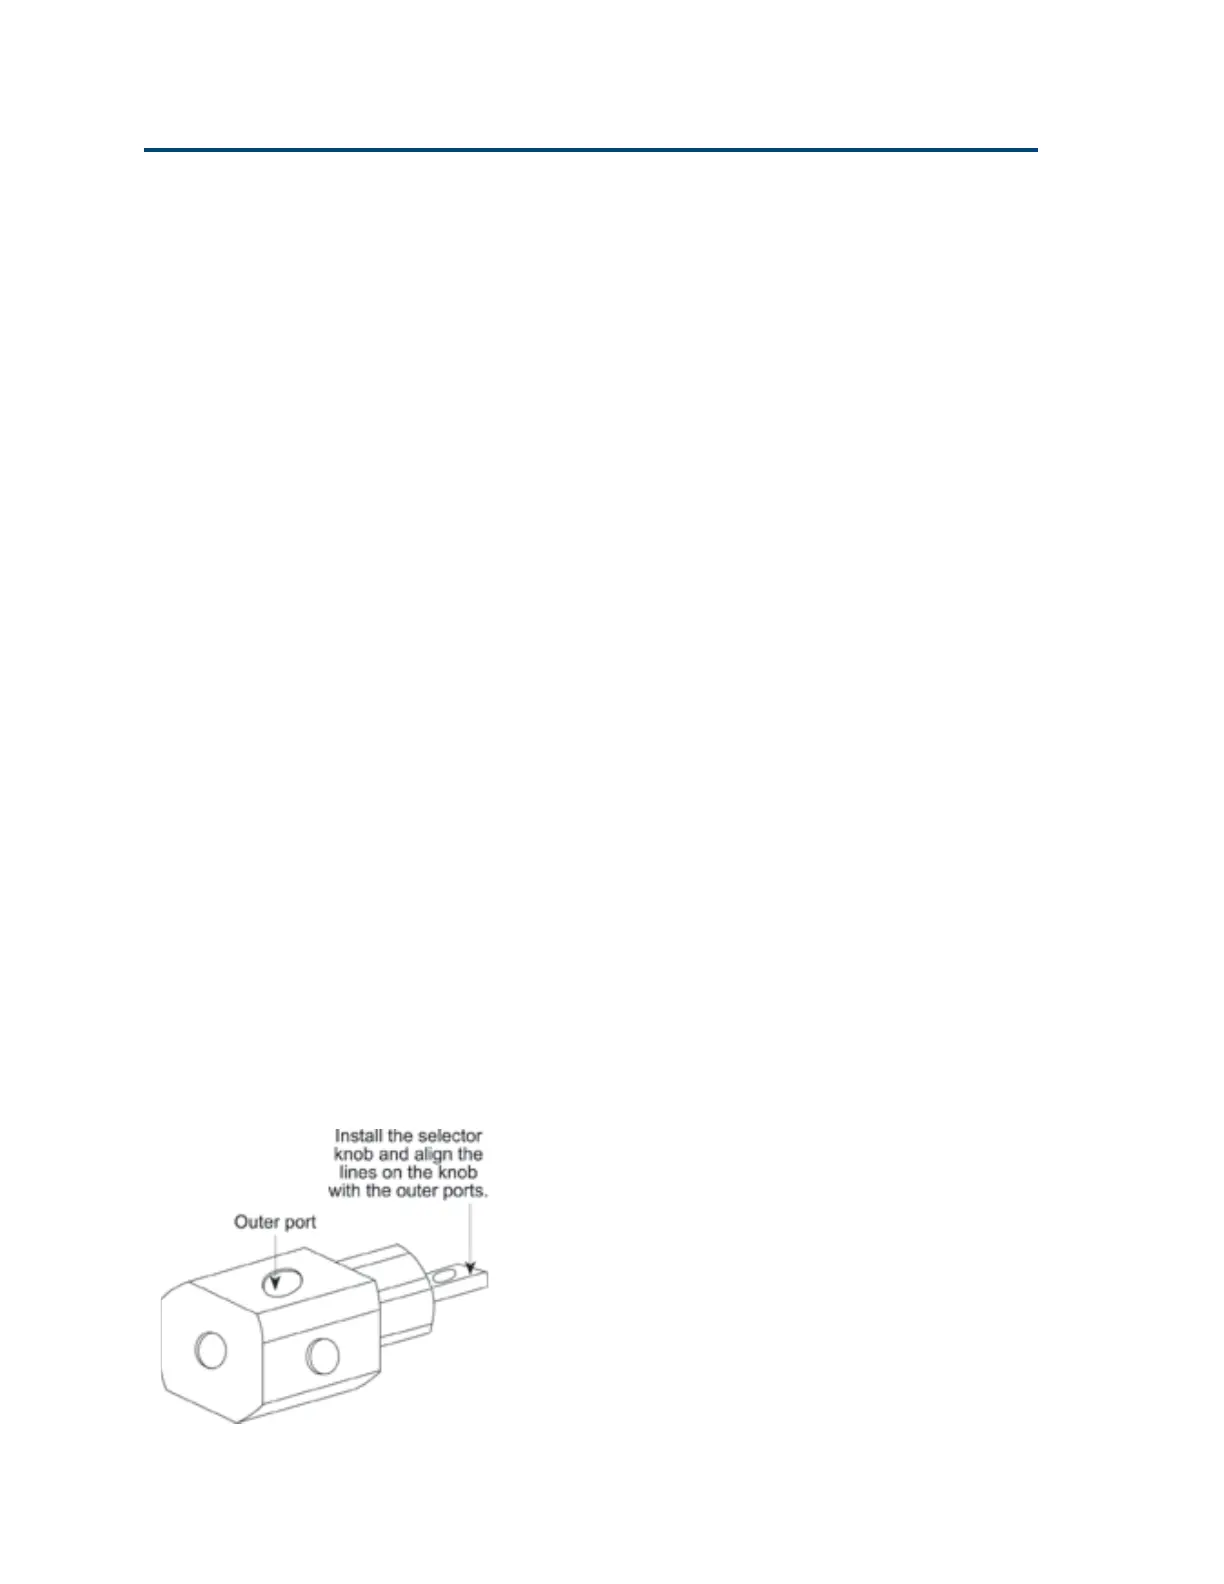
Hamilton 86905 valve. To place this valve in its
home position, do the following:
• With the selector knob installed, turn the
selector knob and align the white lines on the
knob with the outer valve ports.
Artisan Technology Group - Quality Instrumentation ... Guaranteed | (888) 88-SOURCE | www.artisantg.com