2-16
Installation 2
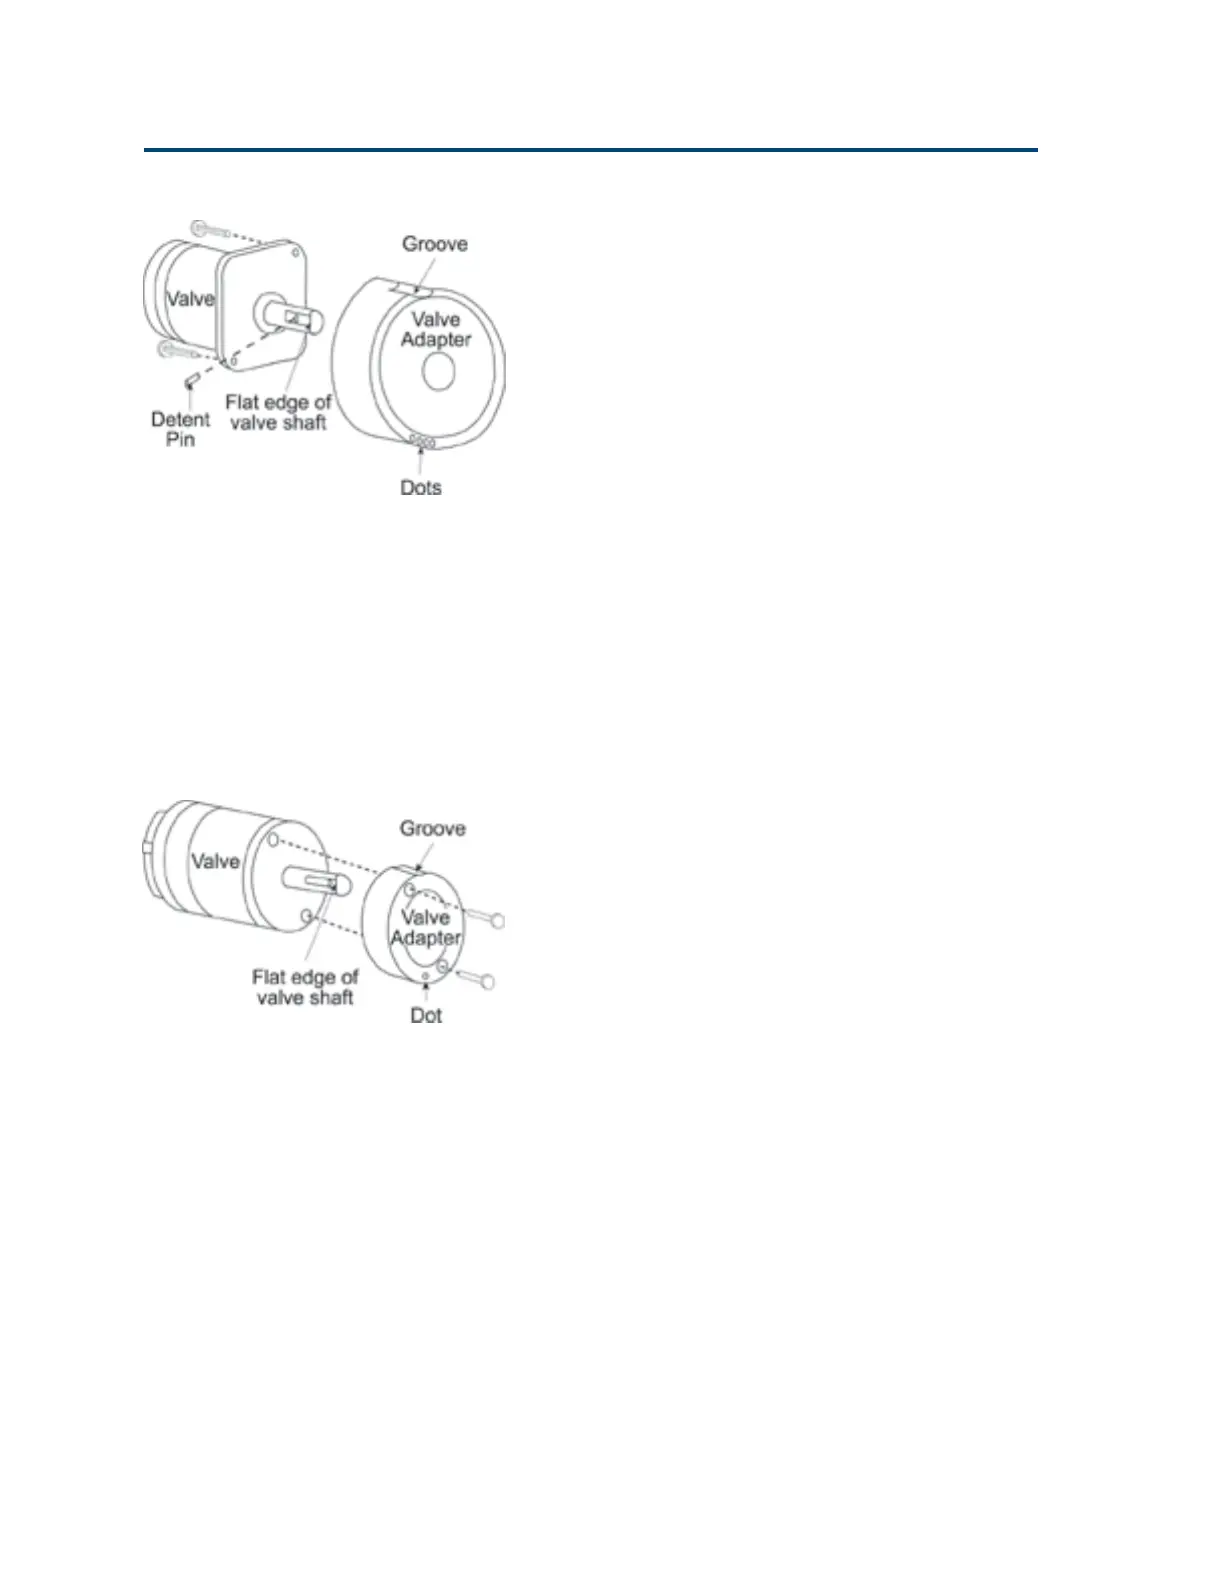
Valve Installation or Replacement
Rheodyne 5011, 5012, 5031, 5032, 5041, or 5042
valve. To attach the valve adapter:
1 Remove the plastic cover plate from the valve
by removing the 2 screws that secure the plate
to the valve.
2 Remove the detent pin from the valve shaft.
3 Refer to the following diagram to install the
valve adapter. When installing the adapter to
the valve, ensure that:
• the valve adapter’s groove faces upward
• the valve’s flat edge faces the left and is
perpendicular to the valve adapter’s groove
• the four dots, located above the valve
adapter’s flat edge, face away from the valve
4 To attach the valve and its adapter, insert and
tighten the two flat-head screws supplied with
the adapter.
Rheodyne 7000, 7010, 7030, 7040, 7710, 9010,
9030, 9060, or 9710 valve. To install the valve
adapter:
1 Refer to the diagram to install the valve
adapter. When installing the adapter to the
valve, ensure that:
• the valve adapter’s groove faces upward
• the valve’s flat edge faces the left and is
perpendicular to the valve adapter’s groove
• the one dot, located above the valve adapter’s
flat edge, faces away from the valve
2 To secure the valve and adapter, insert and
tighten the two socket-head screws supplied
with the adapter.
Artisan Technology Group - Quality Instrumentation ... Guaranteed | (888) 88-SOURCE | www.artisantg.com