19191818
9. Commissioning/charging9. Commissioning/charging 9. Commissioning/charging9. Commissioning/charging
5.
Stop chargingStop charging
The charging process is completed when the LEDs
light up green.
If you want to stop charging prematurely, use the
„cable release“ function of your vehicle or the large
round button of the go-eCharger app (tab „Char-
ging“).
The cable remains locked in the type 2 socket in
the standard setting after the charging process
has ended (adjustable via the app) until it is remo-
ved from the vehicle (theft protection).
If the power supply is interrupted, the charging ca-
ble remains locked in the charging box for reasons
of theft protection. To unlock it, it is necessary to
re-energise the charging station. In the case of
chargers with hardware version 3, the cable can
also be unlocked automatically after a power fai-
lure, provided the function has been activated in
advance via the „Cable unlock“ setting in the app.
However, it is then no longer theft-protected in the
event of a power failure.
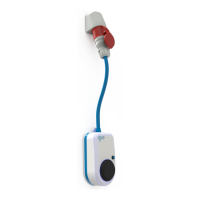
3.
Starting the charging processStarting the charging process
Connect the go-eCharger and the vehicle by using
a type 2 charging cable (or if the car has a type one
socket by using a type 2 to type 1 adapter cable).
Make sure that the type 2 plug is inserted as far as
possible into the type 2 socket of the charger.
The Charger is ready for charging and is waiting
for the car to release it. The LEDs light up yellow in
the number of the preset charging current.
4.
ChargingCharging
After the car has enabled charging, the LEDs rot-
ate clockwise around the type 2 socket during the
charging process.
The number of „tails“ corresponds to the number
of connected phases (or, in the case of chargers
with serial number CM-03- / hardware version V3,
the number of phases set in the app):
• 1 rotating tail = 1-phase charging (230 V)
• 3 rotating tails = 3-phase charging (400 V)
The speed of rotation and length of the tails indica-
te the amount of charging current.
2.
Ready to chargeReady to charge
The go-eCharger is ready for operation. The num-
ber of blue LEDs corresponds to the set charging
current.
Five predened charging levels can be selected
via the but ton.
You can adjust the charging levels individually in
the go-eCharger app („Current levels“). It does not
matter whether the go-eCharger is connected sin-
gle-phase or three-phase.
1 LED = 1 A
HOME+ 11 kW = 6 A - 16 A
HOME+ 22 kW = 6 A - 32 A
1.
Start of the chargerStart of the charger
The go-eCharger performs a self-test during initial
start-up or after a restart, during which the LEDs
light up in rainbow colours.