TROUBLESHOOTING
O Your device does not work.
w Make sure that output tension between terminals and remains betweenpower supply '–' '+' 17,5
a 18,5V .c.nd d Otherwise, disconnect the from the system and measure tensionpower supply
again If it is correct, there is a in the Disconnect the from. short circuit installation. power supply
the network and check the .installation
w Make sure that terminal is not short circuited to terminals r'D' '–' o '+'.
w Make sure that terminal has not been exchanged with in a part of the system.'D' 'A'
O Audio volume inadequate.
w Adjust audio levels following the instructions indicated on page . In case of feedback, reduce44
the volume until it disappears. If the feedback disappears only by reducing volume to a
minimum level, probably another problem exists.
O Persisting audio feedback
w Make sure that terminal is not short circuited to any other terminal and that it has been properly'A'
connected.
O Door opening function cannot be activated.
w Remember that this function can be activated only during calls and communication.
w Make sure that the jumper located in the rear part of the is in a correct position see pageJP1 (door panel
43).
w Make sure that the connection has been carried out acccording to the type of lock release installed see(
page ).69
w Make a short circuit between terminals and in this moment the valuedoor panel 'CV1' 'CV2';
between the lock release terminals should be d r a.c According to the12V .c. o . ( door panel
configuration, see page In such a case, check lock release condition). .69
OThe lock release remains enabled.
w If you are using an alternative current door opener, check its connection by means of the diagram
shown on page .69
O The device cannot be programmed.
w Make sure that number 2 in the configuration switch is set to ON (see page ) and that the43
program sequence is correct (see pages , and ).51-52 59 63
w Make sure that terminal D is not short-circuited to any other terminal' '
O Some monitors (phones) do not receive calls.
w R .emember that each house must be equipped with a unique main terminal Make sure that the
terminal has been properly programmed and that it is on.
w Make sure that the master monitor or phone is on.
OThe monitor does not show images.
w Make sure that number in the configuration switch is set to see page4 OFF ( ).43
w Check the proper connection of coaxial cable or twisted pair by means of the diagrams shown on
pages .65 to 68
OThe monitor shows a distorted or a low-defined image.
w Check the proper connection of coaxial cable or twisted pair by means of the diagrams shown on
pages pay particular attention to the cable correct polarity, .65 to 68
D
oor bell push button connection.
A
+
_
D
SAR-12/24
P
N
220 Vac/
1.8A max.
IN IN
NC NA C
( )
*
The neutral supply from the stairs light will be wired through the relay contacts SAR-12/24, the maximum current for stairs
light will be 1.8A.
( )
*
A
uxiliary devices activation with T- 40 Plus telephone.5
To activate auxiliary devices the use of a SAR-12/24 relay unit will be required. If this device is
shared for all the T- 40 Plus telephones, link their PA terminal and use just one relay unit. In5
case that each telephone has its own application use a SAR-12/24 relay unit for each
telephone and don't link the PA telephone terminals.
To activate this function, press telephone push button at any moment with no dependence of
the handset position.
Usual applications are the activation of stairs light, second lock release, ...
First t T- 40 Plus telephone must be configured with SW1 dip switch in "PA" output mode5
he
function (see page ).61
PA
To distributor/
door panel.
To stairs light
push button
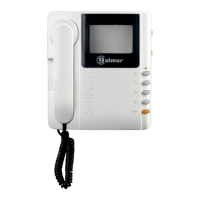
The Tekna Plus monitor and the T- 40 Plus and T- 40 Uno telephones can be used toSE 5 5 SE
receive the calls made from the apartment door, saving the use of a bell. Wire the push button of
the apartment door to the 'HZ ' and ' ' monitor or telephone terminals.
– –
The reproduced acoustic tones are different depending on their provenance, that allows the user
to distinguish where the call is made from. If during a conversation a call is made from the
apartment door, acoustic tones will be reproduced on the handset to advise that someone is
calling.
OPTIONAL CONNECTIONS
73
74
T-540 Plus
HZ-
-
HZ
-
T- 40 Uno5 SE Tekna Plus SET- 40 Plus5
 Loading...