MONITOR ADJUSTMENTS
48
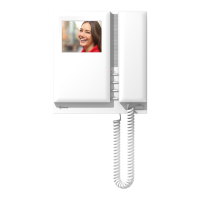
MONITOR DESCRIPTION
47
D
escription of the SW2 DIP switch (quick programming mode).
The SW2 DIP switch is located on the left-hand side of the back
of the monitor.
It enables the monitor to be configured as master / slave and an address
to be assigned.
*Factory default
D
escrip .tion of the RJ-45 connector (installation with UTP cable)
The monitor features an RJ-45 connector for installation with a UTP
cable. It is located on the left-hand side of the back of the monitor.
I enables connection of the system's main communication wires
(+, -, A, D, Vp y Mp) in twisted-pair installations.
Dip3 Dip10: .to To set the monitor address
This kit video SV-801 SE, . Themust be set the monitor only with address "106"
switches set to have a zero value.OFF .
The values of the switches set to are shown in the table below.ON
The monitor code is the sum of the values of the switches set to ON.
Dip1 Dip2: Dip1 Dip2and To set the the monitor as master / slave. and to
OFF , Dip1 ON Dip2 OFF s 1, Dip1 OFF Dip2master to and to lave to and
to lave and to laveON s 2, Dip1 Dip2 ON s 3.
Remind: Up to two monitors and one phone in each house without extra
power supply.
E : 64+ + + + +2+ =xample 0+ 32 0 8 0 0 106
Switch umbern :
en ON:Value wh
4
64
5
32
6
16
7
8
8
4
9
2
10
1
3
128
RJ-45 connector (Cable type: T568B)
Male connector Female connector
PAIR 2 PAIR 1 PAIR 4
PAIR 3
1 2 3 4 5 6 7 8
1 2 3 4 5 6 7 8
Pin
Ethernet cable
Golmar connection
1
White + Orange
2
3
4
5
6
7
8
GND (Audio)
Audio
Orange
GND (Data)
White + Green
+18V
Blue
+18V
White + Blue
Data
Green
Vp
White + Brown
Mp
Brown
RJ-45 equivalence table
Important: This type of programming cannot be performed on a general door panel.
NOT :E ,For this type of installation contact our Golmar technical support department.
U
se of the jumperend of line .
The jumper is located in CN4 connector, in the rear part of theend of line
monitor In systems with twisted pair, the jumper is located in the. end of line
EL562 module (see next paragraph)
Do not remove jumper in those monitors where the video cable end is
located.
Remove jumper only in intermediate monitors.
E
L562 .module for video installations with twisted pair
Find connector in the rear part of the monitorCN4 .
Before plug the EL562 module, remove the existing jumper.
NOT :E (coaxialThe admits both installation types or twisted pairdoor panel
installation without making any change) .
See the specific installation diagram.
 Loading...