Version: V1.2 16
2.2 Removing and installing the heat sink
Before starting to install the heat sink, please read the following guidelines:
Turn off the computer and unplug the power cord from the electrical outlet before installing the heat sink to prevent
damage to the hardware.
Unplug all cables from electrical outlets.
Disconnect all communication cables from their ports.
Place the system unit on a flat and stable surface.
Follow the instructions to turn on the system.
Warning!
Make sure the motherboard is disconnected from the power source before starting to work on any components of the
motherboard, otherwise serious damage may result.
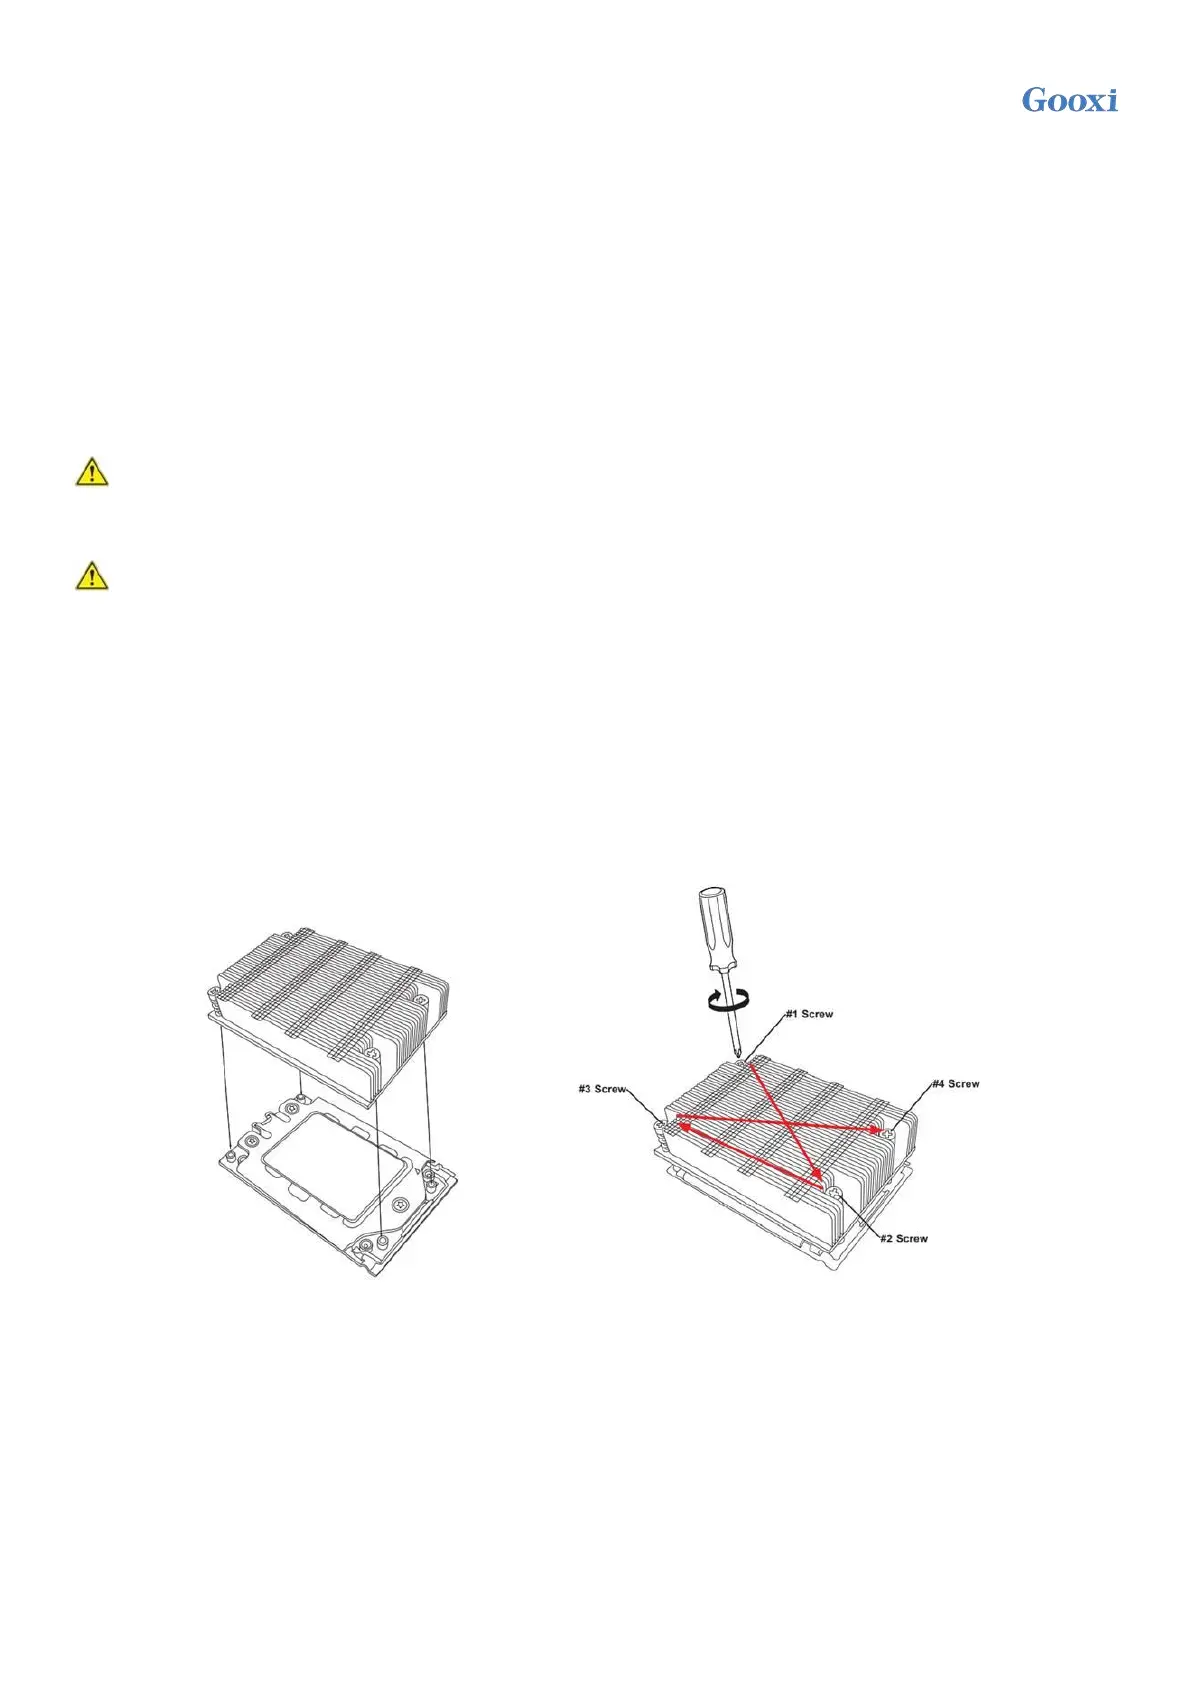
Note: When installing the heat sink to the CPU, use a Phillips screwdriver to tighten the 4 fixing nuts in the order of
1-4.
Follow the instructions below to disassemble and install the heat sink:
1. Lift the heat sink and align it with the 4 studs on the CPU socket.
2. Tighten the heat sink fixing screws in order (1→2→3→4) to fix them in place.
3. To remove the heat sink, perform steps 1-2 in reverse, while making sure to unscrew the fixing screws in sequence
(1→2→3→4), as shown in the picture below.
(The pictures of the heat sink are for reference only, the actual product shall prevail)
Figure 2-4
 Loading...