GP3D Root User Manual
8
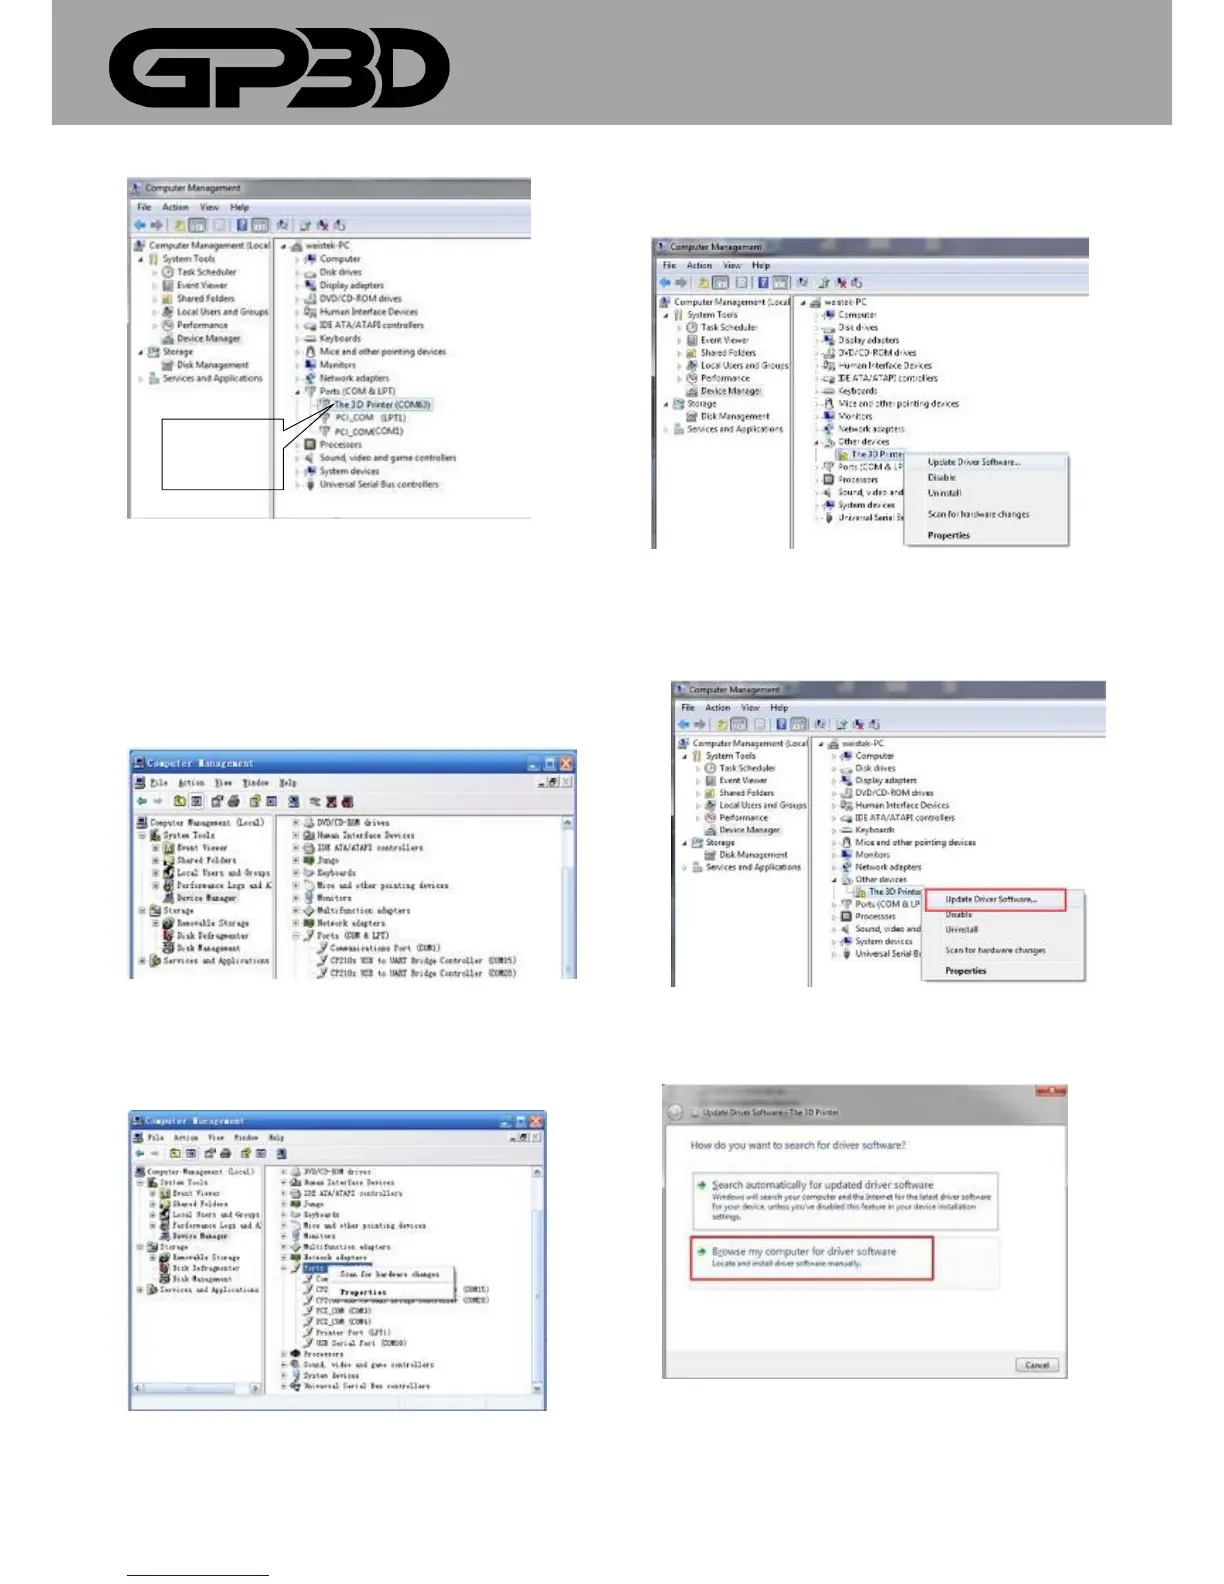
(Figure 3.4-05)
3.5 WIN7 DRIVER INSTALLATION
3.5.1 After connecting the 3D printer, the system will install the driver
automatically, and check if the installation was successful. Right-click on
“Computers”, and click “Properties.” In the pop-up interface, click”
“Device Manager.”
(Figure 3.5-01)
3.5.2 As shown on “Figure 3.5-02”, click “+” in front of “Port (COM &LPT)”.
If the “USB Serial Port” can be seen, and there is no “?” or “!”, so the
installation was successful.
(Figure 3.5-02)
3.5.3 If the installation is not successful, right-click on “Port (COM&LPT)”,
and select “Scan for hardware changes”. Move to next step for manual
installation.
(Figure 3.5-03)
3.5.4 If the installation is still unsuccessful and there is a yellow
exclamation mark on “Other devices”, right-click on “The Replicator”, and
select ”Update Driver Software”.
(Figure 3.5-04)
3.5.5 Click ”Browse my computer for driver software”. The following steps
are the same as 3.4.3~3.4.5.
(Figure 3.5-05)