GP3D Root User Manual
17
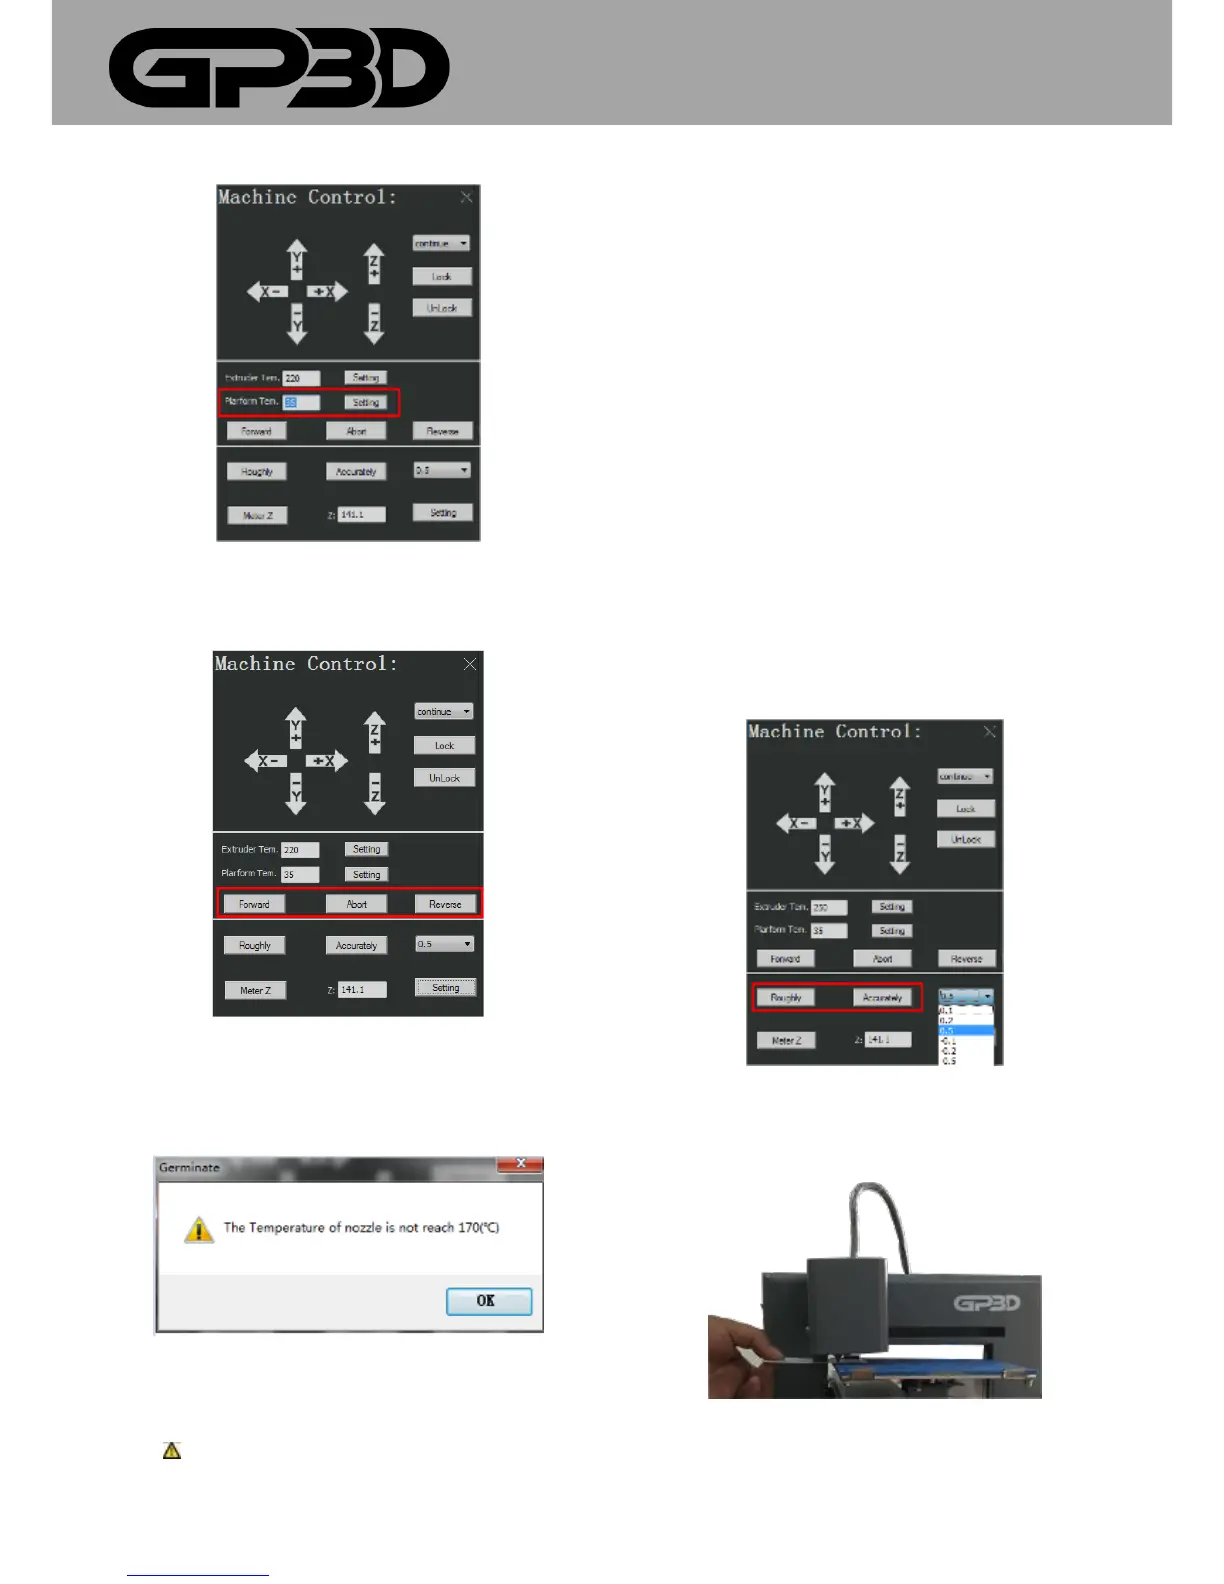
4.1.10.7 After the nozzle temperature reaches the set value, you can click
“Forward/Abort/Reverse “to change the material or debug the nozzle.
4.1.10.8 Before the nozzle temperature reaches the set value, you cannot
feed or return the material. If you click “Forward/Reverse “, the following
prompt box will pop out.
4.1.10.9 Notice: difference between the temperature setting here
and “Print parameter settings” in 4.3.8: The temperature setting here is
to set the temperature of the GP3D Root when software is connected to
the GP3D Root. If the temperature is set at 220 °C as GCODE file is
generated but the temperature before printing is set at 230 °C, the
printing is carried out at 230 °C. It is the same with the platform
temperature setting. The temperature setting in 4.3.9.16 and 4.3.9.17 is to
set the temperature as GCODE file is generated, which can be set before
software is connected to the GP3D Root.
4.1.10.10 In the part of Z-axis height setting, click “Roughly”, and Z-axis
platform will automatically descend to the lowest point and then rise
close the nozzle nozzles. At this time, according to the distance between
the platform and the nozzle, click “▼” after “Accurately” to select the step
length of single Z-axis movement. If “0.5” is selected for debugging of this
GP3D Root, which is equal to clicking “Accurately”, Z-axis moves 0.5mm
upwards. The less distance between the platform and the nozzle, the
smaller the step length needs to be. If the platform touches the nozzle,
choose a negative for the movement downwards, as shown below.
4.1.10.11 To precisely measure the height of Z-axis platform, you can just
put a card between the platform and the nozzle, as shown below.
4.1.10.12 Click “Meter Z”, and the GP3D Root automatically starts
measuring. You can see the increase of the figure in the dialog after “Z:”.