GP3D Root User Manual
18
After the measuring is complete, click “Setting” to complete the
measuring of Z-axis height and the following print will be carried out in
terms of this height.
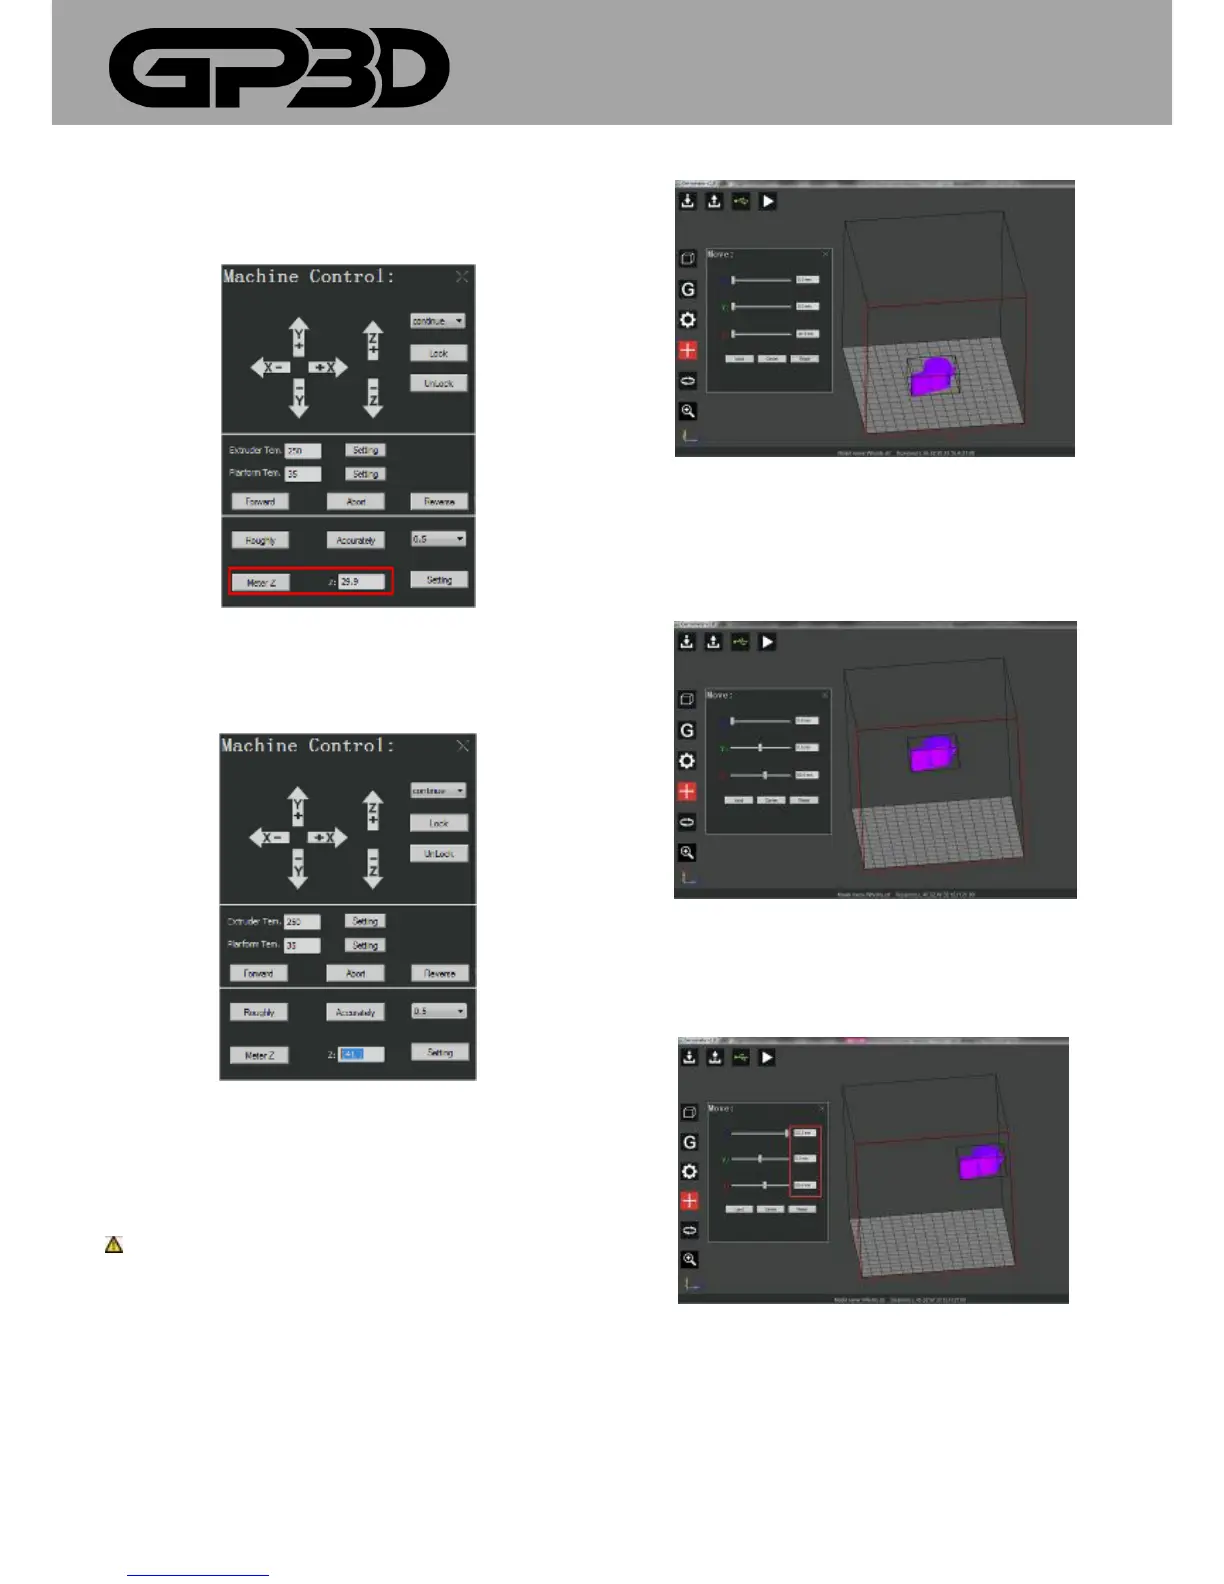
4.1.10.13 After a period of use or if the height of the platform needs to be
fine-tuned, you can directly modify the figure in the dialog after “Z:”, and
click “Setting”.
4.1.11 Model movement
4.3.10.1 Sometimes you need to move the model before printing. After
the model is selected, click the menu icon of model movement on the left,
and the interface pops out.
Notice: only after the model is selected can the menu icon for model
movement appear.
4.1.11.2 The imported model will be automatically placed in the center of
the platform. You can move the slider in “X/Y/Z” with the mouse to
change its position and the model will move on the platform according to
the distance the slider moves.
4.1.11.3 You can also directly input the moving distance in the slider
dialog of “X/Y/Z”. Notice: if the moving distance is beyond the maximum
frame, the model will move to the position of the maximum frame, as
shown below.
,
4.1.11.4 After the model is rotated, scaled or moved, if you want to move
the model to the center of the platform, click “Land” and “center” or click
“Reset” to return to the original state of model printing.