GP3D Root User Manual
11
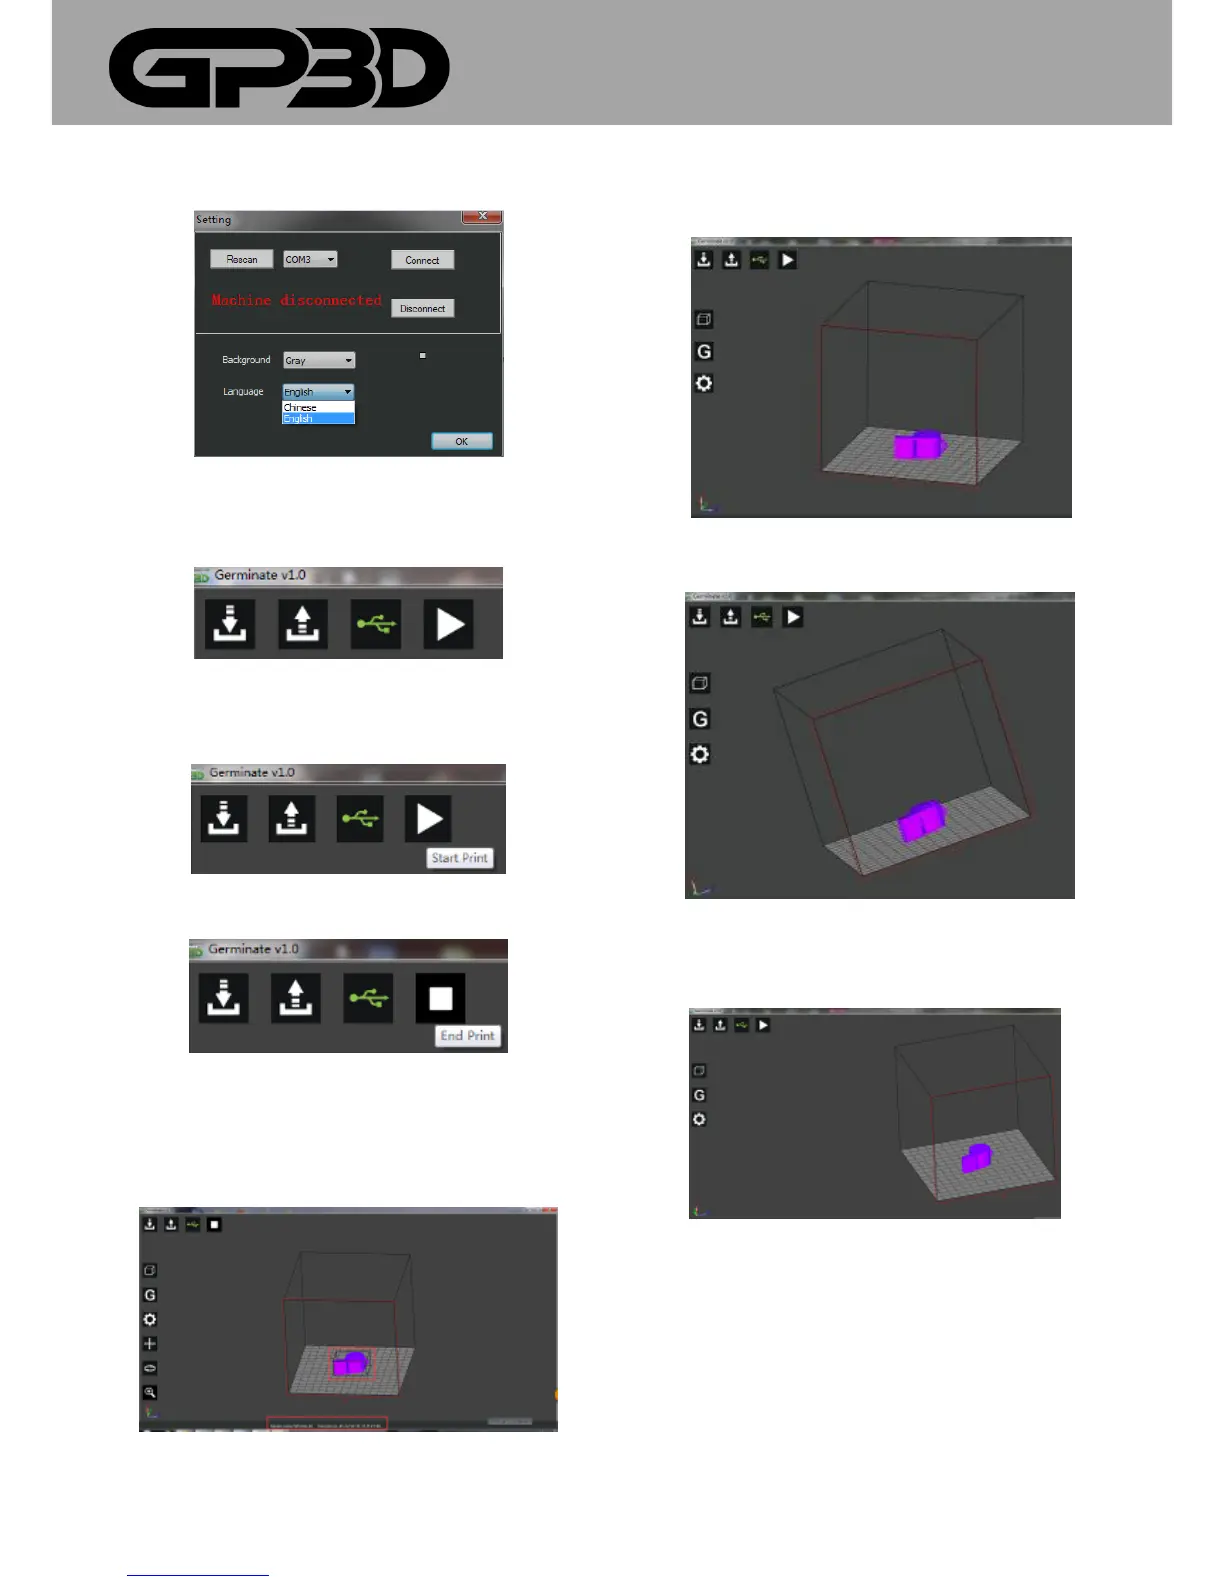
English.
4.1.6.7 After successful connection, the icon in the interface turns green
from white, as shown below.
4.1.6.8 After the GCODE file is generated or opened, click the icon “Start
Print”, and the GP3D Root will start to print.
4.1.6.9 To stop printing, click the icon “End Print”.
4.1.7 Control models with mouse
4.1.7.1 Click with the left mouse button to select the model, the size of the
model is displayed in the status bar at the bottom in terms of the outer
wall’s length, width and height, and a transparent box will surround the
model to show the selected status.
4.1.7.2 After the model is selected, the edit menu icons hidden on the left
will appear, as shown in Figure 4.3.7.1. If the model is not selected, the
icons are hidden.
4.1.7.3 Click the right mouse button to move, and the model display
frame can be rotated at any angle.
4.1.7.4 Hold the middle mouse button, and you can move the overall
model display frame.
4.1.7.5 Click the model with the right mouse button, and the following
menu pops out. Select “Land” and the model will descend to the center of
the platform. Select “Reset” to restore the original state of the model. You
can also select “Remove” to uninstall the model.