Repair
22 3A0732U
Reassemble the Air Valve
1. See F
IG. 13. Lubricate detent cam (304
◆
) and
install into housing.
2. See F
IG. 14. Lubricate the u-cups (308†
◆
) and
install on the piston (302
◆
) with lips facing toward
the center of the piston.
3. See F
IG. 13. Lubricate both ends of the piston
(302
◆
) and install it in the housing.
4. Lubricate and install the detent assembly (303
◆
)
into the piston.
5. Lubricate new o-rings (306†
✚◆
) and install on the
end caps (307
✚
). Install the end caps into the
housing.
6. Install a snap ring (310
◆✚
) on each end to hold end
caps in place.
7. Install the spring (311
◆
). Lubricate and install the
air valve cup (312
◆
), see F
IG. 15. Align the small
round magnet with the air inlet.
8. Install the valve plate (305
◆
). Tighten the screws
(309†
◆
) to hold it in place.
Replace Pilot Valves
1. Stop the pump. Follow Pressure Relief
Procedure, page 10.
2. Disconnect the air line to the motor.
3. See F
IG. 16. Push the safety spring (9) down and
hold to access the pilot valve on the bottom cover.
4. See F
IG. 18 on page 25. Use a 10 mm wrench to
remove the old pilot valves (213) from the top and
bottom covers.
5. Lubricate and install the new pilot valves (213).
Torque to 95-105 in-lb (11-12 N•m).
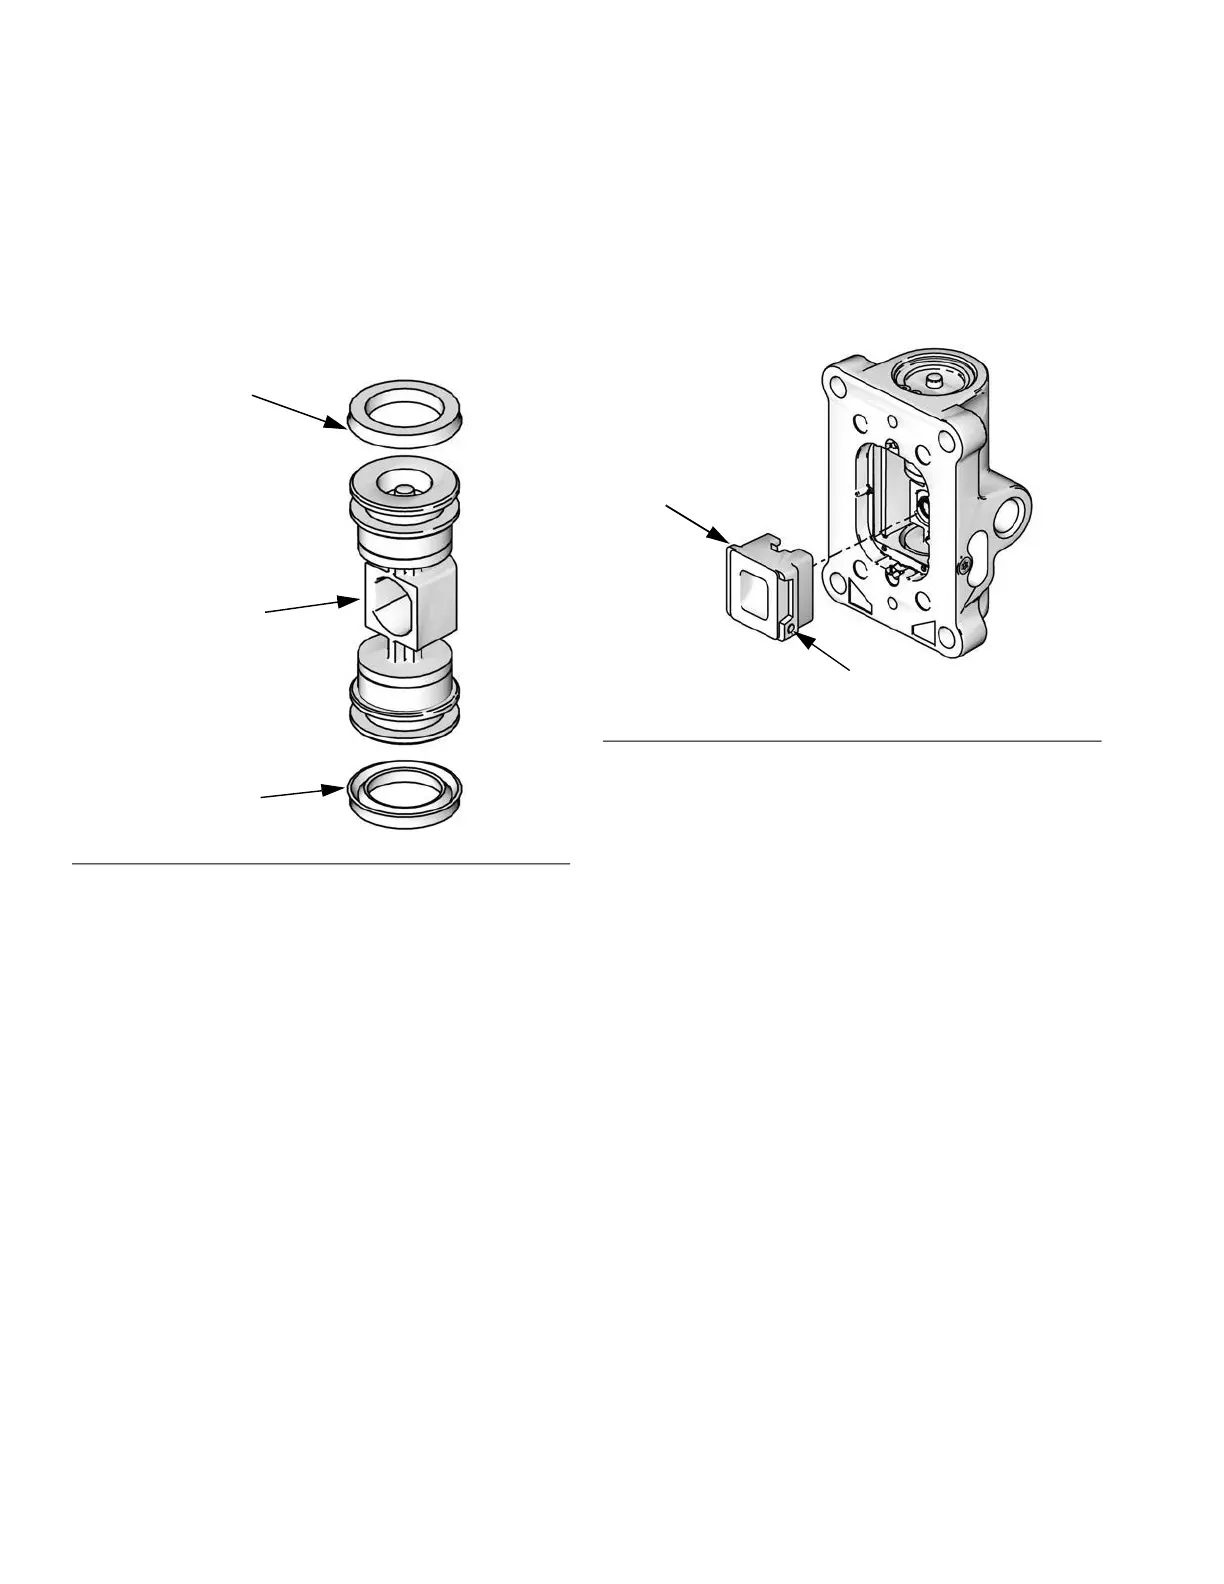
F
IG. 14. Air Valve U-cup Installation
Lips face down
Lips face up
† 308
† 308
302
ti12754a
FIG. 15. Air Valve Cup Installation
312
ti16283a
Magnet