Repair
24 3A0732U
Repair Air Motor
NOTE: Complete Air Motor Replacement Kits are
available. Order 24G693 (2.5 in. motor) or 24G694 (3.5
in. motor).
NOTE: Air Motor Seal Kits are available. See page 37
for the correct kit for your motor. Parts included in the
kit are marked with an asterisk (*). For best results, use
all the parts in the kit.
Disassemble the Air Motor
1. See FIG. 18. Use a 10 mm socket wrench to remove
four screws (211). Remove the air valve (214) and
gasket (209*
◆
†).
2. Remove four screws (211) and remove the manifold
(220) and two gaskets (208*).
3. Use a 10 mm socket wrench to remove the pilot
valves (213) from the top and bottom cover.
4. Use a 13 mm socket wrench to remove the tie bolts
(212).
5. Remove the top cover (210). Remove the o-ring
(202*). On 3.5 in. motors only, remove the plug (231)
and o-ring (230*).
6. Remove the shield (206) and cylinder (205).
7. Remove the o-ring (204*) from the piston.
8. Secure the piston (219) in a vise with soft jaws. Use
a wrench on the flats of the rod (218) to remove the
rod and bottom cover assembly (201) from the
piston.
9. Remove the rod from the bottom cover assembly.
10. Remove retaining ring (217), u-cup seals (207*), and
o-ring (202*) from the bottom cover.
Reassemble the Air Motor
NOTE: For easier reassembly, start with the top cover
(210) turned over on the workbench and assemble the
air motor upside-down.
1. Lubricate and install the o-ring (202*) on the top
cover (210).
2. Lubricate the inside of the cylinder (205). Lower the
cylinder onto the top cover (210).
3. Install the shield (206) around the cylinder (205) and
in the groove on the top cover (210).
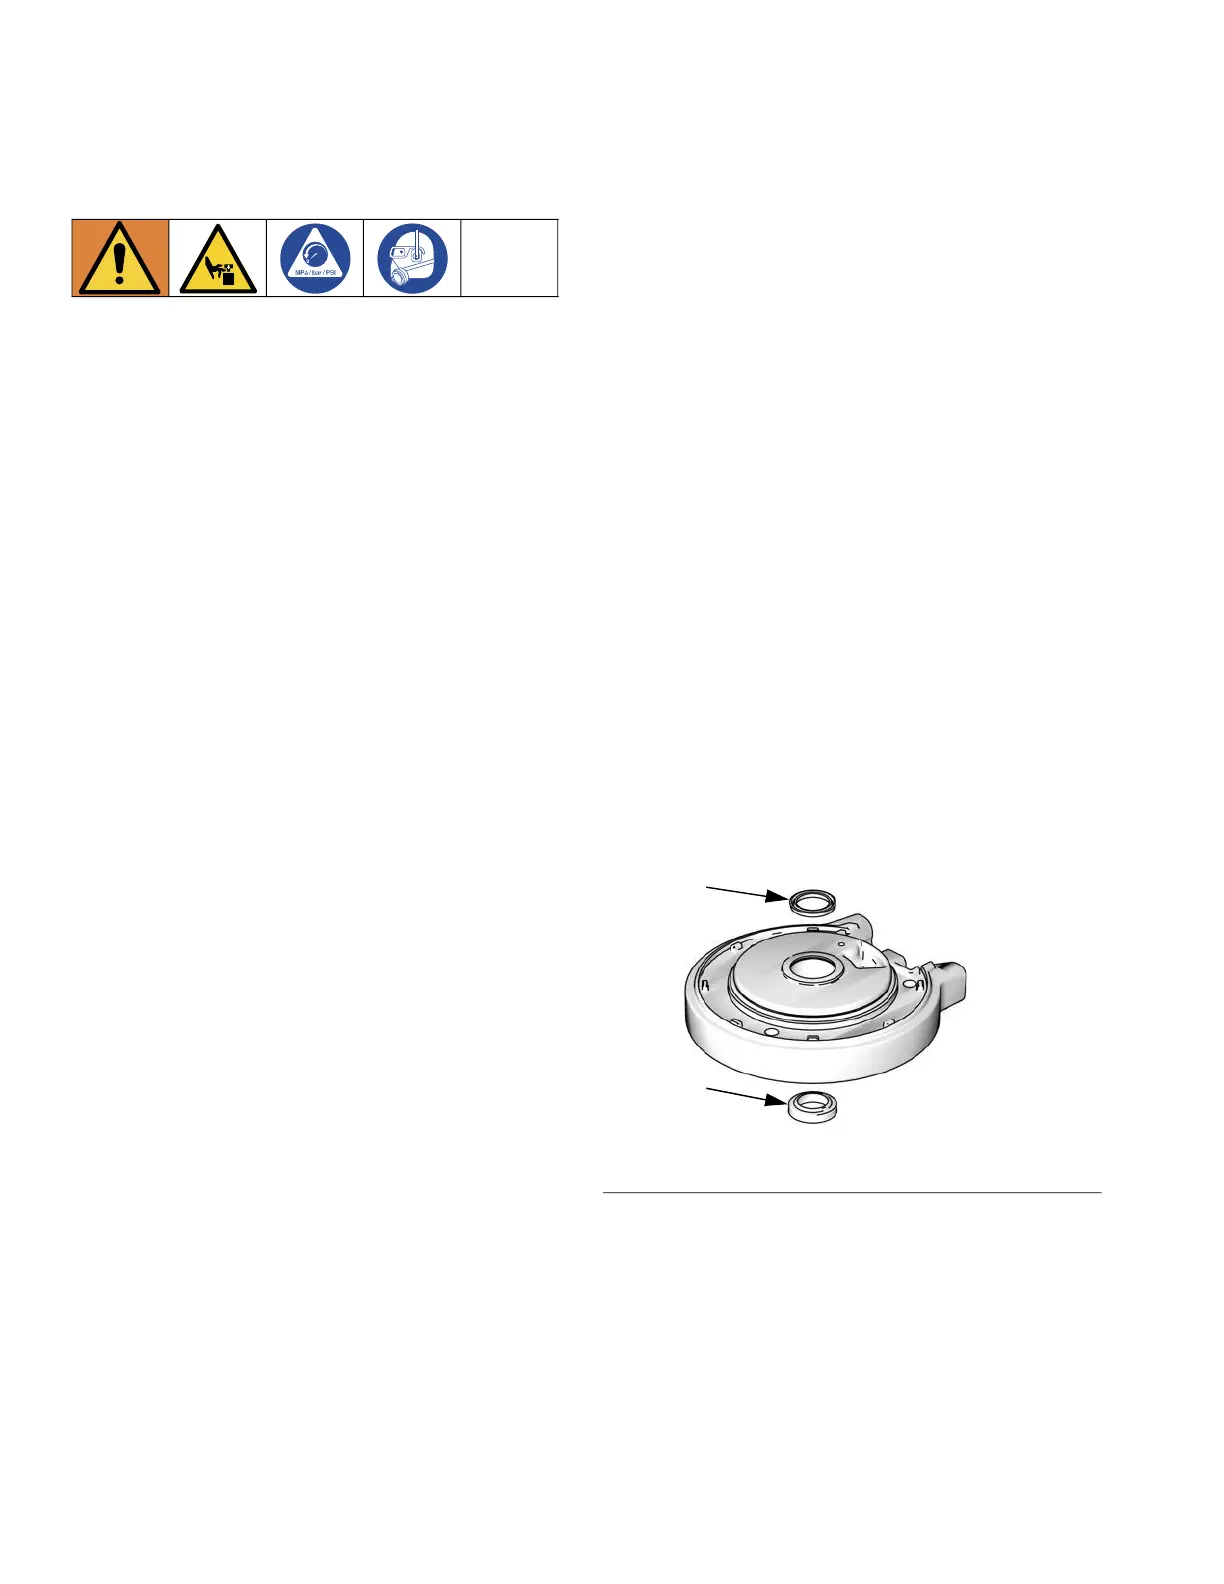
4. See F
IG. 17. Lubricate and install new u-cup seal
(207*) in the bottom of the bearing in the bottom
cover (201). The lips must face down. Lubricate and
install new u-cup seal (207*) in the top of the
bearing. Lips must face up Install retaining ring
(217).
FIG. 17. Air Motor U-cup Installation
*207
*207
Lips face up
Lips face down