Flushing
WARNING
T
o reduce the risk of serious injury whenever you
are instructed to relieve pressure, always follow the
Pressure Relief Procedure
on page 6.
How To Flush
1. Relieve
the pressure
.
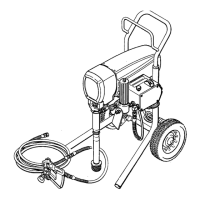
2. Remove the filter bowl (A), screen (B) and support
(C).
Clean the screen and support separately
.
Install
the
bowl, without the screen and support, to flush it.
See Fig. 8. See instruction manual 307–273,
supplied,
for detailed instructions.
0486
A
B
C
D
KEY
A Filter
Bowl
B
Filter Screen
C
Filter Support
D Pressure Drain Valve
Fig.
8
3.
Close the pressure drain valve (D).
4. Pour 2 liters of compatible solvent into a grounded
metal
pail. Put the suction tube in the pail.
5.
Remove the spray tip from the gun.
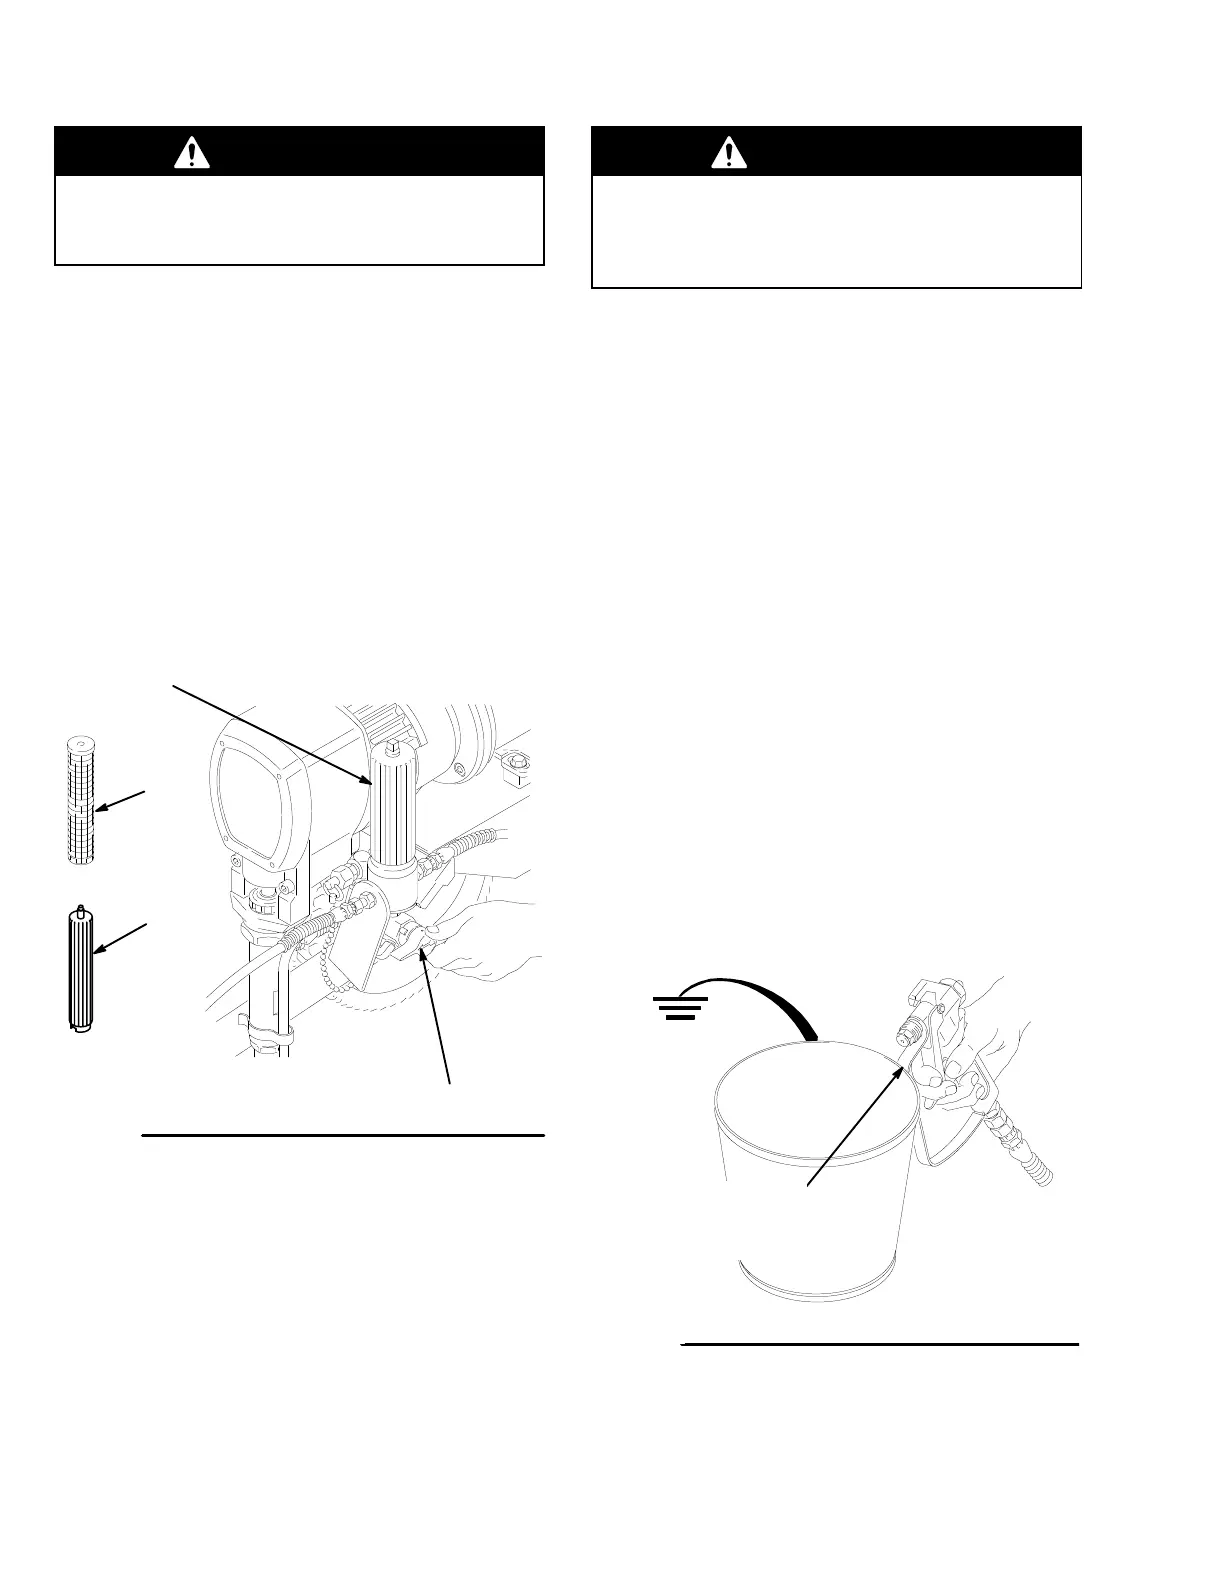
WARNING
T
o reduce the risk of static sparking and splashing
when flushing, always remove the spray tip from
the gun, and hold a metal part of the gun firmly to
the side of, and aimed into, a grounded metal pail.
6. Disengage
the gun safety latch. Point the spray gun
into
a metal waste container
. With a metal part of the
gun firmly touching the metal container
, squeeze the
gun
trigger
.
See Fig. 9. This procedure helps reduce
the risk of static sparking and splashing. Start the
sprayer,
trigger the gun, and slowly turn the pressure
adjusting
knob clockwise, just until the pump starts.
Keep the gun triggered until clean solvent comes
from
the nozzle. Release the trigger
. Engage the gun
safety
latch.
7. Check
all fluid connections for leaks. If any connec
-
tions leak, first relieve the pressure. Tighten the
connections.
Start the sprayer
.
Recheck the connec
-
tions
for leaks.
8. Remove the suction tube from the pail. Disengage
the
gun safety latch. T
rigger the gun to force solvent
from
the hose. Do not let the pump run dry for more
than
30 seconds, to avoid damaging the pump
pack
-
ings!
Relieve the pressure
.
9. Leave the pressure drain valve open until you are
ready to use the sprayer again. Unscrew the filter
bowl and reinstall the clean screen. Reinstall the
bowl,
hand tight only
.
10. If
you flushed with
mineral spirits and are going to use
a
water–base paint,
flush with soapy water followed
by
a clean water flush.
Relieve the pressure
.
0483
MAINTAIN
FIRM
METAL-TO-METAL
CONT
ACT BETWEEN THE
GUN AND A GROUNDED
MET
AL CONT
AINER
Fig.
9