How to Flush (continued)
10.
Raise the foot brace and engage it in the hitch.
11. After the engine is warm, gradually open the choke
lever (turn to OFF position) and close the bypass
valve.
See Fig 5 and 6.
12. Point the gun into the grounded metal pail and hold
a
metal part of the gun firmly against the pail.
NOTE: To save the fluid in the pump and hose, trigger
the gun into the paint container or a separate
clean
container
.
At the same time, slowly turn the
pressure control knob clockwise just enough to
start the pump. When solvent appears, release
the
trigger and continue as below
.
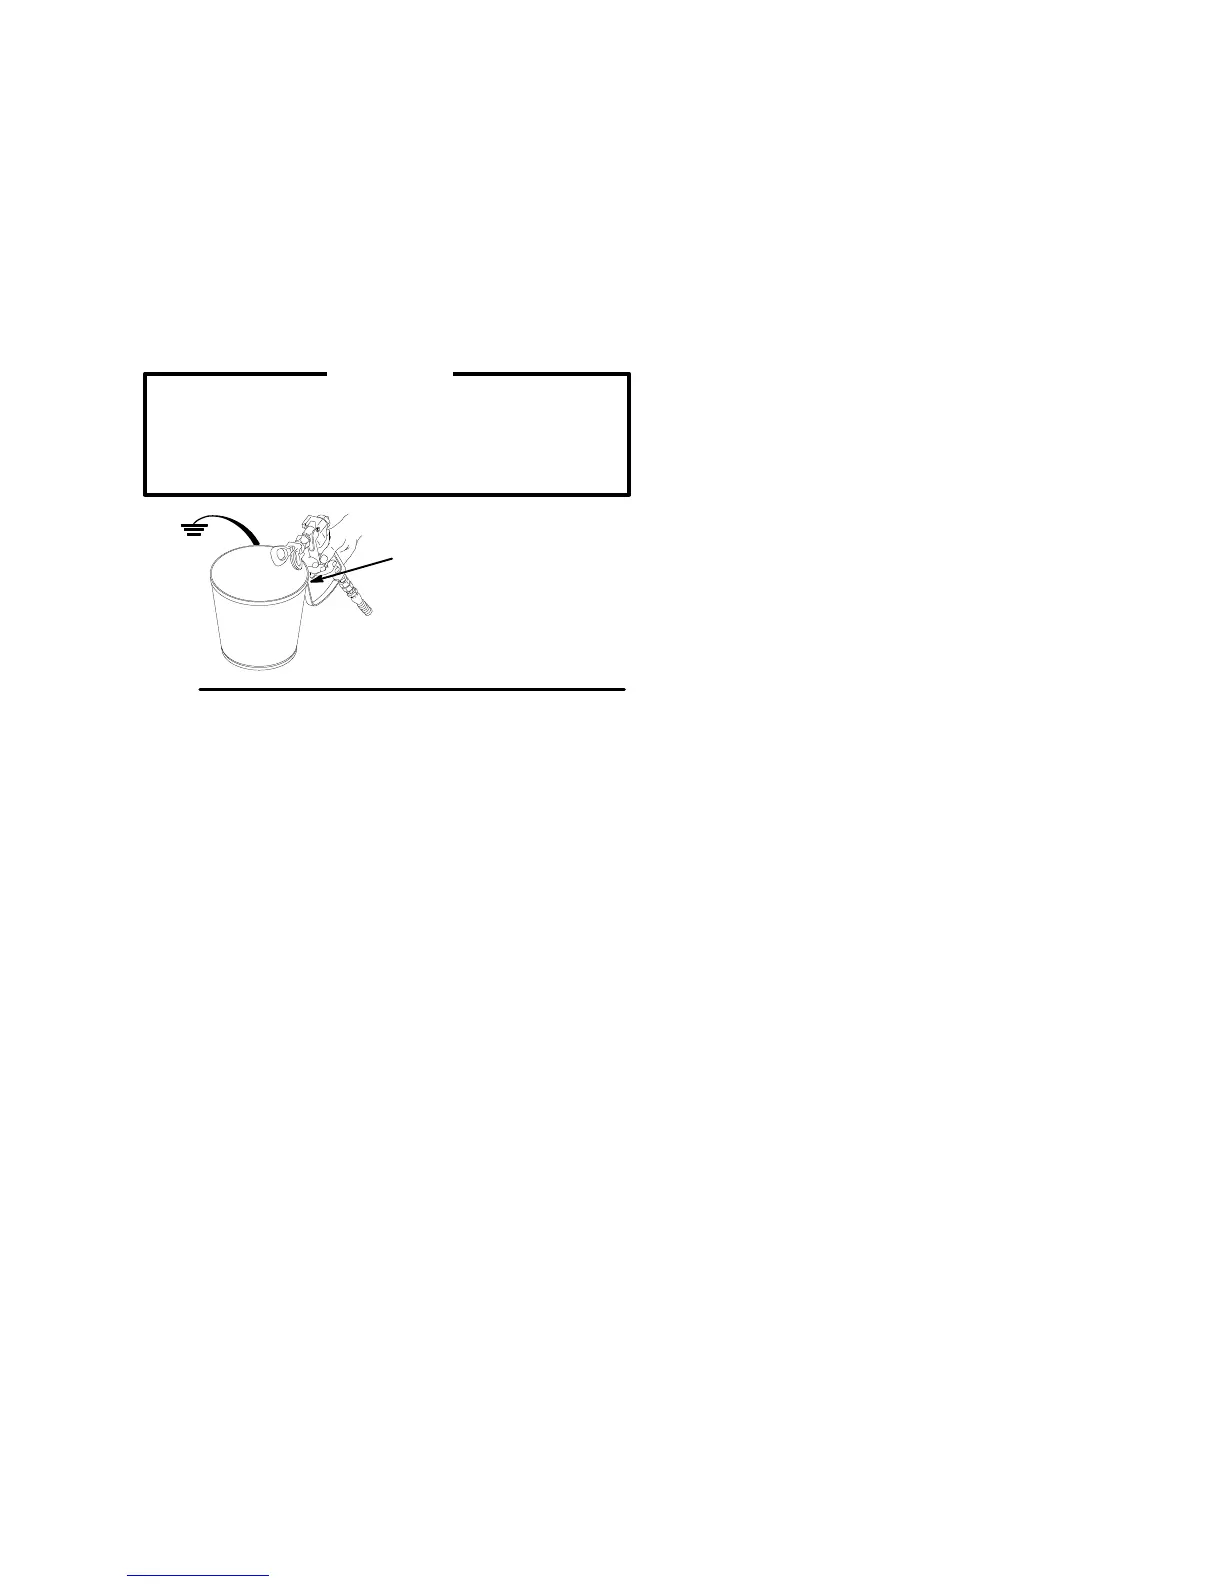
WARNING
To reduce the risk of static sparking and splashing
when
flushing, always remove the spray tip from the
gun
and hold a metal part of the gun firmly to the side
of
a grounded metal pail.
Fig 7
MAINTAIN
FIRM
METAL-TO-METAL
CONTACT
BETWEEN GUN
AND GROUNDED PAIL
13. Making firm metal-to-metal contact, hold the gun
firmly
to the side of the grounded solvent pail. T
rigger
the gun. At the same time, slowly turn the pressure
control
knob clockwise just enough to start the
pump.
14. Circulate the solvent until the system is thoroughly
flushed.
15. Release
the trigger and engage the gun safety
latch.
16. If
you are going to start spraying,
place the pump
or
suction tube into the supply container
. Follow the
Pressure
Relief Procedure
on page 2. Engage
the
gun safety latch until you are ready to prime the
pump.
See Step 3, page 9.
17. If
you are going to store the sprayer
,
be sure your
final flush is with an oil–based solvent, such as
mineral spirits. Remove the suction tube or pump
from the solvent pail. Follow the Pressure Relief
Procedure
on page 2. Engage the gun safety latch,
but
leave the drain valve open.