FLUSHING GUIDELINES
When to Flush
1. New sprayer. Your new sprayer was factory tested
with
lightweight oil which was left in to protect pump
parts
from corrosion.
Before using oil–base paint,
flush with mineral
spirits
only
.
Before
using water–base paint,
flush with
mineral
spirits, followed by soapy water, then a clean water
rinse.
2. Changing colors. Flush with a compatible solvent
such
as mineral spirits.
3. Changing from water–base to oil–base paint.
Flush
with soapy water
, then mineral spirits.
4. Changing from oil–base to water–base paint.
Flush with mineral spirits, followed by soapy water ,
then
a clean water flush.
5. Storage.
Water–base paint:
flush with water , then mineral
spirits
and leave the pump, hose and gun filled with
mineral spirits. Follow the Pressure Relief Proce-
dure
W
arning,
page 8.
Oil–base
paint:
flush
with mineral spirits. Follow the
Pressure
Relief Procedure W
arning
, page 8.
6.
Startup after storage.
Before using water–base paint,
flush out mineral
spirits
with soapy water and then clean water
.
When using oil–base paint,
flush out mineral
spirits
with fluid to be sprayed.
How to Flush
WARNING
Follow the Pressure Relief Procedure W arning
on
page 8. Remove the spray tip before flushing.
1. Engage the gun safety latch. Remove the spray tip
from
the gun.
2. Pour enough clean, compatible solvent to fill the
pump
and hoses into a large, grounded metal pail.
3. Place
the suction tube into the pail or tilt the sprayer
back
(it will support
itself) and place the pail under the
pump. Then tilt the sprayer forward to lower the
pump
into the pail.
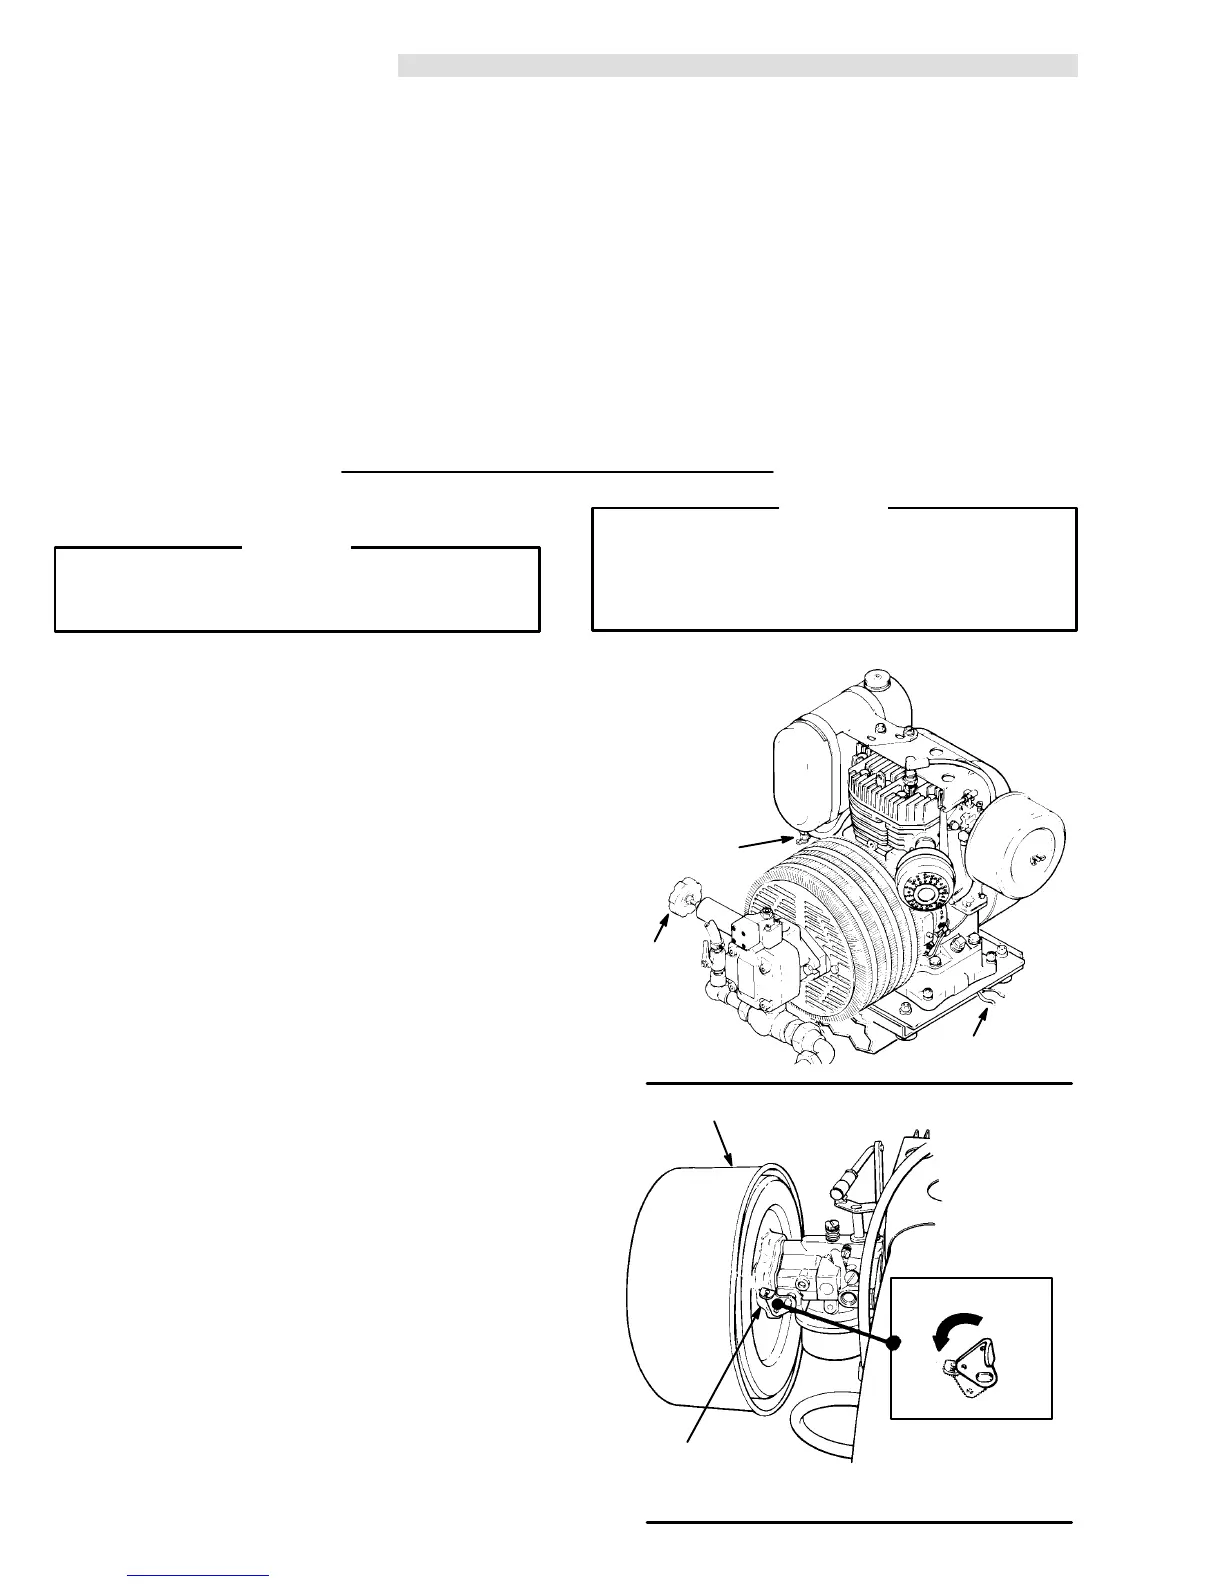
4. Turn the pressure control knob
counterclockwise
until
all spring tension is relieved. Y
ou will be able to
feel
it. The sprayer is now set at the lowest pressure
setting. T urning the knob further will remove it.
Tighten
the knob locknut to set. See Fig 5.
5. Open the bypass valve. The valve lever will be
parallel
to the body of the valve. See 5.
6. Open the fuel shutoff valve by screwing it out as far
as it will go. See 5.
7. Disengage
the foot brace from the hitch and lower it.
See
Fig 5.
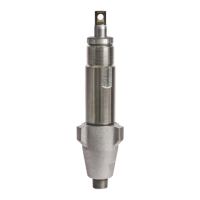
8. Close
the choke by turning the lever to the ON posi
-
tion
(horizontal). See Fig 6.
9. Brace
one foot against the foot brace and gently pull
the starter
rope
until you feel it engage, the continue
pulling
all the way out
and let it recoil slowly into the
starter. Then, holding the starter rope firmly, rapidly
pull
the rope to
start the engine. If it does not start af
-
ter
one or two attempts, open the choke a little (turn
lever toward OFF position). If the engine floods,
open
the choke all the way and continue pulling the
rope.
WARNING
Always
hold the starter rope firmly while pulling or
recoiling
it to reduce
the chance of being hit and in
-
jured
by the rope or of jamming and damaging
the
starter
assembly
.
Fig 5
FUEL
SHUTOFF
VALVE
PRESSURE
CONTROL
KNOB
HITCH
Fig
6
OFF
ON
TO CLOSE CHOKE,
TURN TO THE ON
POSITION
(HORIZONTAL)
CHOKE
AIR FILTER