Repair
24 3A1570L
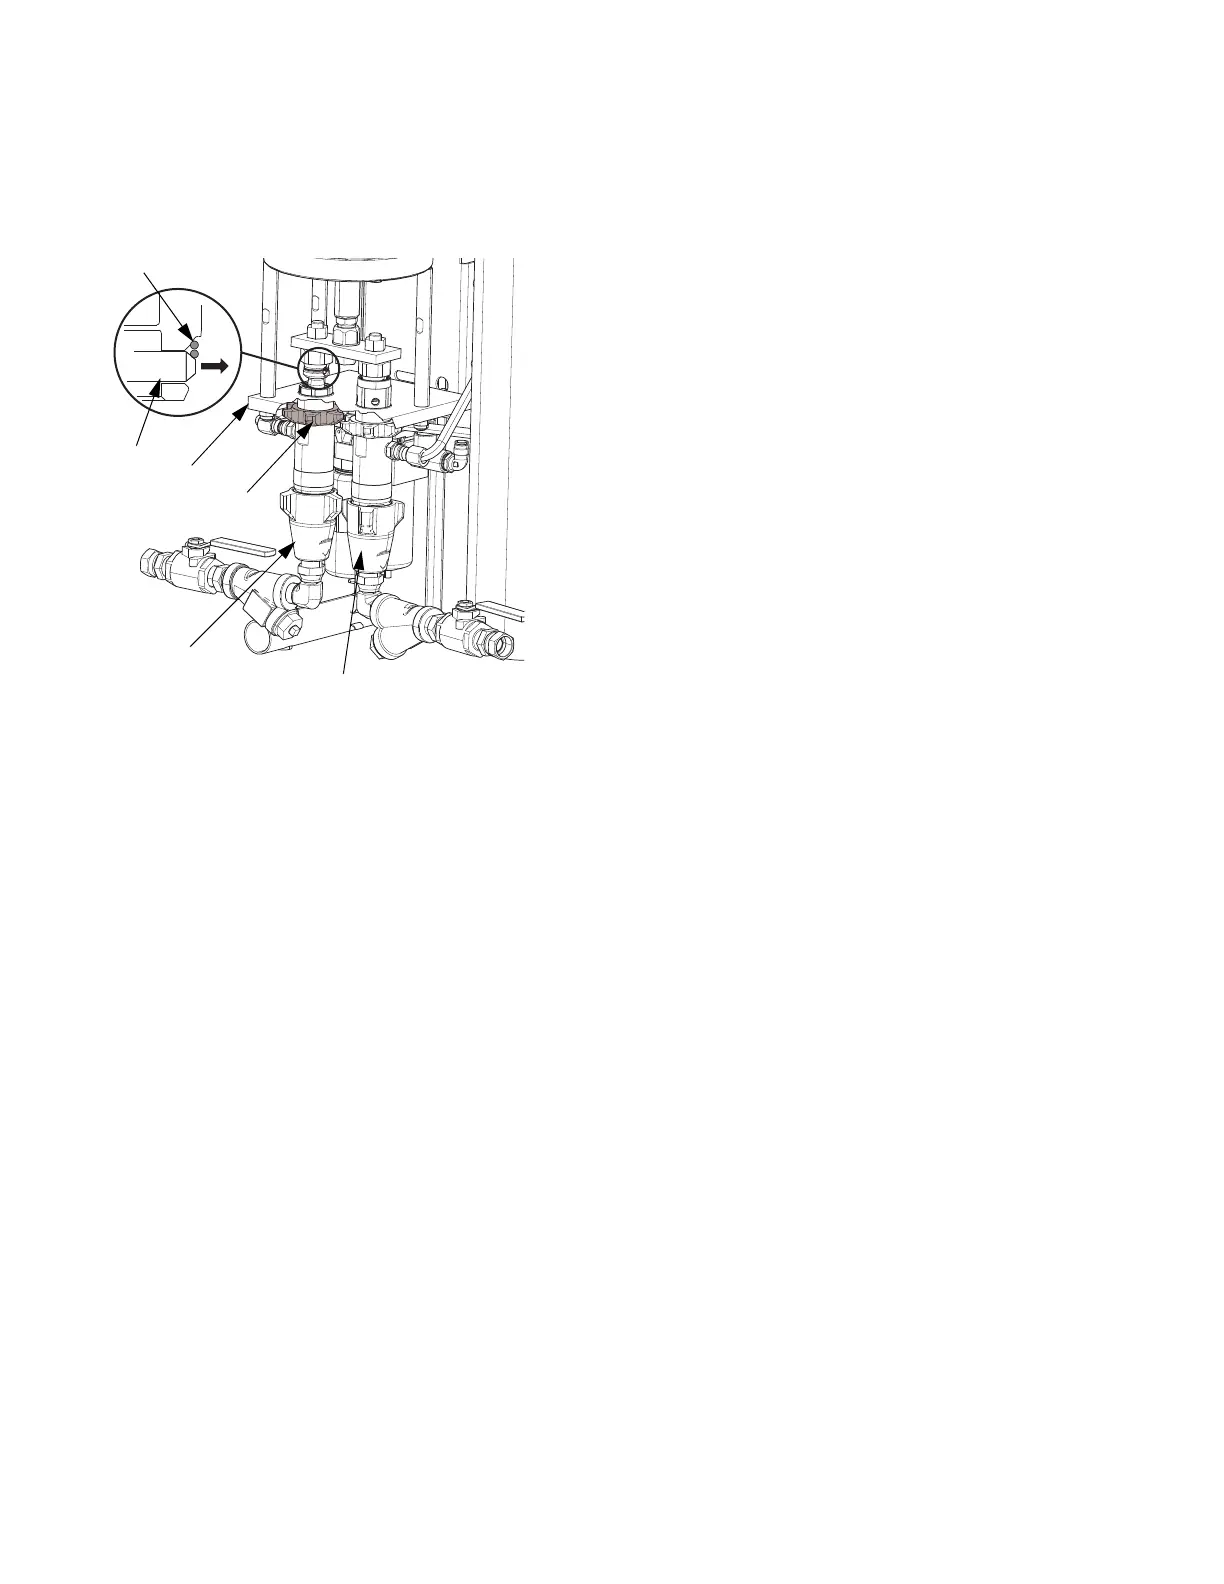
11. Push retaining wire clip (307) up. Push retaining pin
(306) out.
12. Loosen lock nut (302) by hitting firmly with a
non-sparking hammer.
13. Unscrew pump out of pump mounting plate (301).
14. See pump manual for repair procedures and
replacement parts.
Connect Pump
1. Ensure locknut (302) is screwed on pump with flat
side up. Grease pump mounting threads in plate
and pump cylinders (303, 304) with lithium grease.
Screw pump into pump mounting plate (301) until
top of pump thread is above mounting plate 1/2 to 1
1/2 threads above flush.
Pump rod connecting links (302) should be positioned
so that pins (306) are in line with each other.
2. Align pump rod hole with link hole. Push retaining
pin (306) in. Pull retaining wire clip (307) down to
cover pin ends.
3. Tighten locknut (302) by hitting firmly with a
non-sparking hammer.
4. Install adapter (312) in fluid outlet. Connect A side
(21) and B side (23) steel outlet tubes.
5. For Iso A pump only:
a. Install two pipe plugs (324).
b. Reconnect two tubing lines (N) from ISO Pump
Lube reservoir. Flush and refill reservoir with
TSL 206995.
6. Refill Resin B pump wet cup with TSL 206995.
ti17991a
307
306
302
301
304
303
 Loading...