6
308–626
Installation
Installation
NOTE:
Numbers in parentheses in the text refer to
reference numbers on the figures and parts drawing.
1.
Connect a grounded fluid hose to the gun fluid
inlet.
2.
Without the spray tip installed, start the pump or
sprayer and flush and prime it according to the
pump or sprayer instructions.
INJECTION HAZARD
T
o reduce the risk of a serious injury
,
always follow the
Pressure Relief Pro
-
cedure on page 7 whenever you are
instructed to relieve the pressure.
WARNING
3.
Relieve the pressure.
4.
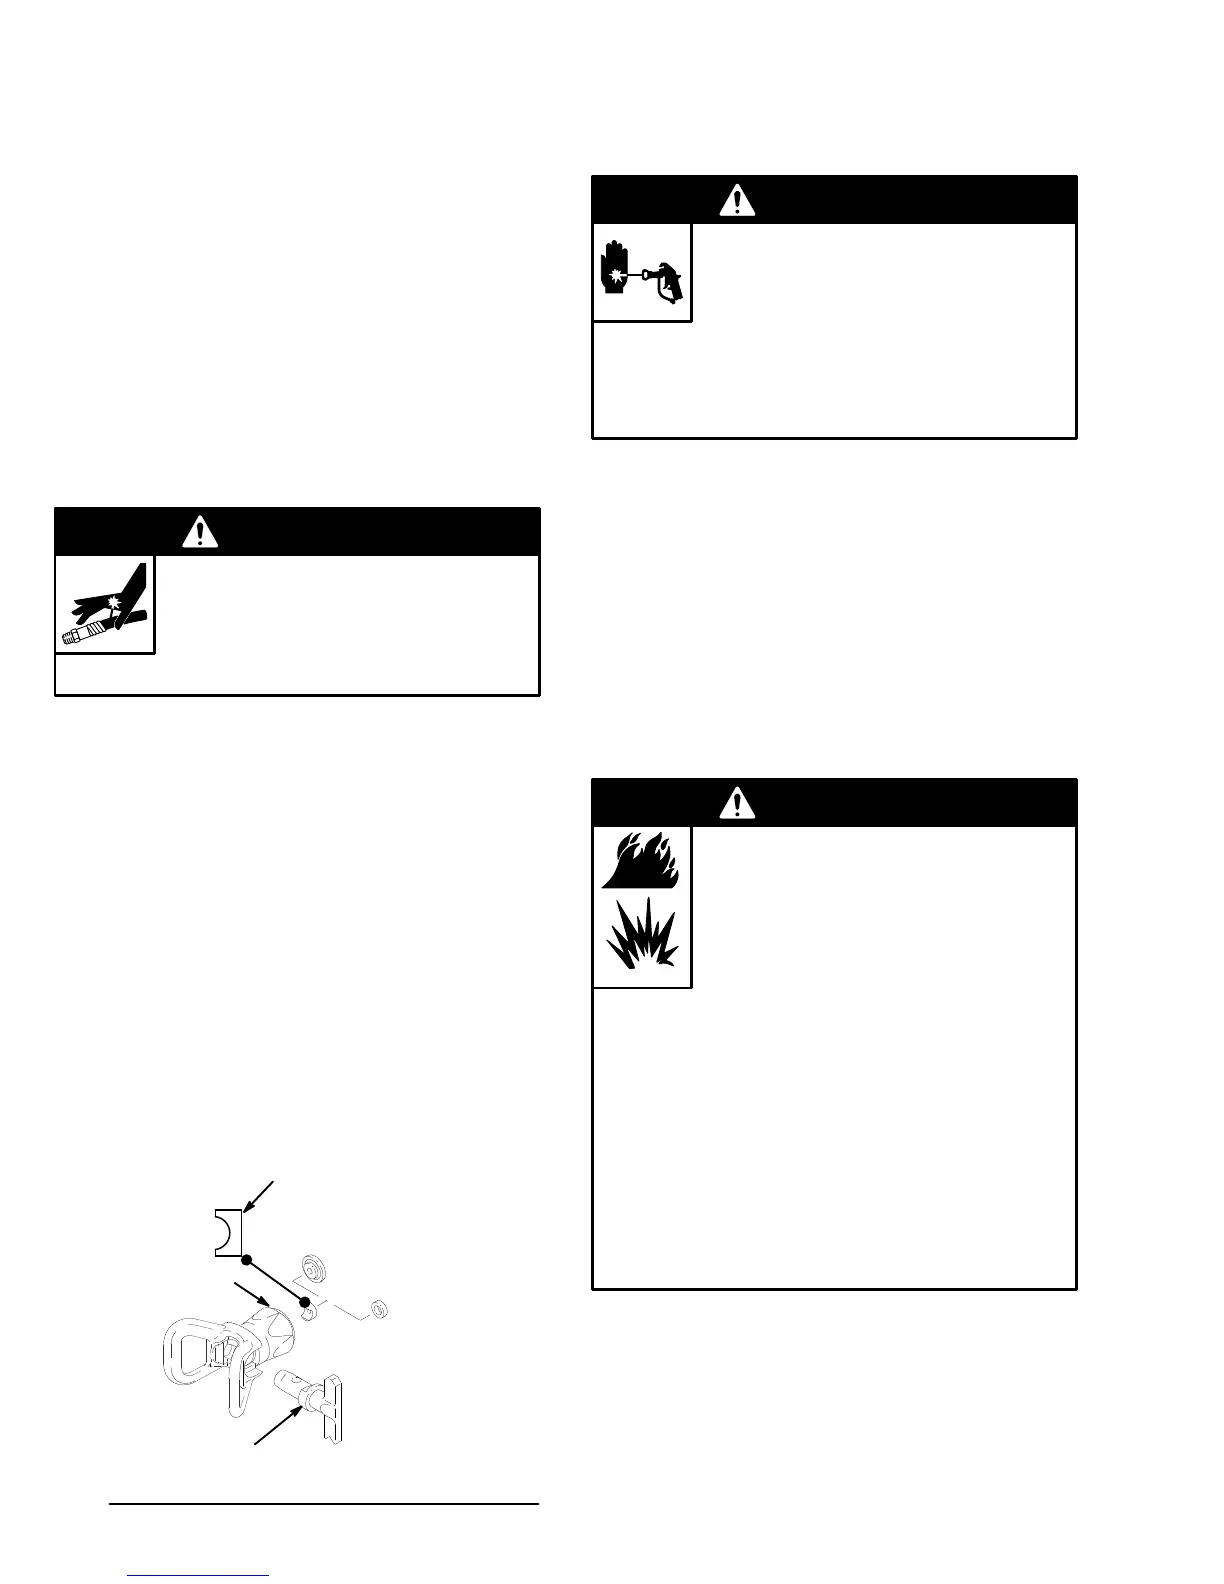
Insert SwirchTip. Guide seat into retaining nut and
turn until it fits cylinder
. Drop in gasket and press
down. Screw nut snugly onto gun, holding orange
guard in desired direction. T
ighten retaining nut
with a wrench.Cylinder handle must be in full spray
position. Make sure switch is inserted completely
before operating. Replace gasket and seat when
-
ever a SwitchT
ip wears out. See Fig. 1.
5.
Strain the fluid you are spraying if it contains
particles which clog the spray tip.
Fig. 1
"
t
!
Required Accessories
INJECTION
HAZARD
Y
our spray system must have a bleed-
type master air valve and a fluid drain
valve. These two accessories help re
-
duce the risk of serious injury
, including fluid injec
-
tion, splashing in the eyes or on the skin, or injury
from moving parts, if you are adjusting or repairing
the pump or gun.
WARNING
1. The
bleed-type master air valve
(air-powered
pumps only) relieves air trapped between this
valve and the pump after the air regulator is shut
off. T
rapped air can cause the pump to cycle
unexpectedly.
2. The
fluid drain valve
assists in relieving fluid pres
-
sure in the displacement pump, hose and gun;
triggering the gun to relieve pressure may not be
sufficient.
Electrical Grounding
FIRE
AND EXPLOSION HAZARD
T
o reduce the risk of static sparking,
which can cause a fire or explosion and
result in serious injury
, including electric
shock, and property damage, always
follow these precautions.
D
Read and follow the warnings in FIRE and
EXPLOSION HAZARD on page 5.
D Provide
electrical grounding continuity
throughout
the
entire spray system as instructed below
.
D
Have a trained and qualified person perform all
electrical wiring.
D
Comply with all applicable local, state and
national fire, electrical and other safety
regulations.
WARNING
1.
Provide electrical grounding for the
pump or
sprayer
as instructed in its separate manual.
2.
Provide electrical grounding for the
air compres
-
sor or hydraulic power supply
according to the
local code and the manufacturer
’
s recommenda
-
tions.
Continued on page 7.