10
308–626
Service
Troubleshooting.
Problem Solution
The gun continues to
spray after the trigger is
released.
Adjust the needle. See
page 10. If necessary
,
disassemble and repair
the gun.
Fluid is leaking past the
packings.
T
ighten the packing
screw (20) if it is loose.
Replace worn or dam
-
aged packings (15) or
the needle, as needed.
Fluid is leaking around
the swivel housing (9).
Replace the swivel. See
page NO
TAG.
INJECTION HAZARD
T
o reduce the risk of a serious injury
,
always follow the
Pressure Relief Pro
-
cedure on page 7 whenever you are
instructed to relieve the pressure.
WARNING
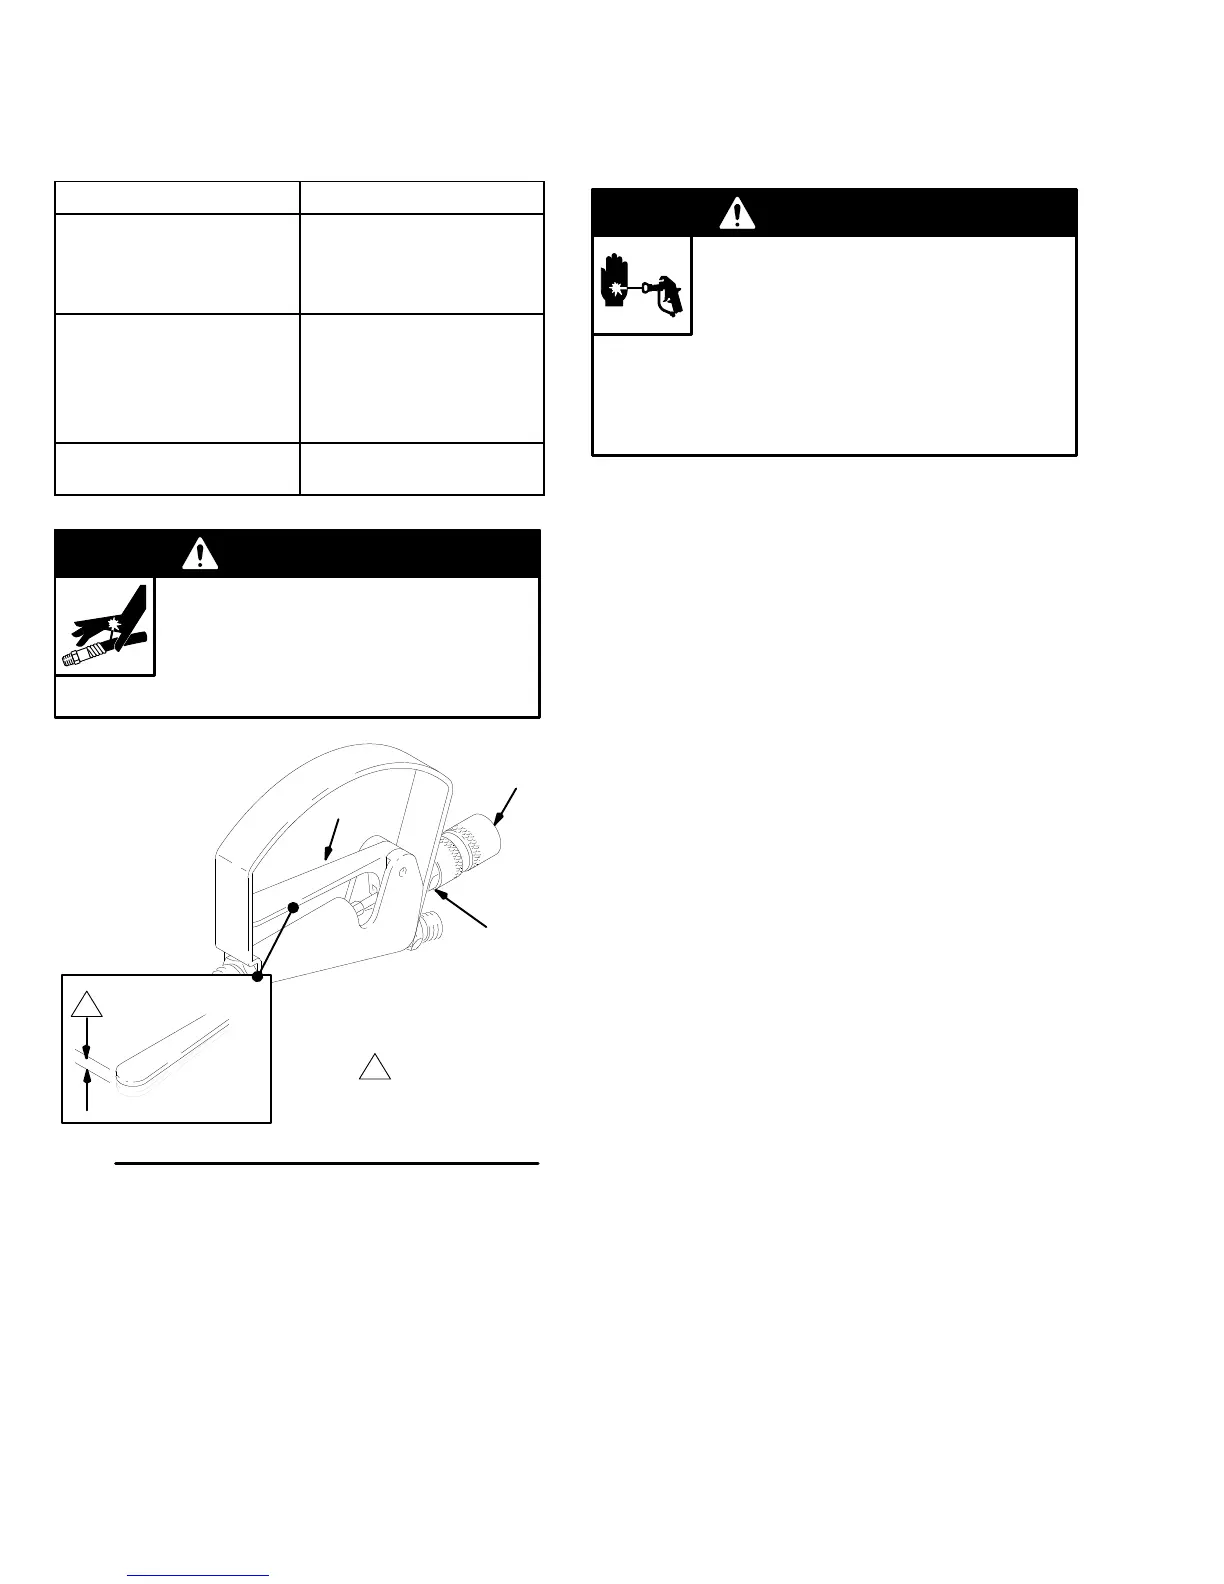
Fig. 5
FREE
PLA
Y
1/8 to 5/16 in.
(3 to 8 mm)
35
21
C
1
04885
04884
Adjust the Needle.
WARNING
INJECTION
HAZARD
Improper needle adjustment may allow
the gun to be triggered even when the
safety knob is locked, which can result in
serious injury
, including fluid injection and splashing
fluid in the eyes or on the skin. Be sure that the
needle assembly is properly adjusted, as instructed
below.
1.
Relieve the pressure. Disconnect the fluid hose.
2.
Check the free play of the trigger
. Lift the trigger
(21) with a finger; it should move 1/8 to 5/16 inch
(3.2 to 7.9 mm). See Fig. 5. If not, adjust as de
-
scribed below
.
3.
Grasp the hex (C) of the safety knob (35) with an
1
1/16 inch open end wrench and unscrew the knob
assembly from the gun body
.
4. Squeeze the trigger to move the adjusting nut (19)
out, and then loosen the cap screw (3). See Fig. 6.
Unscrew
the adjusting nut (19) just a few turns.
5.
Push the adjusting nut forward as far as possible.
Y
ou should feel the valve stem (28) contact the
seat (31). This indicates proper contact to stop the
flow of fluid.
6. T
urn the adjusting nut (19) in until the proper free
play is obtained. Squeeze the trigger to move the
adjusting nut out and tighten the cap screw (3).
7.
Screw on the safety knob (35).