Repair
313289W 43
Remove Displacement Pump
Follow these instructions for removing only the
displacement pump; the air motor will remain installed.
1. Follow Pressure Relief Procedure, page 17.
2. Disconnect displacement pump from fluid inlet
assembly. See steps 2 and 3 under Remove Pump
Assembly, page 42.
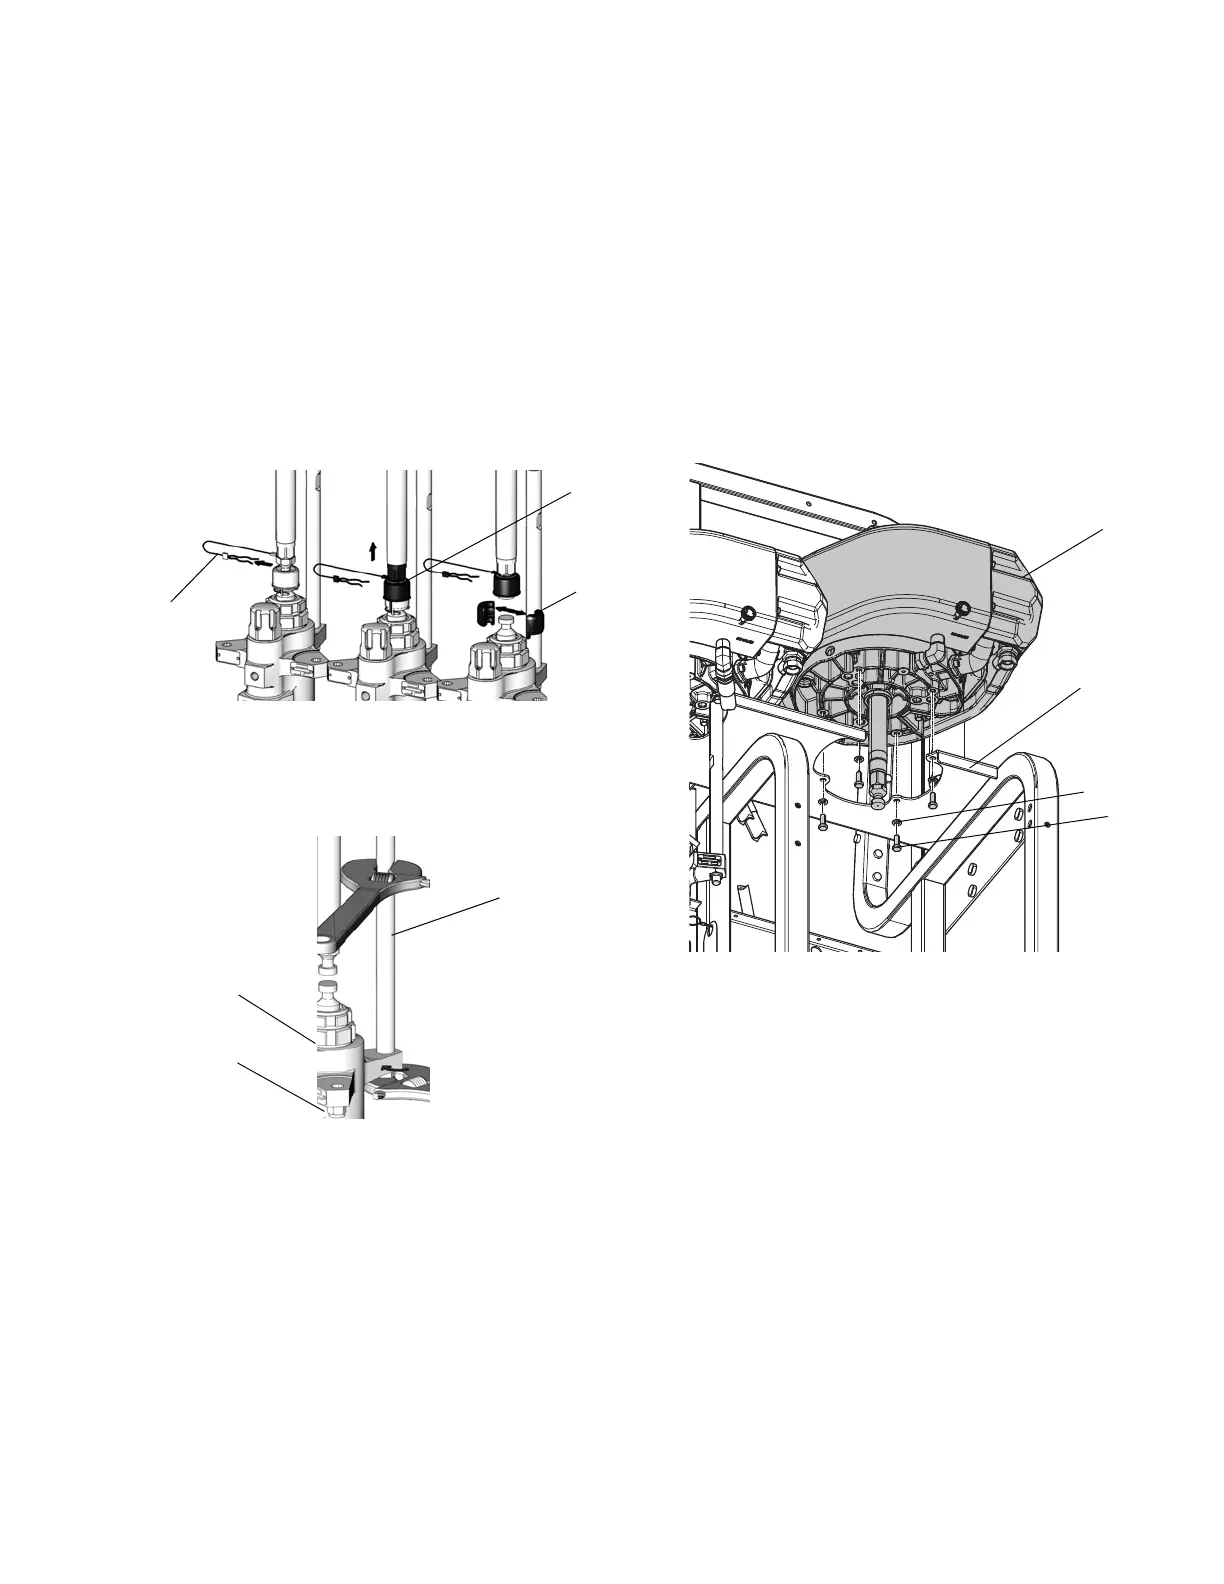
3. Remove clip (133), and slide coupling cover (134)
up to remove coupling (132).
4. Use a wrench to hold the tie rod flats to keep the
rods from turning. Unscrew the nuts (129) from the
tie rods (128) and carefully remove the
displacement pump (66 or 67).
5. Refer to your Xtreme Displacement Pump manual
to service or repair the displacement pump.
6. Follow steps in reverse order to reinstall
displacement pump.
Remove Air Motor
1. Follow Pressure Relief Procedure, page 17.
2. Disconnect displacement pump from air motor. See
steps 2 and 3 under Remove Displacement Pump,
page 43.
3. Disconnect sensor cable, air line, and ground wire
from air motor.
4. Remove mounting screws (4) and washers (3)
holding air motor (2) to mounting bracket.
5. Refer to your XL Air Motor manual to service or
repair the air motor.
6. Follow steps in reverse order to reinstall air motor.
WLD
 Loading...