4.18
21901443 R02 - 2016 Gravely Atlas JSV3000 / JSV6000 EFI Service Manual
© Copyright Ariens Company
ECU REPLACEMENT
Although the need for ECU replacement is unlikely, a
specific replacement procedure is required to ensure that
all essential data contained within the original ECU is
transferred to the replacement ECU.
NOTE
Refer to this procedure and carefully follow all
instructions provided in Digital Wrench®.
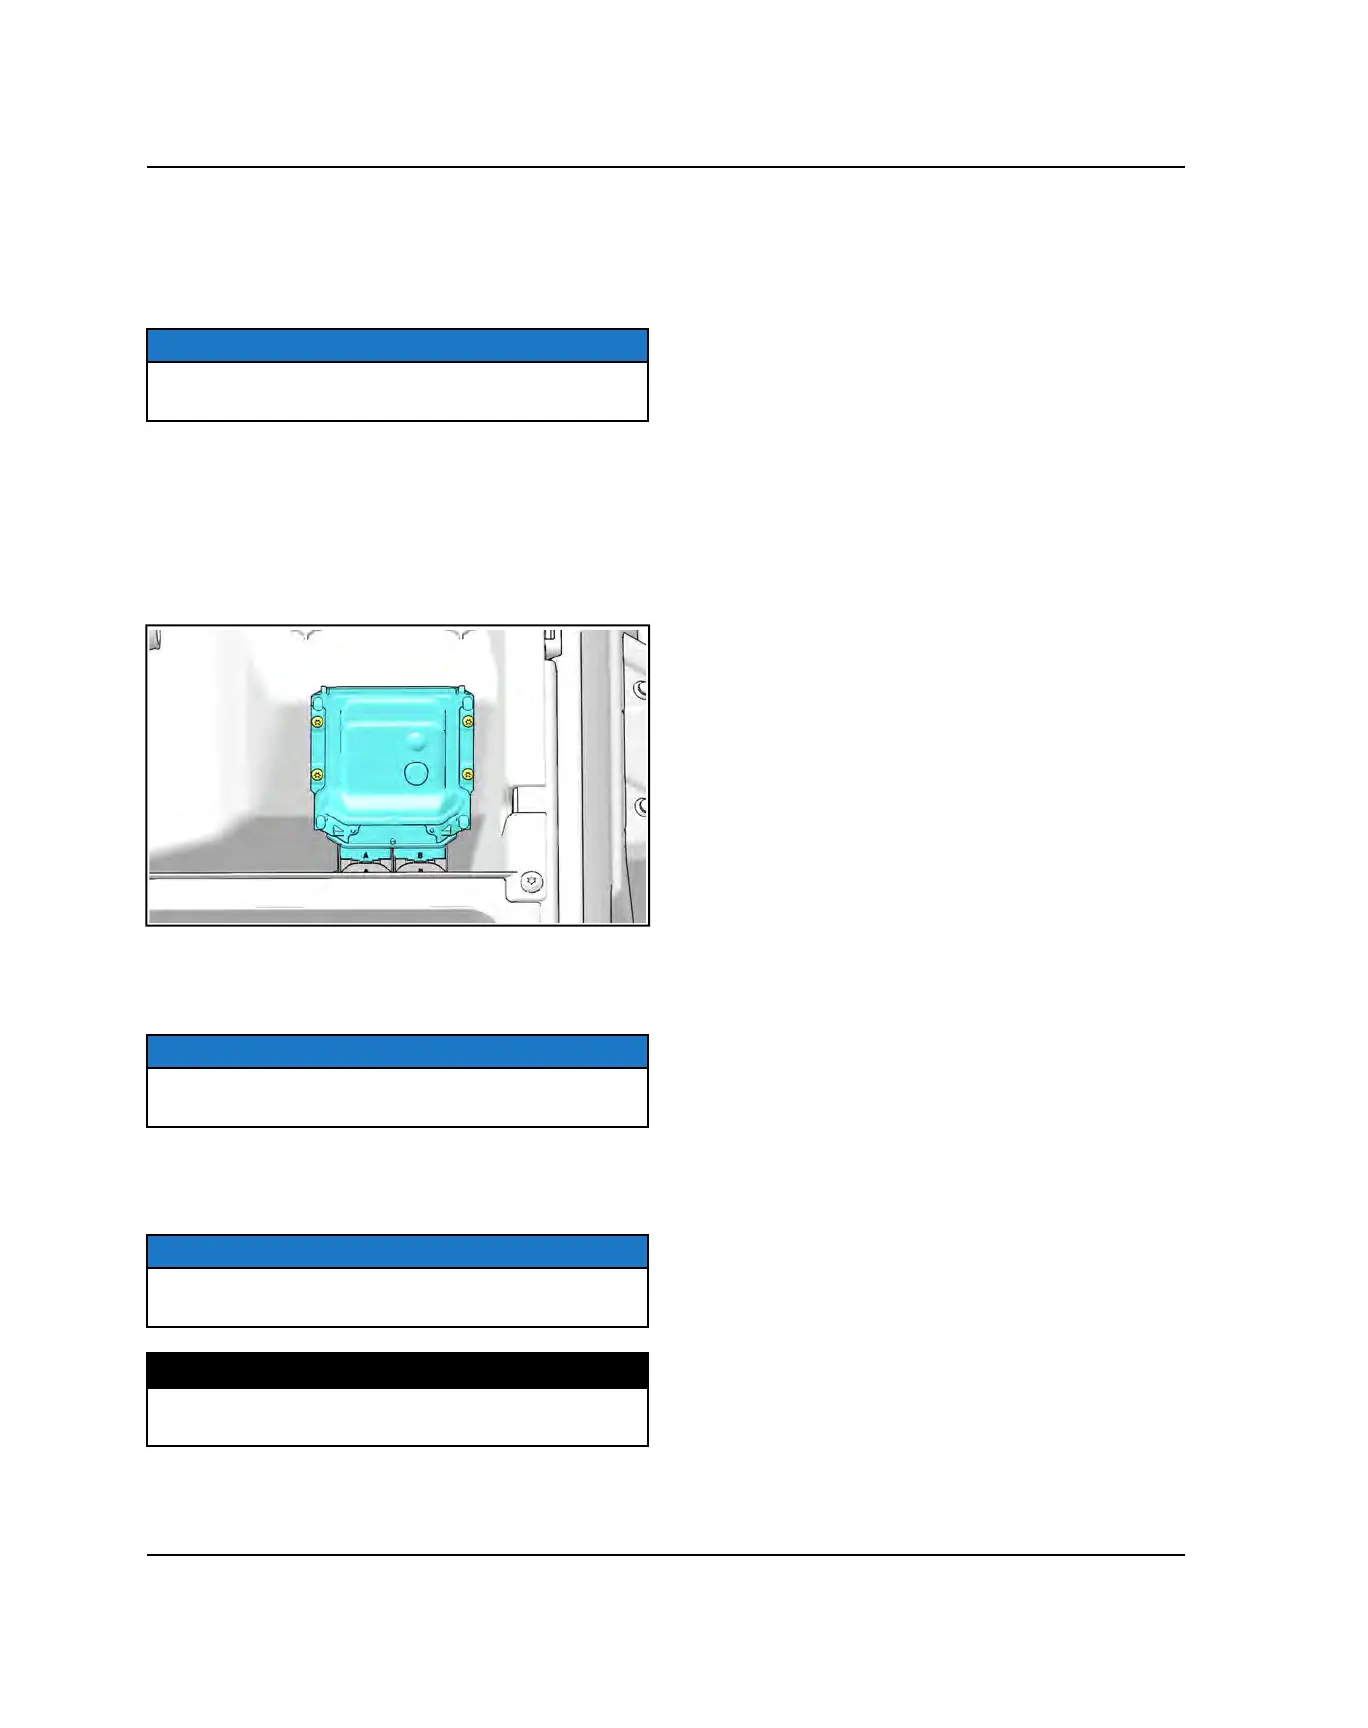
1. Remove the passenger seat base.
2. Connect the Vehicle Interface Cable to the Digital
Wrench® diagnostic connector. Go to the Special
Tests menu and select ECU Replacement. Carefully
follow the ECU replacement instructions.
3. Remove the (4) T-25 Torx head screws retaining
ECU to center tray.
4. With the ignition turned off, disconnect the wire
harness from the ECU. Lift the connector locking
lever and rotate it up until the connector is free from
the ECU.
NOTE
Upon removing the ECU connector, you should hear a
“click” when the connector is fully open.
5. Remove the ECU from the vehicle.
6. To reinstall, reverse this procedure and tighten the
mounting screws to specification.
NOTE
Upon installing the ECU connector, you should hear a
“click” when the connector is fully closed.
TORQUE
ECU Retaining Screws:
24 lb-in (2.7 Nm)
FUEL SYSTEM

 Loading...