Section - Charging with HC refrigerant R-290
Steps recommended
No
Where Activities
1
Carry out all intended works without hurry and
THINK BEFORE ACTING!
2
Continuing from section - Evacuation
3
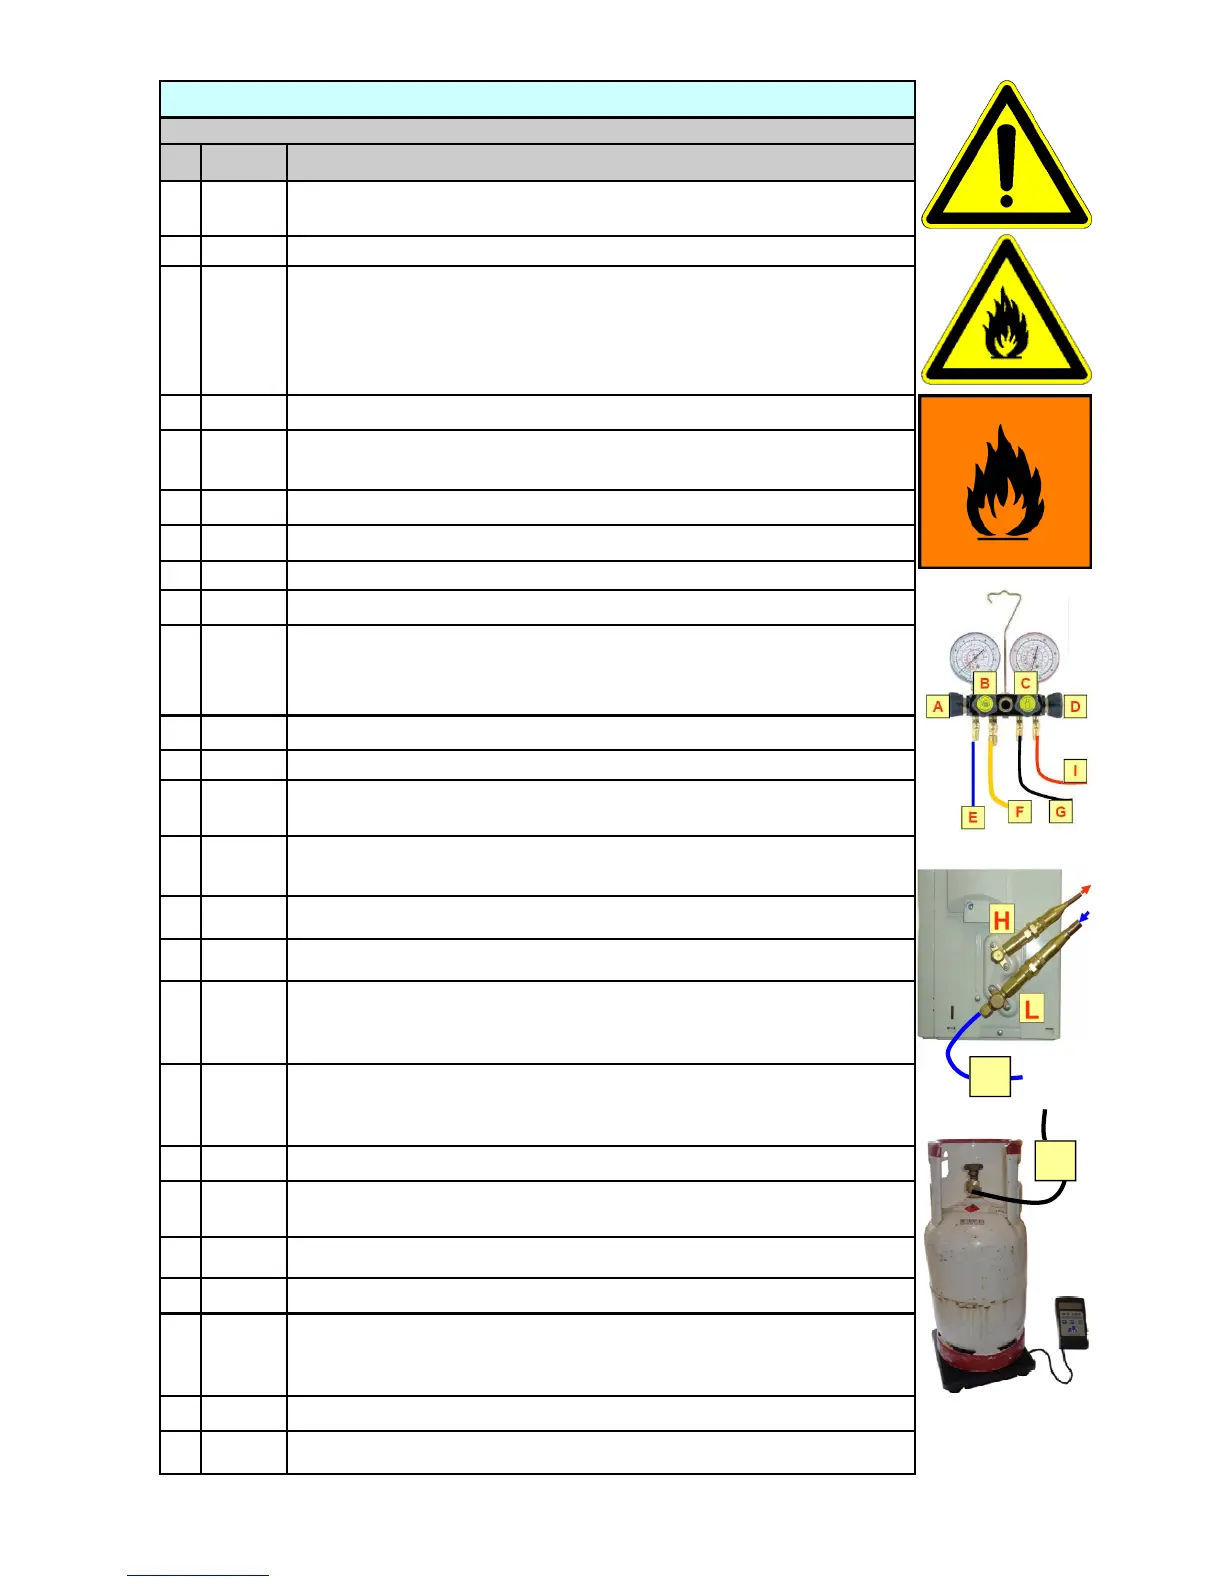
Arrange your tools and equipment connections as indicated on page 96.
Ensure that the refrigerant transfer hose “E” with the connection at the suc-
tion line service port “L” consists of a core depressor to open the service port
inner core valve during connection. The warning sign is placed in the work-
area.
4
AC system “OFF”, evacuated and dehydrated.
5
A, B,
C, D
Manifold gauge valves are closed.
6
L & H
Stop valves at condensing unit are open
7
Open the refrigerant cylinder valve
8
Zero the weighing scales
9
A
Open the low pressure valve at the manifold gauge.
10
C
Open the refrigerant valve at the manifold gauge. Transfer refriger-
ant vapour slowly (50% of total charge) into the suction side of the
condensing unit
11
Measure (note) transferred (charged) refrigerant amount
12
C
Close the refrigerant charging valve of the manifold gauge set.
13
Switch on the unit to COOLING MODE, bearing in mind that there
is a time delay of 3 minutes until the compressor starts.
14
C
Open the refrigerant charging valve “C” of the manifold gauge set
and slowly charge accurately the remaining refrigerant amount.
15
Close the refrigerant cylinder valve
16
Record the system data (use provided form from page 102).
17
H
Close stop valve at condensing unit (HP). Stem in front-seated po-
sition to pump down and transfer the refrigerant into the high side
section of the AC unit.
18
If low pressure gauge indicates 0 bar, all refrigerant remaining in
the hoses assembly and gauges manifold set is sucked back into
the AC unit.
19
A
Closed
20
H
Open the high pressure stop valve at the outdoor unit. Stem in
back-seated position.
21
B, C, D
Closed
22
Remove Manifold and install end-caps.
23
L & H
Final leak check with soapy water or electronic HC leak detector.
H – while operational AC unit
L – in “off“ mode
24
General functional test of the system and system labelling.
25
Fill Start-Up data sheet for “Service and Repair” works
G
E