Boston Scientific (User’s Manual Template 8.5in x 11in Global, 91091755 Rev/Ver. AA), Manual, MB, XPS, Global, 50623316-01A_pretrans
Process Black ΔE ≤5.0 / CMYK ImageProcess Black ΔE ≤5.0 / CMYK Image
15
Note: It may take time (typically 5 to 15 minutes, but can be up to 40 minutes in rare cases such as extremely cold conditions) for the console to
reach the proper operating temperature and pass all internal self-check tests before it is ready for operation.
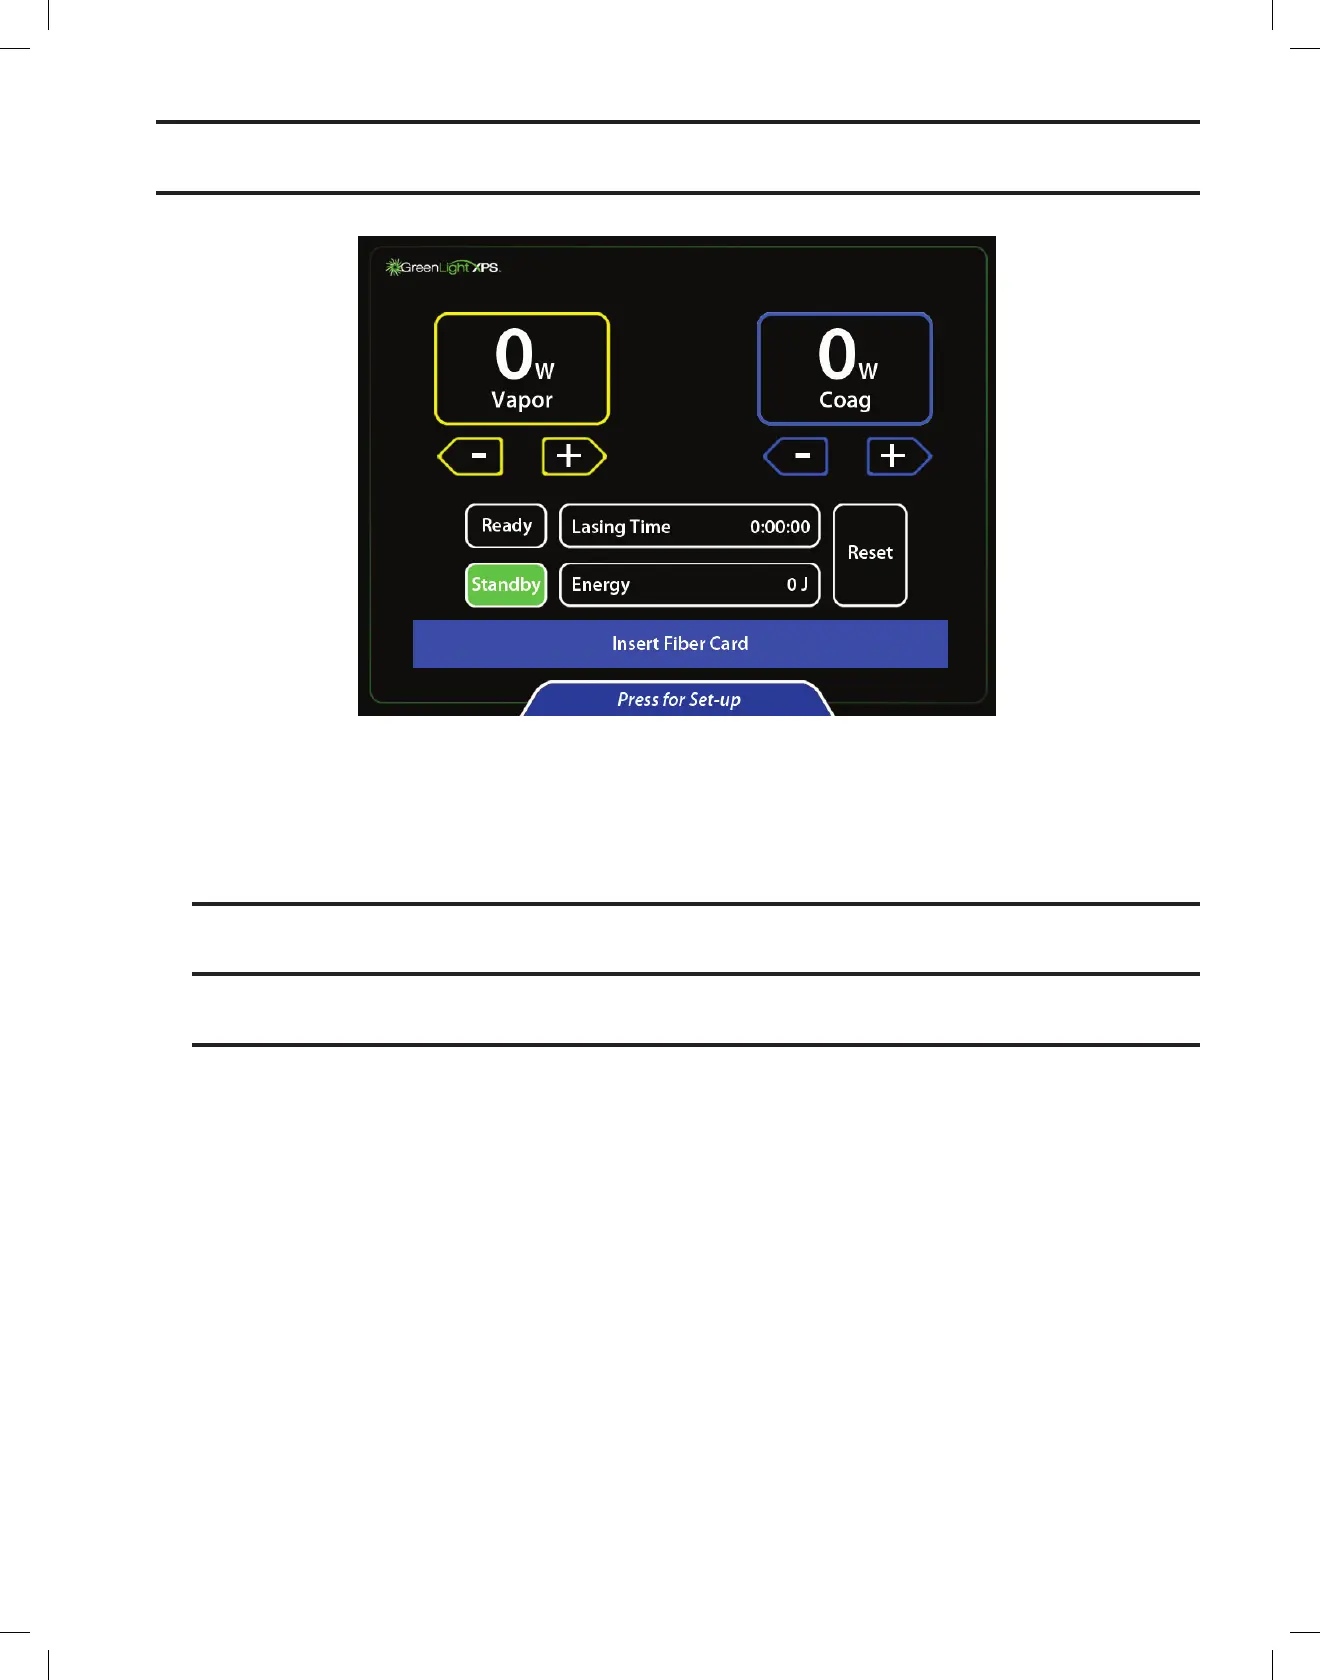
5. The console will perform self-tests. When the tests are completed, a screen is displayed prompting to insert fiber card.
6. Prepare the patient for the procedure.
7. If the telescope does not include a built-in video camera insert, place a small or large video camera insert between the telescope and the
camera. The video camera insert protects the camera from the high-intensity light.
A. To insert the large video camera insert, hold the camera head pointing up. Place the video camera insert (labeled side facing towards
camera) onto the camera head and depress the coupler. Attach the telescope to the camera.
B. To insert the small video camera insert, hold the telescope portion of the cystoscope with the eyepiece pointing up. Place the video
camera insert (writing side facing outward) into the eyepiece. Attach the camera to the telescope.
Note: Some telescopes have a built-in video camera insert to prevent the transmission of green light. In this case, do not insert an additional
video camera insert between the telescope and the camera.
CAUTION:Donottouchmultipleareasonthetouchscreenatonetime.Contactinmultipleareasofthescreenwillresultinnoresponse
from the command buttons. Only touch the desired command button when making adjustments to parameters.