G0555LX (Mfg. Since 3/13)
-47-
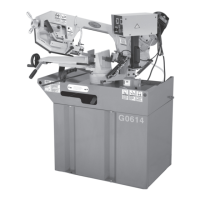
Replacing V-Belt
Tools Needed Qty
Hex Wrench 6mm .............................................. 1
Wrench or Socket 13mm ................................... 1
Replacement V-Belt (Part No. P0555LX068) .... 1
To replace the V-belt:
1. DISCONNECT BANDSAW FROM POWER!
2. Put on heavy leather gloves and remove the
blade from the machine.
3. Loosen the motor mount cap screws shown
in Figure 66.
To ensure optimum power transmission from the
motor to the blade, the V-belt must be in good
condition and be properly tensioned.
Replace the V-belt if it shows signs of cracking,
fraying, and excessive wear.
Figure 66. Locations of the wheel mount bolt,
and motor mount cap screws.
Wheel Mount
Bolt
4. Pivot the motor to the right (as viewed from
the front of the bandsaw) so the upper cap
screw slides to the right in the slot—this will
release the V-belt tension.
5. Roll the V-belt off the pulleys.
7. Remove the wheel from the shaft. Make sure
not to misplace the shaft key.
8. Put new belt on.
9. Align the wheel keyway with the shaft key,
and slide the wheel back onto the shaft.
10. Secure the wheel with the wheel mount bolt
and flat washer.
11. Position the V-belt on the desired pulleys,
then properly tension it, as instructed in
V-Belt Tension on Page 46.
12. Replace the blade, then properly track and
tension it (see Pages 19 and 23) and adjust
the guide and support bearings.
6. Remove the wheel mount (it has left hand
threads, so it loosens by turning clockwise).
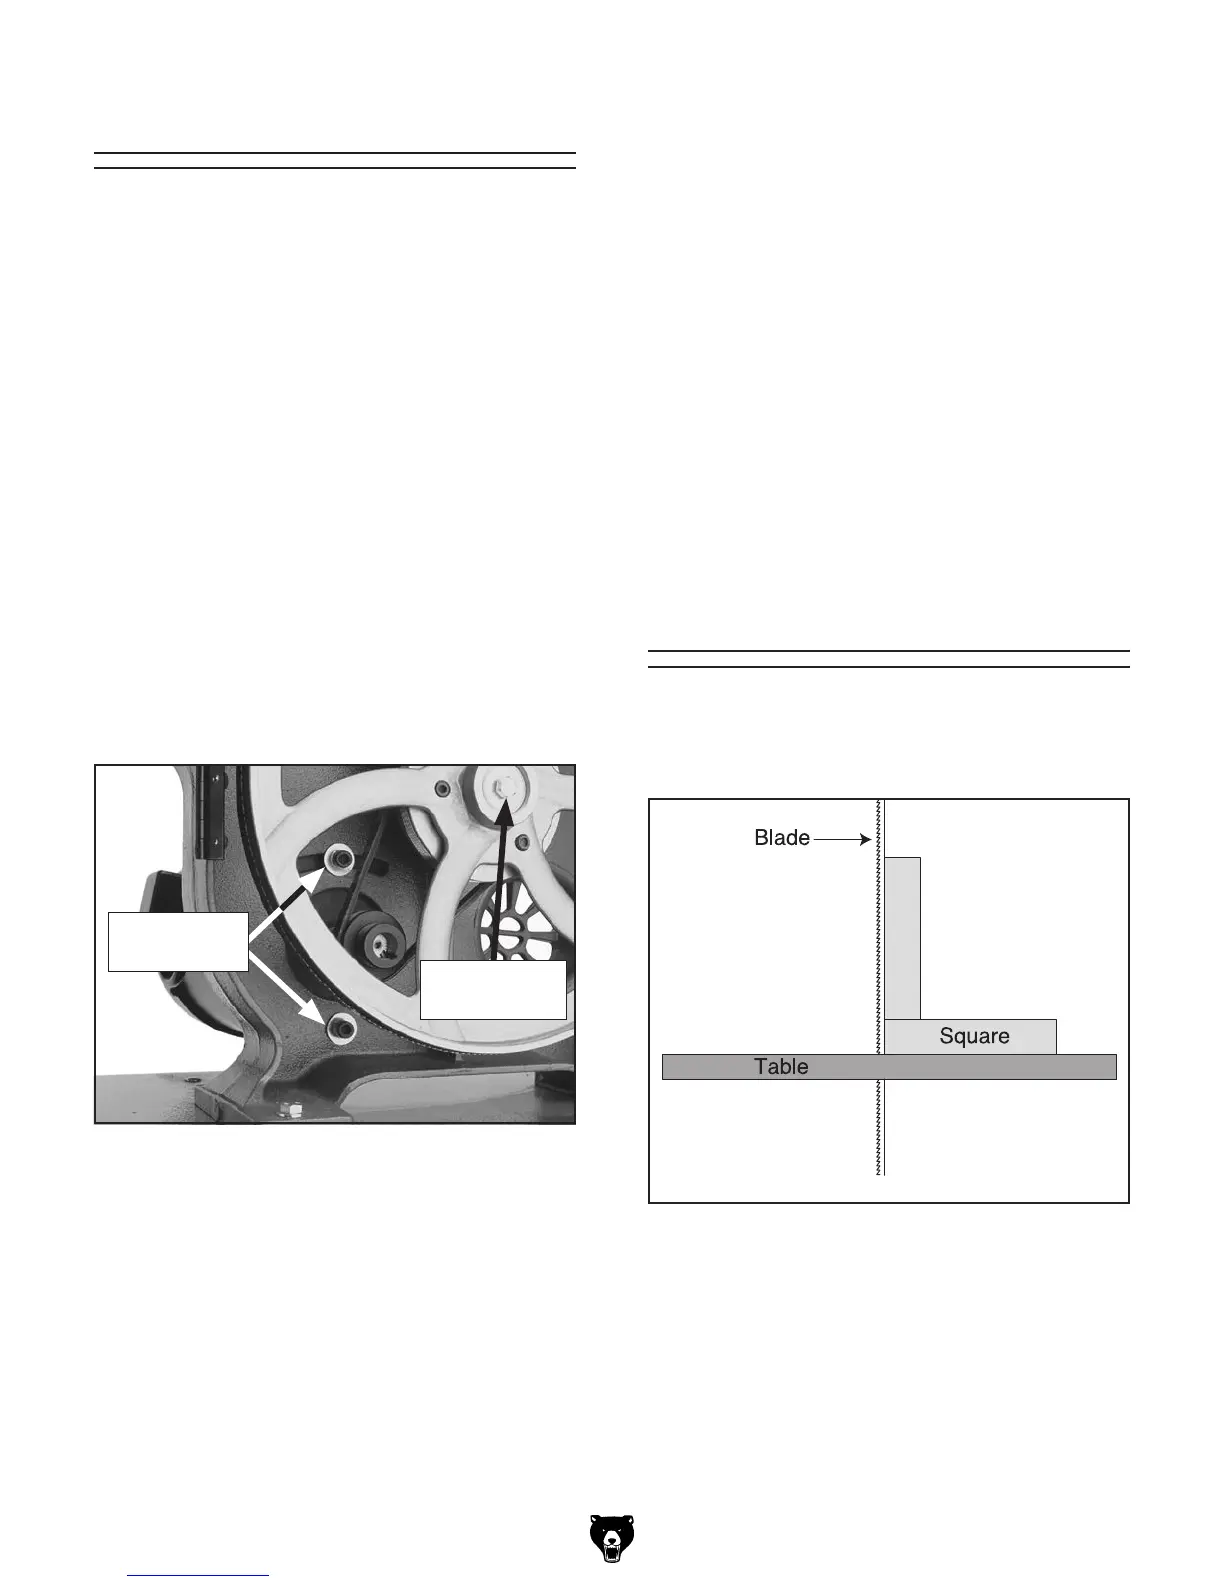
To ensure accuracy when cutting stacked cuts or
circles, the table must be 90° to the back of the
blade, as shown in Figure 67.
Figure 67. Checking the table to be
perpendicular to the back of the blade.
If the table is not perpendicular to the back of
the blade, correct this condition by placing shims
between the table and trunnions underneath it.
Follow the procedures in Aligning Table on Page
28 to ensure accurate cutting.
Shimming Table
Motor Mount
Cap Screws

 Loading...