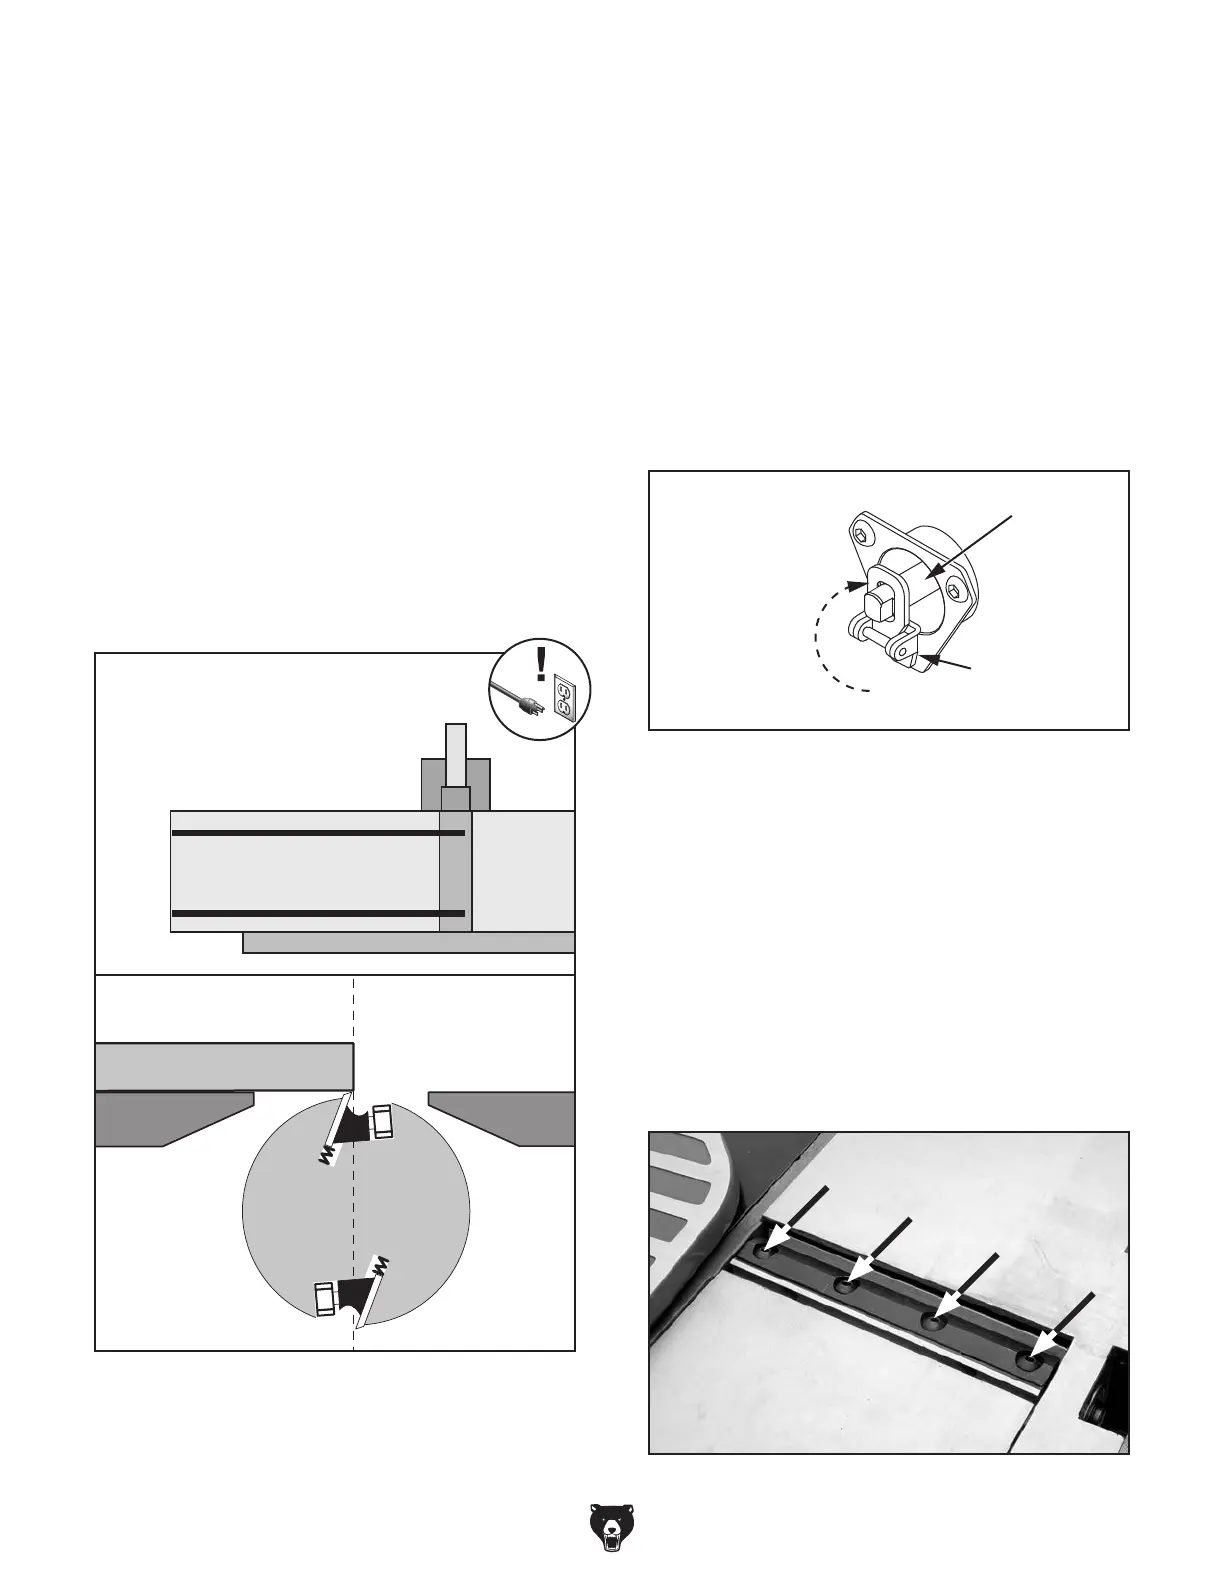
Black Lines Represent
Straightedge Positions
From Overhead View
Straightedge
Outfeed Infeed
Figure 36. Checking knife height at top dead
center with a straightedge.
Lock Engaged
Cutterhead
Lock
Cutterhead
Figure 37. Cutterhead lock engaged.
Figure 38. Cutterhead knife clamp screws.
-38-
Model G0945/G0946/G0947 (Mfd. Since 06/21)
Checking Knife Height
1. DISCONNECT MACHINE FROM POWER!
2. Loosen (2) button head cap screws secur-
ing cutterhead guard to jointer base, then
remove cutterhead guard.
3.
Using a straightedge on outfeed table, check
height of each knife at positions shown in
Figure 36.
— Knives are set correctly when they just
touch bottom of straightedge at top dead
center (TDC) (see Figure 36) in each
straightedge position.
— If knives do not touch straightedge, or they
lift up at any position, knives need to be
adjusted. Proceed to Step 2 of Setting/
Replacing Knives.
Setting/Replacing Knives
1. DISCONNECT MACHINE FROM POWER!
2. Put on heavy leather gloves, move fence all
the way back, and remove cutterhead guard.
3.
Lower infeed table to
1
⁄2" on depth-of-cut
scale to provide access to cutterhead knives.
4.
Rotate cutterhead until knife clamp is on top,
then engage cutterhead lock by moving lock
up and over end of cutterhead, as shown in
Figure 37.
5.
Loosen (4) cutterhead knife clamp screws, as
shown in Figure 38.
— If setting knives, proceed to Step 6.
— If replacing knives, carefully remove knife
and clamp from cutterhead, then install
new knife and re-install clamp. Proceed to
Step 6.
Note: Clean cutterhead thoroughly before
installing new or sharpened knives.