EasyManua.ls Logo

Grizzly G0759 - User Manual

Grizzly G0759
72 pages
Print Icon
To Next Page IconTo Next Page
Loading...
COPYRIGHT © MAY, 2016 BY GRIZZLY INDUSTRIAL, INC.
WARNING: NO PORTION OF THIS MANUAL MAY BE REPRODUCED IN ANY SHAPE
OR FORM WITHOUT THE WRITTEN APPROVAL OF GRIZZLY INDUSTRIAL, INC.
#BL18227 PRINTED IN CHINA
The following change was recently made to this machine since the owner's manual was printed:
Removed wire between spindle direction knob and circuit board (see Figure 1), making speed range
identical in forward and reverse. Refer to updated wiring diagram on following page.
Aside from this information, all other content in the owner's manual applies and MUST be read and under-
stood for your own safety. IMPORTANT: Keep this update with the owner's manual for future reference.
For questions or help, contact our Tech Support at (570) 546-9663 or techsupport@grizzly.com.
READ THIS FIRST
For questions or help with this product contact Tech Support at (570) 546-9663 or techsupport@grizzly.com
Model G0759
***IMPORTANT UPDATE***
For Machines Mfd. Since 05/16
and Owner's Manual Revised 07/15
P3
P1
P2
A+
A1
9
5
1
11
7
3
12
8
4
10
6
2
24
14
23
13
L1
A
RPM Display
Spindle Direction Knob
Spindle
Speed
Knob
On/Off Switch
N1
IN
N
Neutral
Hot
Ground
110 VAC
5-15 Plug
Motor
Brushes
L2
IN
L
G
A
B
L1
Fuse
F10AL250V
Fuse
F15AL250V
Gnd
110V Motor
Gnd
JD-014 5WR02J
CESX 1101-28
ZD-SX-THL
Kedu KJD-178/120V
WX14-12
Kedu EN61058
10A
15A
Chip Guard
Limit Switch
Spindle
RPM Sensor
Figure 1. Location of wire removed.
Wire
Removed

Questions and Answers

  • S
    Sarah SchroederAug 12, 2025
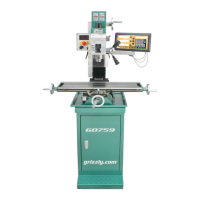
    Why my Grizzly G0759 machine does not start?
    • J
      Jeffrey HooverAug 12, 2025
      If your Grizzly Power Tool machine does not start, several factors could be at play. Begin by checking the fuse on the machine and replacing it if it's blown. Ensure the plug is in good condition and correctly wired. Verify the motor wiring is accurate. Check the wall fuse or circuit breaker, and reset or replace it if necessary, ensuring the circuit size is correct and there isn't a short. Inspect for any broken wires or loose connections, repairing or replacing them as needed. Confirm the machine's power switch is correctly wired and replace it if faulty. Lastly, the motor itself might be the issue, requiring testing, repair, or replacement.
  • J
    Jessica CruzAug 16, 2025
    Why does my Grizzly G0759 Power Tool have vibration or noisy operation?
    • E
      Eric DennisAug 16, 2025
      If your Grizzly Power Tool is experiencing vibration or noisy operation, start by checking for any loose motor or machine components and tighten or replace them, using thread locking fluid. Reduce the depth of cut if it's excessive. Ensure the cutter or tooling is properly secured. Replace or sharpen the cutter if it's dull or faulty. If the bit is chattering, try replacing or sharpening it, adjusting its position to the workpiece, and using an appropriate feed rate and cutting RPM. Make sure the machine is correctly mounted and sits evenly, tightening or replacing mounting bolts or shimming the machine. Finally, test the motor bearings and replace them if rotational grinding or a loose shaft is detected.
  • N
    Nicole JohnsAug 20, 2025
    What to do if my Grizzly Power Tool stalls or is overloaded?
    • J
      Justin GrimesAug 20, 2025
      If your Grizzly Power Tool stalls or is overloaded, it might be due to a feed rate or cutting speed that's too fast, so try decreasing it. Ensure you're using the right cutter for the task. If the machine is undersized or the tooling is incorrect, use smaller or sharper tooling, reduce the feed rate or spindle speed, and consider using cutting fluid. Check that the motor connection is correctly wired for the intended voltage. Test the motor bearings; if there's rotational grinding or a loose shaft, they likely need replacement. If the motor has overheated, clean it off, let it cool, and reduce the workload. Lastly, the motor itself might be faulty, requiring testing, repair, or replacement.
  • E
    Edward MillerAug 23, 2025
    Why does the workpiece vibrate or chatter during Grizzly G0759 operation?
    • B
      Brittany HollandAug 23, 2025
      If the workpiece vibrates or chatters during the Grizzly Power Tool operation, make sure the table locks and quill lock lever are tightened. Ensure the workpiece is securely clamped to the table or in the mill vice. If the spindle speed is too slow or the feed rate is too fast, adjust accordingly. If the spindle is extended too far down, fully retract it and lower the headstock to increase rigidity.
  • W
    wagnerjeanAug 27, 2025
    How to improve bad surface finish with Grizzly G0759?
    • G
      Gregory WhiteheadAug 27, 2025
      If you're experiencing a bad surface finish with your Grizzly Power Tool, adjust the spindle speed and feed rate. Sharpen your cutting tool or select a more appropriate one for the task. Verify that the cutting tool has the correct rotation. Ensure the workpiece is securely clamped to the table. Fully retract the spindle and lower the headstock if the spindle is extended too far down to enhance rigidity.
  • P
    philiphoganAug 30, 2025
    What to do if tool slips in collet of Grizzly G0759 Power Tool?
    • J
      James ThompsonAug 30, 2025
      If the tool slips in the collet of your Grizzly Power Tool, ensure the drawbar is tightened so that the collet is fully drawn up into the spindle taper. Verify you are using the correct size collet by measuring the tool shank diameter and matching it with the appropriate collet diameter. Clean any debris from the collet or spindle taper. Reduce the depth of cut to allow chips to clear.
  • C
    cbridgesSep 3, 2025
    Why is my Grizzly Power Tool breaking tools or cutters?
    • T
      Tonya JohnsonSep 3, 2025
      If your Grizzly Power Tool is breaking tools or cutters, adjust the spindle speed or use a slower feed rate. Use coolant fluid or oil for the appropriate application, following the cutting fluid manufacturer's recommendations for proper use and safety. Decrease the depth of cut. Fully retract the spindle and lower the headstock to increase rigidity.
  • J
    Julie HernandezSep 7, 2025
    What to do if table of Grizzly G0759 is hard to move?
    • A
      Amanda AndersenSep 7, 2025
      If the table of your Grizzly Power Tool is hard to move, first ensure that the table locks are fully released. Clean away any chips that have accumulated on the ways. Check to make sure that all table limit stops are not in the way. Adjust the gibs.

Summary

INTRODUCTION

Manual Accuracy

Details potential discrepancies between manual and machine.

Contact Info

Grizzly Technical Support contacts and feedback channels.

Machine Description

Explains the mill/drill's function in shaping metal and workpieces.

Identification

Electronic Controls Identification

MACHINE DATA SHEET

Product Dimensions

Specifies physical dimensions, weight, and footprint.

Shipping Dimensions

Details carton dimensions and weight.

Electrical

Lists electrical requirements: voltage, current, cord specs.

Motors

Provides motor specifications including horsepower, phase, amps, and speed.

Main Specifications

Operation Info

Covers spindle travel, distances, capacities, and head tilt.

Table Info

Details table dimensions, T-slots, and centers.

Spindle Info

Information on spindle taper, speeds, quill diameter, and bearings.

SECTION 1: SAFETY

Safety Instructions for Machinery

Essential safety guidelines for operating any machinery.

Apparel and Operational Safety

Warnings on attire, dust, hearing, tools, and safe operating practices.

Additional Safety for Mill;Drills

Specific safety advice tailored for mill/drill operations.

SECTION 2: POWER SUPPLY

Availability

Requirements for power supply circuit before machine installation.

Full-Load Current Rating

Explanation of the machine's amperage draw at full power.

Circuit Requirements

Necessary specifications for the 110V power supply circuit.

Grounding & Plug Requirements

Importance of proper grounding and plug usage for electrical safety.

Extension Cords

Guidelines and limitations for using extension cords with the machine.

SECTION 3: SETUP

Setup Essentials

Covers needed items, unpacking, inventory, and cleanup procedures.

Site and Installation Requirements

Details site considerations, machine placement, and mounting.

Assembly

Drill Chuck Arbor

Instructions for installing the drill chuck onto its arbor.

Test Run

To test run machine:

Steps to verify proper machine operation and safety feature functionality.

Spindle Break-In

To perform spindle break-in process:

Procedure to ensure proper lubrication and minimize bearing wear.

SECTION 4: OPERATIONS

Operation Overview

Provides a basic understanding of machine operation and controls.

Machine Controls and Operation

Covers basic controls, spindle speed, height, and table movement.

Tooling Installation and Chuck Operations

Details loading tooling, drill chuck installation, and removal.

Headstock and Table Movement

Instructions for headstock travel and table movement.

SECTION 5: ACCESSORIES

Workholding and Setup Accessories

Covers angled worktables, milling tables, and collet racks.

Tooling and Measurement Accessories

Includes boring sets, end mills, mobile base, T-slot nuts, and indicators.

Tilting and Fixturing Accessories

Describes tilt tables and magnetic bases for precise setups.

SECTION 6: MAINTENANCE

Schedule

Recommended maintenance schedule for daily, monthly, and biannual checks.

Lubrication

Importance and procedure for regular lubrication of machine parts.

Leadscrew Lubrication

Steps for cleaning and lubricating machine leadscrews.

Headstock Gear and Bushing Lubrication

Procedure for lubricating headstock bushing and gear components.

SECTION 7: SERVICE

Troubleshooting

Guide to diagnose and solve common machine problems.

Gibs

Table Gib Adjustment

Steps for adjusting table gibs to eliminate play in the table movement.

Headstock Gib Adjustment

Steps for adjusting headstock gibs for smooth, play-free movement.

Leadscrew Backlash

X-Axis Leadscrew Adjustment

Procedure to adjust the X-axis leadscrew nut for backlash.

Y-Axis Leadscrew Adjustment

Procedure to adjust the Y-axis leadscrew nut for backlash.

Digital Readout Unit Battery Replacement

Battery Replacement Procedure

Steps for replacing the battery in the digital readout unit.

Motor Service

Motor Brush Inspection and Replacement

Procedure for inspecting and replacing motor brushes.

SECTION 8: WIRING

Wiring Safety Instructions

Critical safety guidelines for working with electrical wiring and components.

Wiring Diagram

Reference to the machine's wiring diagram.

SECTION 9: PARTS

Component Breakdowns and Parts Lists

Illustrated breakdowns and parts lists for major machine sections.

WARRANTY AND RETURNS

Warranty Terms

Outlines the 1-year limited warranty for the product.

Warranty Claims

Details the process for making a warranty claim, including return authorization.

Grizzly G0759 Specifications

General IconGeneral
BrandGrizzly
ModelG0759
CategoryPower Tool
LanguageEnglish

Related product manuals