6 OM-SSB-3E/5E/10E & (2)SSB-3E/5E/10E Domestic
DELIMING INSTRUCTIONS:
When using Groen Boilerless Water Filtration System use vinegar as a
deliming agent. Groen approved delimer may be used to remove excessive
scale build-up.
STEP 1 - After following all cleaning steps 1 through 7 listed above, turn
steamer on and allow water to enter steamer cavity.
STEP 2 - Pour 1 cup of vinegar or delimer into steamer cavity and shut
door.
STEP 3 - Set steamer timer to 30 minutes and allow steam cleaning to
occur.
STEP 4 - After 30 minutes cleaning cycle is complete, turn steamer OFF
and allow to cool completely.
STEP 5 - Open steamer door and wipe down the entire steamer cavity to
remove loosened scale particles. Carefully clean float probes if loose scale
is present.
STEP 6 - Replace pan racks and steam lid. Steamer is now cleaned and
ready to use.
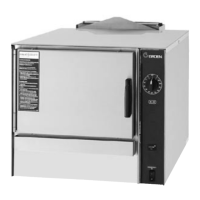
FLOAT PROBE ORIENTATION:
Following is an inside view of steamer cavity with no water present. High
level float probe swings down. Note water probe orientation:
OVERFLOW DRAIN:
1. Turn your unit off and allow it to completely drain. SmartSteam units
will drain automatically when the units are powered off. This is a 5
minute process.
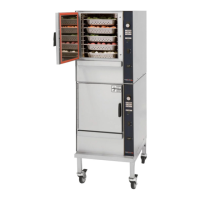
2. Once the reservoir has completely drained (approximately 5 minutes),
stand to the hinged side of the door (Figure 2), slowly open the door
allowing all of the steam to escape from the cavity. Allow the cavity to
completely cool down and confirm that the reservoir has completely
emptied before cleaning the overflow drain.
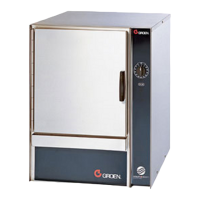
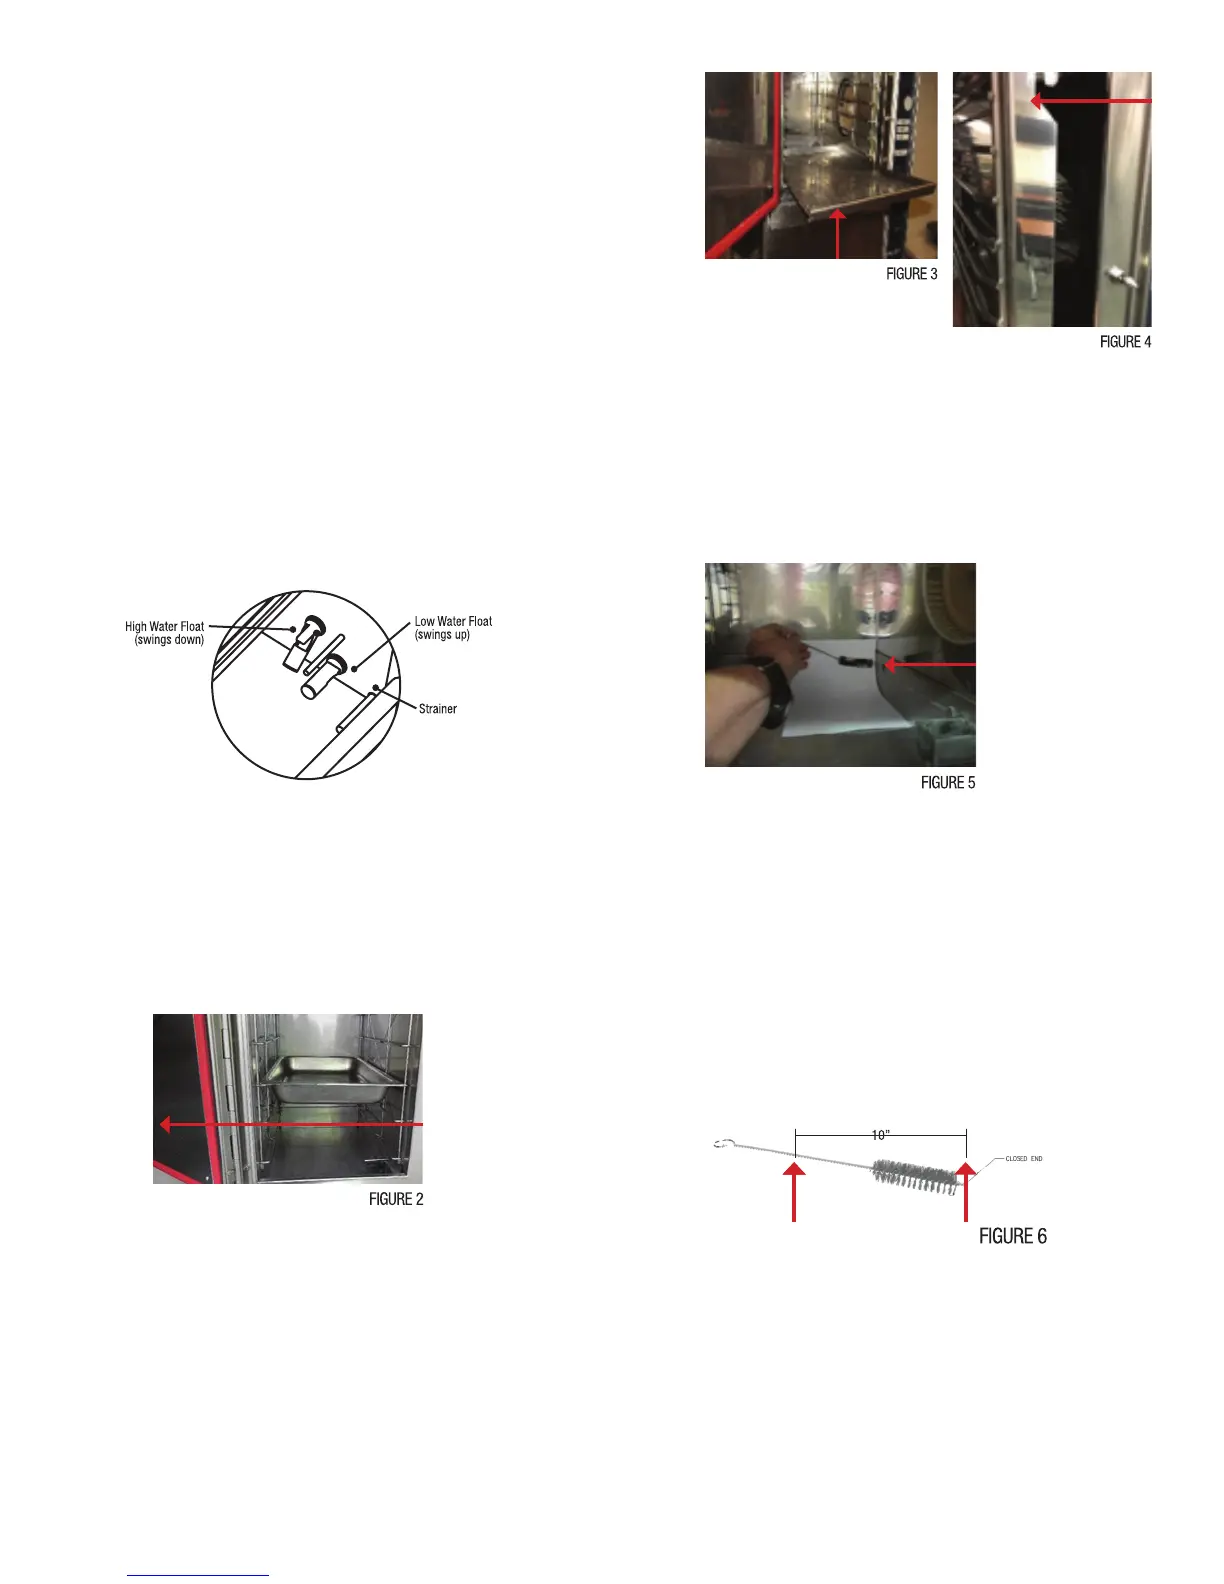
3. Remove the steam lid (Figure 3) and fan cover assembly (Figure 4),
prior to cleaning the overflow drain.
4. Insert the cleaning brush into the overflow drain located at the lower,
back right side of your steamer’s cavity (Figure 5). As the brush is
pushed through the overflow drain, it will bend to follow the shape
of the drain as it travels the length of the overflow drain. Once you
use the cleaning brush for the first time, the wire between the handle
and the bristles will retain a curved shape after the brush is removed
from the overflow drain. The brush is designed to bend/curve in this
fashion. There is no need to straighten the wire between cleanings/
usage.
5. With the cleaning brush, push and pull through the entire lengthy
of the overflow drain several times. The brush should be inserted
at least ten inches (10”) into the overflow drain to pass through
the entire length of the drain piping. Repeat as necessary until the
overflow drain is clean. Ensure that the overflow drain works properly
by squirting water into the overflow drain and confirming that the
water is flowing freely into the drain receptacle and not being blocked
and backing up into the steamer cavity.
If the overflow drain is clogged such that the cleaning brush will not
clear the blockage or if water cannot move through the overflow
drain into the drain receptacle without backing up into the steamer
cavity, then a service call needs to be made and all use of the steamer
must be discontinued until the service agent evaluates the issue and
confirms that the unit is ready for further operation.
6. Clean the cooking cavity per the cleaning instructions in your
operators’ manual.
7. Re-install the steam lid and fan cover assembly.
8. Leave the door open to prolong the life of the door gasket and to allow
the cavity to air out.
9. Clean, dry and store the overflow cleaning brush after each use.
10. If a replacement brush is needed, the part number is 175977.