Model 613-VS2-LES, Log End Slicer Maintenance
R-1176866 613-VS2-LES_CJL20160114.doc:1/15/2016 4:21 PM Grote Company 44
Tensioning the Drive Chain
A jerky product box movement indicates loose chain tension. To adjust the chain, loosen the four
mounting hex nuts holding the motor-reducer unit to the frame. Loosen the jam nut on the chain
tightening bolt and tighten the bolt until the chain is tight. Tighten the jam nut and the four hex nuts.
If there are worn chain links, replace the entire chain. Replace worn sprockets to prevent deformed teeth
from damaging a new chain. Install new chains under slight tension as they elongate a small amount due
to seating of pins and bushings during the first few days of operation.
Lubricating the Drive Chain
Lubricate chain manually with a brush or spout can. Use a good grade of medium weight non-detergent
petroleum base oil. Do not use heavy oil or grease; it is generally too stiff to enter and fill chain joints.
Lubricating the Gear Reducer
Maintain gear reducer oil at the proper level. Remove the oil level plug located on the front of the gear
box to see if the oil is level with the hole. To add oil, remove the plug at the top of the gear box and pour
oil through the hole until the level reaches the oil level hole. Recommended oil is AGMA 7 rated Mobil
SHC 634 H2 Food Grade synthetic lubricant for ambient temperatures of 10
o
to +105
o
F. Oil capacity is
22 ounces. Recommended change interval is 6 months or 2500 hours, whichever comes first.
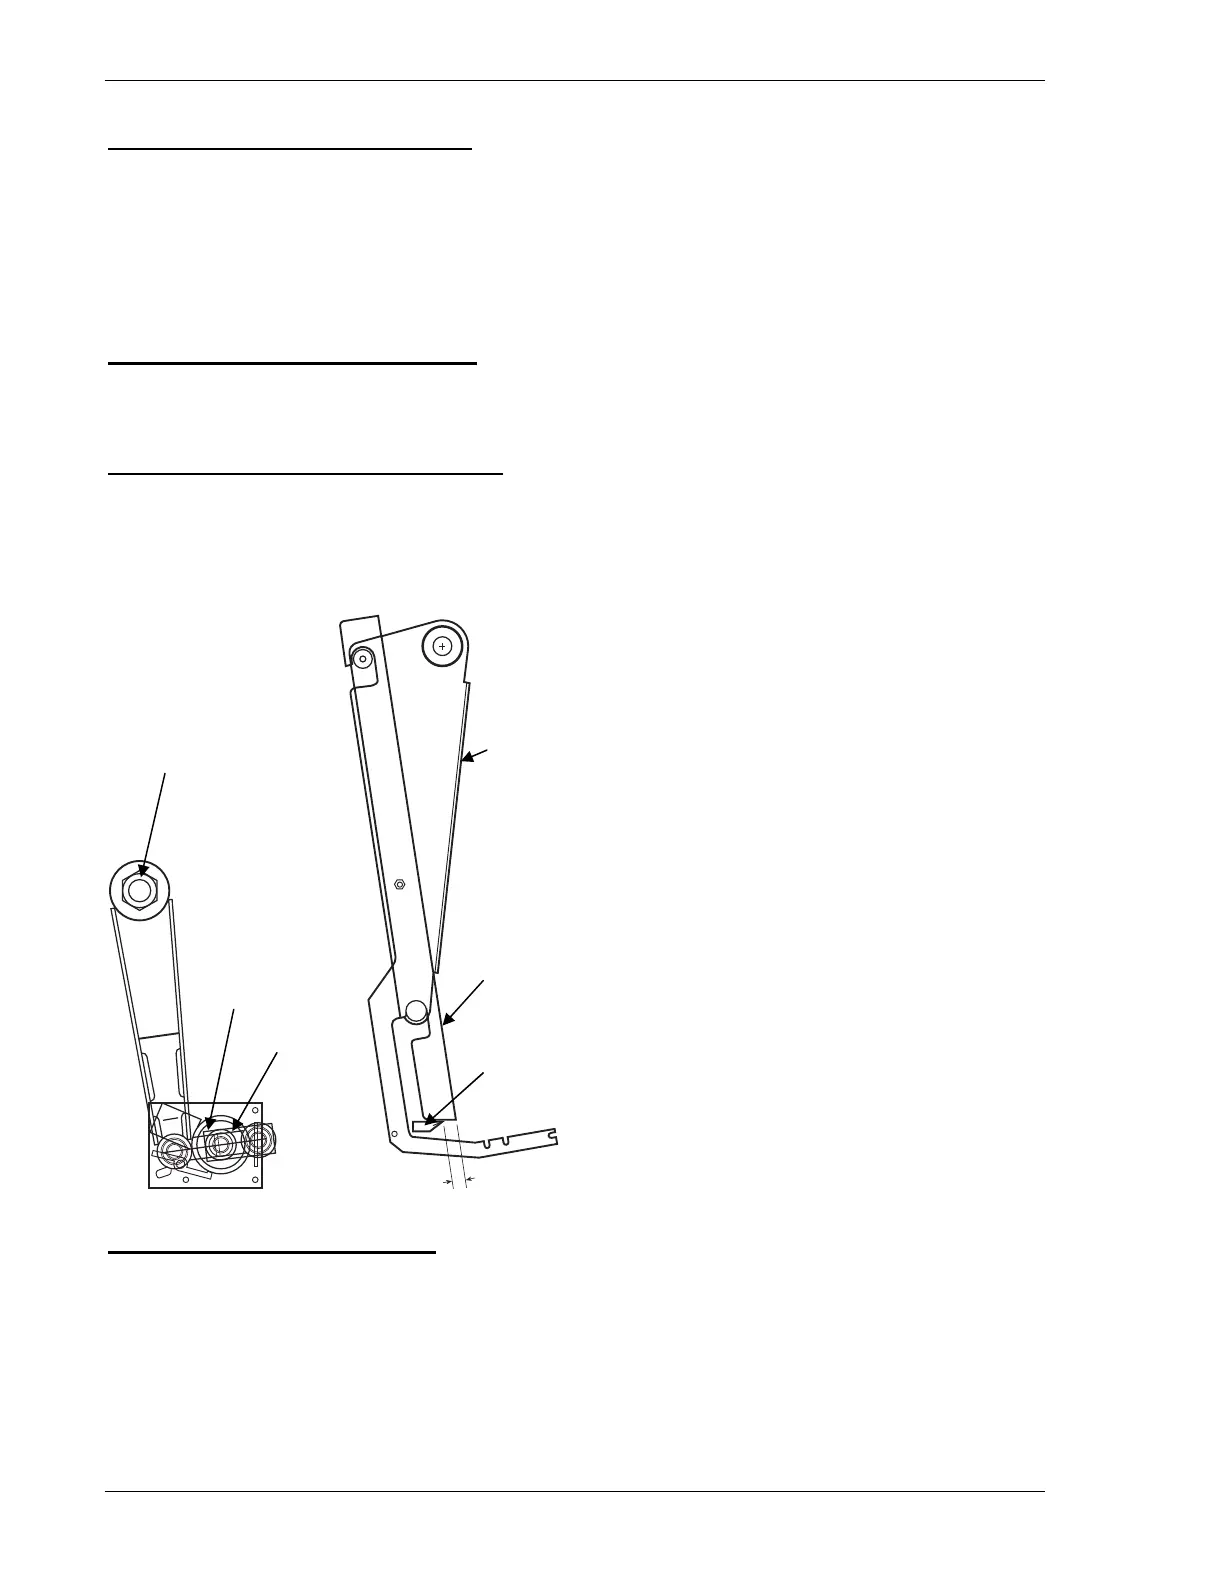
Figure 37. Moment Arm Adjustment
Moment Arm Adjustment
The moment arm is fastened to the product holder drive shaft with an Adjustable Keyless Bushing. Use
the procedure below to reposition the product holder box:
1. Install back section of Product Holder.
2. Loosen the Adjustable Keyless Bushing. Refer to section below.
3. Verify the Crank is in the home position by adjusting the Clutch so the Crank aligns with the Drive
Link when in the stopped position.
djustable
Keyless
Bushing
Product
Holder
Frame
Drive
Link
Crank
.63 in. (16
Blade
Guide
Product
Holder
Back
 Loading...