English (GB)
30
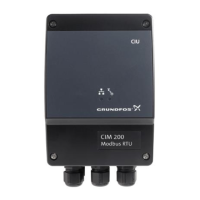
11.4 Hardware setup (CIU 250 GSM call-up)
11.5 Hardware setup (CIM 250 GPRS connection)
11.6 Hardware setup (CIU 250 GPRS connection)
Step Action
1
Connect the GENIbus cable from the CIU 250 to the Grundfos product. See fig. 5 in the "CIU, Communication Interface
Unit installation and operating instructions".
2 Fit a GSM antenna to the CIM module SMA connector. See section 6.1.1 Fitting a GSM antenna.
3 Insert the SIM card in the CIM 250. See section 6.1.2 Inserting the SIM card.
4 Connect the mains cable to the CIU 250 (see the CIU quick guide instruction) and power on the CIU 250.
5 Power on the Grundfos product
6 Observe that LED2 turns steady green (see section 6.2 Status LEDs), indicating that the GENIbus connection is working.
7
Observe that LED1 blinks yellow and changes to yellow pulsing after approximately 30 s (see section 6.2 Status LEDs),
indicating that the GSM connection is working.
By making a call-up from a phone the connection can be verified (LED1 turns steady yellow).
8
For configuring the CIU 250 for a call-up connection, follow the instructions in the "CIM 25X SMS commands installation
and operating instructions" (included on CIM/CIU support files CD), section 2.1-3.
9 To verify the GSM settings after completion, the SMS command GSMSETTINGS can be used.
The CIU 250 is now ready to be accessed from a Modbus RTU master via GSM call-up (or via SMS commands).
Step Action
1 Install the CIM 250 in the Grundfos product according to the product documentation.
2 Fit a GSM antenna to the CIM module SMA connector. See section 6.1.1 Fitting a GSM antenna.
3 Insert the SIM card in the CIM 250. See section 6.1.2 Inserting the SIM card.
4 Power on the Grundfos product
5 Observe that LED2 turns steady green. See section 6.2 Status LEDs.
6
Observe that LED1 blinks yellow and changes to yellow pulsing after approximately 30 s (see section 6.2 Status LEDs),
indicating that the GSM connection is working.
7
For configuring the CIM 250 for a GPRS connection, follow the instructions in the "CIM 25X SMS commands installation
and operating instructions" (included on CIM/CIU support files CD), sections 2.1, 2.2 and 2.4.
8
To verify the GPRS setting after completion, the SMS command GPRSSETTING can be used.
To verify that the GPRS connection is working, the SMS command GPRSSTATUS can be used. The connection state
should be "Context active" if ready and "Connected" if a Modbus TCP master is already communicating.
The CIM 250 is now ready to be accessed from a Modbus TCP master via GPRS (or via SMS commands).
Step Action
1 Connect the GENIbus cable from the CIU 250 to the Grundfos product. See the CIU quick guide instruction.
2 Fit a GSM antenna to the CIM module SMA connector. See section 6.1.1 Fitting a GSM antenna.
3 Insert the SIM card in the CIM 250. See section 6.1.2 Inserting the SIM card.
4 Connect the mains cable to the CIU 250 (see the CIU quick-guide instruction), and power on the CIU 250.
5 Power on the Grundfos product.
6 Observe that LED2 turns steady green (see section 6.2 Status LEDs), indicating that the GENIbus connection is working.
7
Observe that LED1 blinks yellow and changes to yellow pulsing after approximately 30 s (see section 6.2 Status LEDs),
indicating that the GSM connection is working.
8
For configuring the CIM 250 for a GPRS connection, follow the instructions in the "CIM 25X SMS commands installation
and operating instructions" (included on CIM/CIU support files CD), sections 2.1, 2.2 and 2.4.
The CIU 250 is now ready to be accessed from a Modbus TCP master via GPRS (or via SMS commands).
 Loading...