21
14. Startup for Cool-Top®
Do not start the pump until it has been filled with liquid and vented.
Warning
Pay attention to the direction of the vent hole and take care to ensure that the escaping liquid does not cause injury
to persons or damage to the motor or other components. In hot-liquid installations, special attention should be
paid to the risk of injury caused by scalding hot liquid. It is recommended to connect a drain pipe to the 1/2" air
vent in order to lead the hot water/steam to a safe place.
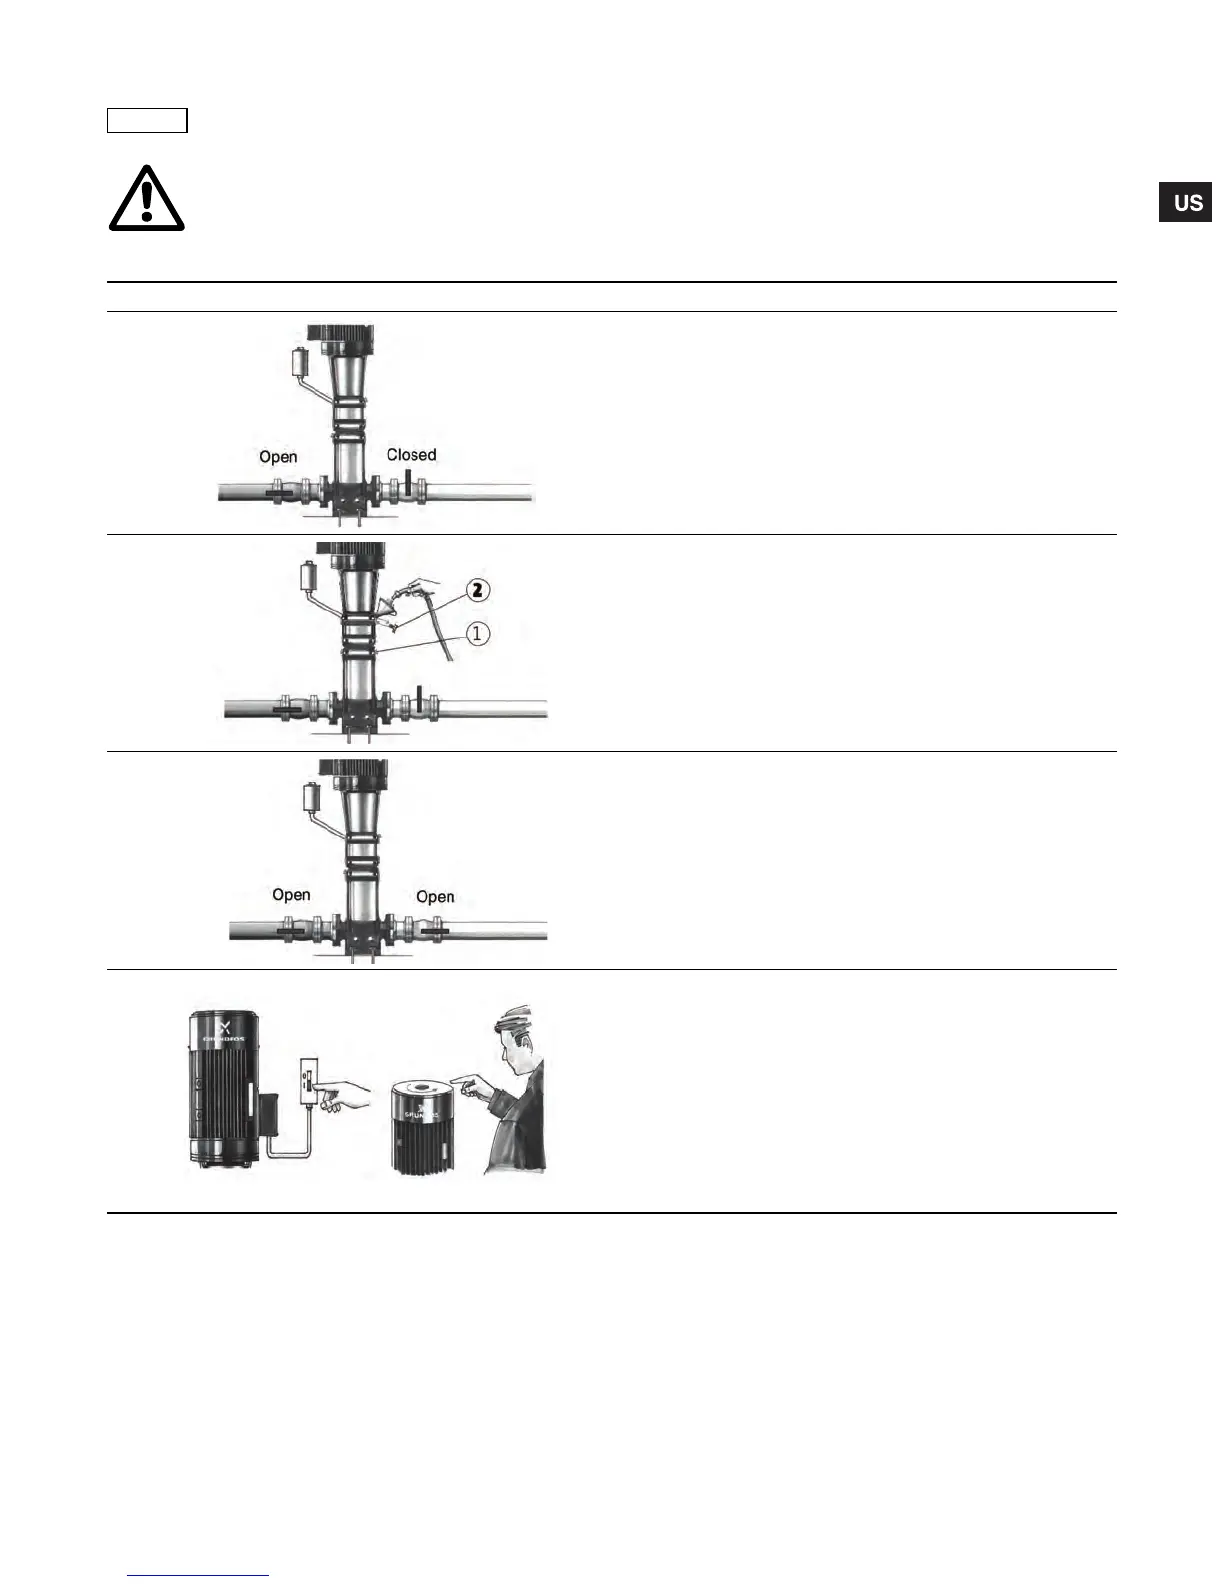
Step Action
1
TM02 4151 5001
Note: The air-cooled top should only be started up with cold
liquid. Close the isolation valve on the discharge side and open
the isolation valve on the suction side of the pump.
2
TM02 4153 1503
Remove the priming plug from the air-cooled chamber (2) and
slowly fill the chamber with liquid.
When the chamber is completely filled with liquid, replace the
priming plug and tighten securely.
3
TM02 5907 4002
Open the isolation valve on the discharge side of the pump.
Valve may have to be partially closed when pump is started if
no back pressure is present (i.e. boiler not up to pressure).
4
TM01 41406 3702
TM01 1405 4497
Start the pump and check the direction of rotation.
See the correct rotation of the pump on the motor fan cover.
If the direction of rotation is wrong, interchange any two of the
incoming supply wires.
After 3 to 5 minutes, the air vent has been filled with liquid.
Note: During startup of a cold pump with hot liquid, it is normal
that a few drops of liquid are leaking from the sleeve.
Grundfos.bk Page 21 Wednesday, March 18, 2009 10:38 AM

 Loading...