17
9.4 Motor lubrication schedule
(for motors with grease nipples)
New motors that have been stored for a year or more should be
regreased according to the following:
9.5 Lubrication Procedure
1. Clean all grease fittings. If the motor does not have grease
fittings, the bearing is sealed and cannot be greased
externally.
2. If the motor is equipped with a grease outlet plug, remove it.
This will allow the old grease to be displaced by the new
grease. If the motor is stopped, add the recommended amount
of grease. If the motor is to be greased while running, a
slightly greater quantity of grease will have to be added.
Note: If new grease does not appear at the shaft hole or
grease outlet plug, the outlet passage may be blocked. At the
next service interval the bearings must be repacked.
3. Add grease SLOWLY taking approximately one minute until
new grease appears at the shaft hole in the endplate or grease
outlet plug. Never add more than 1-1/2 times the amount of
grease shown in the lubrication schedule.
4. For motors equipped with a grease outlet plug, let the motor
run for 20 minutes before replacing the plug.
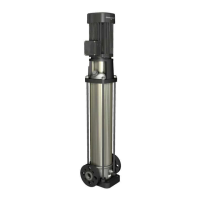
10. Replacing the motor
If the motor is damaged due to bearing failure, burning or
electrical failure, the following instructions detail how to remove
the motor for replacement.
10.1 Disassembly
For disassembly, proceed as follows:
1. Turn off and lock out power supply. The power supply wiring
can now be safely disconnected from the motor wires.
Remove the coupling guards. Note: CR 1s, 1, 3, 5, 10, 15, and
20: do not loosen the three shaft seal securing allen screws.
2. Using the proper metric Allen wrench, loosen the four cap
screws in the coupling. Completely remove coupling halves.
On CR1s-CR20, the shaft pin can be left in the pump shaft.
CR(N)32, 45, 64, 90, 120, and 150 do not have a shaft pin.
3. With the correct size wrench, loosen and remove the four bolts
which hold the motor to the pump end.
4. Lift the motor straight up until the shaft has cleared the motor
stool.
10.2 Assembly
For assembly, proceed as follows:
1. Remove key from motor shaft, if present, and discard.
2. Thoroughly clean the surfaces of the motor and pump end
mounting flange. The motor and shaft must be clean of all oil/
grease and other contaminants where the coupling attaches.
Set the motor on the pump end.
3. Place the terminal box in the desired position by rotating the
motor.
4. Insert the mounting bolts, then diagonally and evenly tighten:
– for 3/8” bolts (1/2 to 2 hp), torque to 17 ft-lb
– for 1/2” bolts (3 to 40 hp) torque to 30 ft-lb
– for 5/8” bolts (50 - 100 hp) torque to 59 ft-lb
– follow instructions for particular pump model in sections
10.2.1 Torque specifications for CR 1s, 1, 3, and 5 through
10.2.4 CR(N) 32, 45, 64, 90, 120, and 150.
NEMA (IEC)
Frame Size
Standard Service
Interval
Severe
Service Interval
Extreme
Service Interval
Weight of grease
to add
[oz (grams)]
Volume of grease
to add
[in
3
(teaspoons)]
Up through 210
(132)
5500 hrs 2750 hrs 550 hrs 0.30 (8.4) 0.6 (2)
Over 210 through 280
(180)
3600 hrs 1800 hrs 360 hrs 0.61 (17.4)* 1.2 (3.9)
Over 280 up through 360
(225)
2200 hrs 1100 hrs 220 hrs 0.81 (23.1)* 1.5 (5.2)
Over 360
(225)
2200 hrs 1100 hrs 220 hrs 2.12 (60.0)* 4.1 (13.4)
Warning
The grease outlet plug MUST be removed before adding new grease.
To avoid damage to motor bearings, grease must
be kept free of dirt. For an extremely dirty
environment, contact Grundfos, the motor
manufacturer, or an authorized service center for
additional information.
Mixing dissimilar grease is not recommended.
It must be emphasized that motors used on CR
pumps are specifically selected to our rigid
specifications. Replacement motors must be of
the same frame size, should be equipped with
the same or better bearings and have the same
service factor. Failure to follow these
recommendations may result in premature motor
failure.
Grundfos.bk Page 17 Wednesday, March 18, 2009 10:38 AM

 Loading...