17. Switch on the main switch.
18. Put the system back into the operating state that was set
before you started your work.
9.6 Checking and cleaning the dry-material feeder
1. Put on the stipulated personal protective equipment. Observe
the chemical manufacturer's safety data sheets (SDS) and
safety instructions of the used chemicals.
2. If possible, run the system without refilling the storage hopper
of the dry-material feeder until the storage hopper is empty.
3. Switch off the main switch on the control cabinet.
a. Make sure the main switch cannot be switched on
accidentally.
4. Close the shut-off valve upstream the pressure reducing valve.
5. If present, remove the cover from the top of the storage hopper.
6. Unscrew and remove the safety guard from the top of the
storage hopper.
a. If the storage hopper is not yet empty, empty it.
7. Visually inspect the dry-material feeder.
a. Check that the storage hopper and the level sensor are free
from deposits.
b. Check that the dosing screw is free from deposits.
c.
CAUTION
Hot surface
Minor or moderate personal injury
‐ After switching off the main switch wait at
least 15 minutes before touching the
heated dosing pipe.
Check that the heated dosing pipe is free from deposits.
Cleaning procedure
8. Clean the storage hopper, the dosing pipe and the dosing
screw with a soft brush.
9. Dry all surfaces with a clean cloth.
Final steps
10. Install the safety guard at the top of the storage hopper.
11. Open the shut-off valve.
12. Switch on the main switch again.
13. Fill the storage hopper with dry material.
14. If present, put the cover back on the storage hopper.
15. Put the system back into the operating state that was set
before you started your work.
9.7 Cleaning or replacing the solenoid valve
1. Switch off the main switch on the control cabinet.
a. Make sure the main switch cannot be switched on
accidentally.
2. Put on the stipulated personal protective equipment.
3. Close the shut-off valve upstream the pressure reducing valve.
Cleaning procedure (cleaning can help if the valve does not
close):
4. Unscrew the 4 screws at the top part of the solenoid valve.
5. Remove the top part and the spring.
6. Remove and clean the diaphragm.
7. Reassemble in reverse order.
Replacing procedure
8. Carefully unscrew the water connections at the solenoid valve.
9. Unscrew the safety screw of the electrical plug connection.
10. Remove the electrical plug.
11. Place the new solenoid valve in the water line.
a. Observe the arrow on the housing that indicates the correct
flow direction.
b. Make sure the technical data of the new component matches
the requirements.
c. Before tightening the water connections, check that the
gaskets are in place.
12. Tighten the water connections.
13. Plug in the electrical plug and screw in the safety screw.
Final steps
14. Open the shut-off valve
15. Make sure the component does not leak.
16. Switch on the main switch.
17. Put the system back into the operating state that was set
before you started your work.
10. Spare parts
In order to get correct spare parts, contact Grundfos and provide
the product number and the order data written on the nameplate of
your system.
Some of the spare parts mentioned below must only be
replaced by certified service persons. If the replacement is
not described in this manual, contact Grundfos service.
Spare parts for the dry-material feeder
• Dosing screw
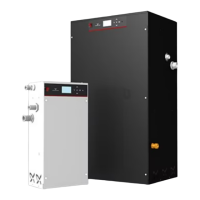
• Gear motor
• Vibrator
• Level sensor
• Heating band for dosing pipe
Spare parts for the control cabinet
• Touch panel
• PLC
Spare parts for the liquid-concentrate pump and line
• Shaft seal
• Rotor
• Stator
• Flow sensor
Spare parts for the water line
• Solenoid valve
• Pressure reducing valve
• Strainer for pressure reducing valve
• Transparent strainer cover for pressure reducing valve
• Flow sensor
Spare parts for the tank
• Stirrer for the mixing chamber 1
• Stirrer for the maturing chamber 2 or storage chamber 3
• Ultrasonic level sensor
Related information
4.2.1 Nameplate of Polydos 412E
11. Decommissioning
Decommissioning for up to 5 hours
1. Stop the system.
Push this symbol to stop automatic mode.
The symbol background switches to white.
Decommissioning for 5 to 24 hours
2. Stop the system.
3. Switch off the main switch.
45
English (GB)