First
some
technica!
features
Your
set is designed for recording and playback on two tracks. When
recording on track 1, the tape is running in a clockwise direction
beginning
with
the green leader tape. At the end of this tape track the
réels are reversed and track 2 is recorded to the other tape half, but
the tape runs in a counterclockwise direction beginning
with
the red
leader
tape.
Thus,
the tape is fully recorded. Playback is made in the
same
séquence.
Recording
from radio
First
cortnect radio set and tape recorder by leading connection cable
No. 237 which
serves
for recording as well as for playback
from
radio
socket
TTof
the tape recorder to tape recorder socked of the radio set.
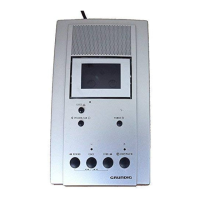
The
micro key @ is
released.
After radio set and tape recorder have been switched on, fune-in the
desired
station at your radio and set it to its best playback quality.
Volume and tone controls can be set at your will because they
don't
affect the recording. For the first recording lock
button
®. When
turning
now the level control © backward you will note that the green
light
halves of the magie level indicator © start moving in accordance
with
the music or the
speech.
Turn the recording level control ©
until
the green
light
halves
flutter
freely but never stay in close proximity or
overlap.
At the highest level they may just touch. Depress start key ©
while depressing recording
button
®. The tape starts running and ail
signais
coming
from
the radio are recorded on the tape. At the end
of the recording depress stop key © which
releases
recording
button
®
and start key ©.
D'abord un peu de technique
Voire enregistreur a été conçu pour l'enregistrement et la reproduction
suivant
la technique «double-piste». Pour enregistrer entièrement la ban-
de,
procédez comme suit:
Durant l'enregistrement de la piste 1, la bande défile de gauche à
droite
en
passant devant les têtes, en commençant par la bande amorce verte.
A
la fin du défilement de la bande, on placera la bobine remplie sur le
support-bobine de gauche et celle vide sur celui de droite. On enregistre
alors
la piste 2, en commençant, cette fois-ci, par la bande amorce
rouge. La bande est ainsi entièrement enregistrée. La reproduction se
fera
dans le même ordre que l'enregistrement.
Enregistrement
de programmes radiophoniques
Premièrement, reliez par un câble 237 la prise Radio TT de l'enregistreur
à la prise «Magnétophone» de l'appareil radio. Ainsi se trouve réalisée
la
liaision pour l'enregistrement et la reproduction.
La
touche «Micro» © est en position de repos (remontée).
Après avoir mis en marche l'enregistreur et l'appareil radio, réglez celui-
ci
avec
le maximum de qualité sur le programme désiré. Vous pouvez
indépendamment régler la puissance et la tonalité selon votre goût.
Pour
enregistrer, enfoncez d'abord la touche «Enregistrement» ® et
tenez-la
dans cette position. Si vous tournez maintenant la molette de
réglage de niveau © en arrière, vous remarquerez que les secteurs
lumineux du «Ruban magique» © bougent au rythme de la parole ou
de la musique. Le niveau correct est atteint lorsque, dans les «Fortes»,
les
secteurs lumineux se rejoignent à peine (le terme technique est:
«enregistrement à modulation maxima»).
Dès que vous enfoncez la touche «Marche» (Start) ©
tout
en appuyant
sur
a touche «Enregistrement» ® la bande démarre et commence à en-
registrer le programme radiophonique. La touche «Enregistrement» ®
reste
alors enfoncée. A la fin de l'enregistrement, vous appuyez sur la
touche «Arrêt» ®. Ainsi vous libérez les touches «Enregistrement» ® et
«Marche» (Start) ©.