7
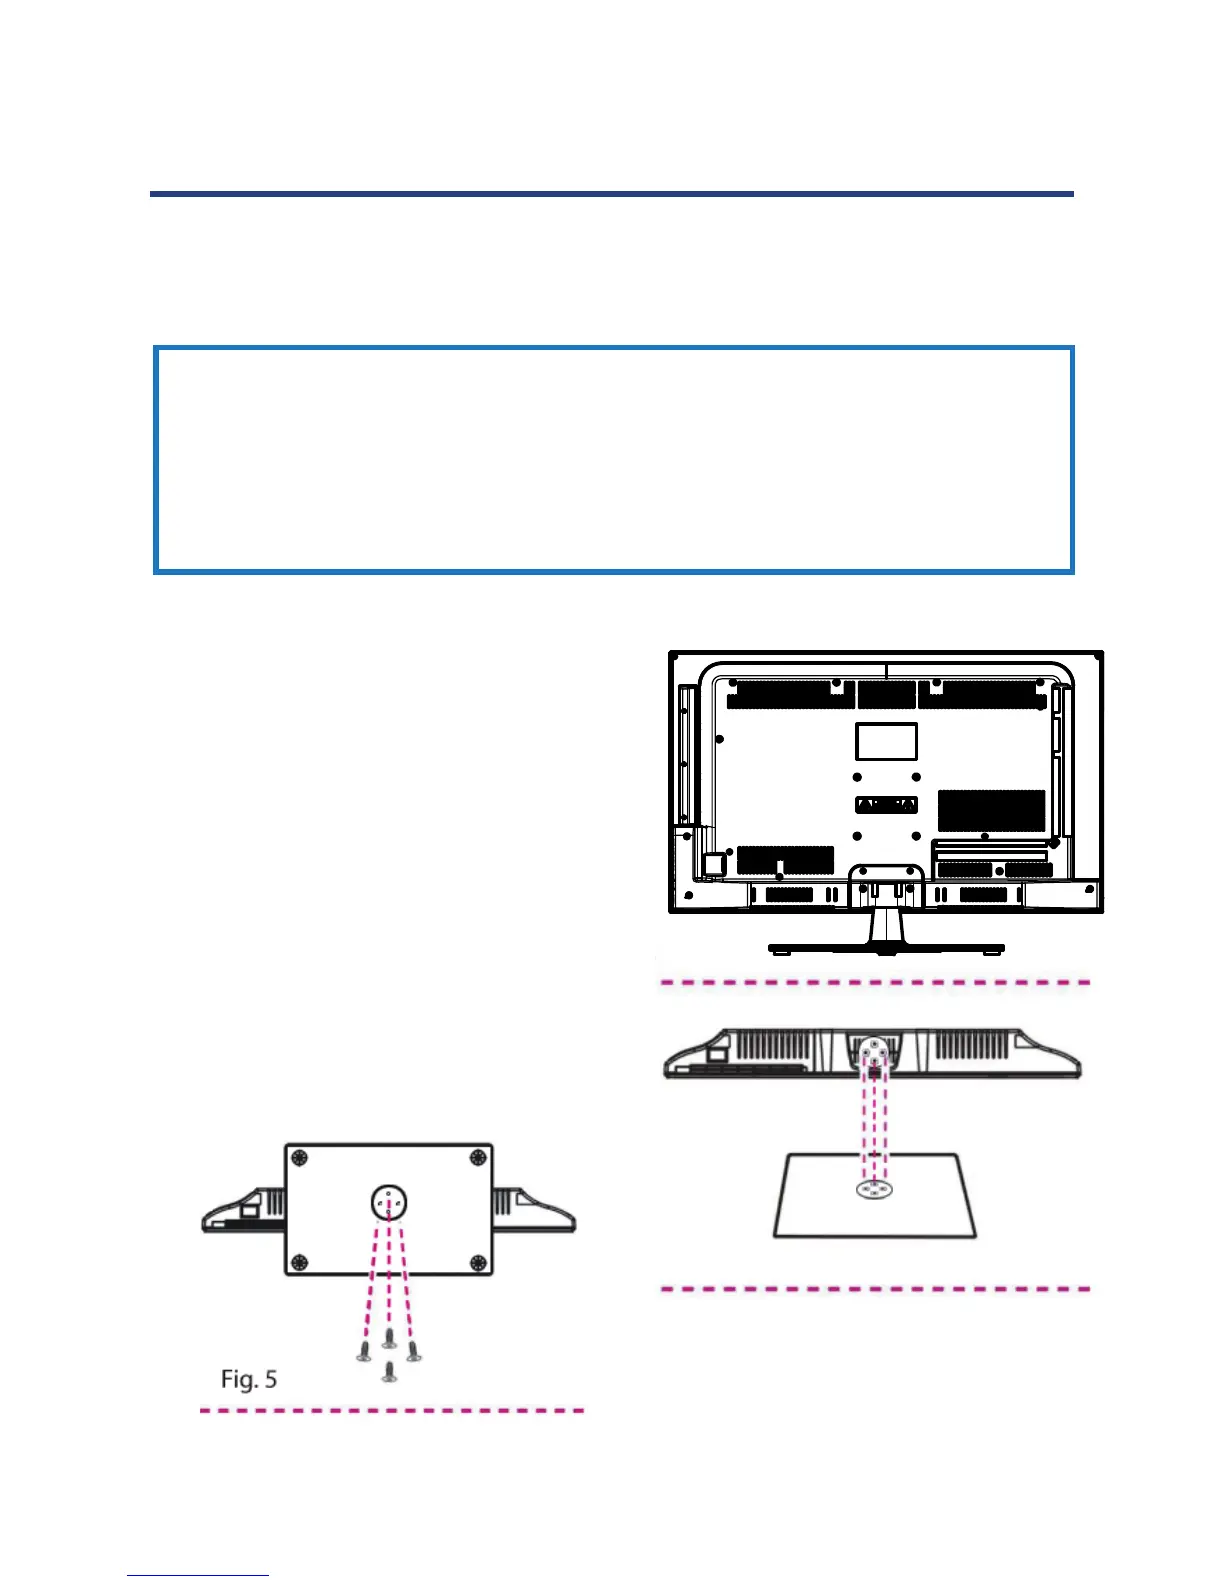
Attaching the stand
Step 1: Place a soft cushioned material on top of
a at surface to prevent damaging the
screen panel. Then place the TV monitor
at on top, with the screen side facing
down, as illustrated in Fig. 3, right.
Step 2: Align the stand with the neck of the TV, as
illustrated in Fig. 4, right.
Step 3: Tighten the screws (supplied) with a
screwdriver to ax the stand to the panel,
as illustrated in Fig. 5, below.
Fig. 3
Fig. 4
IMPORTANT!
• Make sure the TV set is unplugged from the power supply before
installing or removing the stand.
• The TV panel may be awkward to install on your own. We recommend
you ask someone to help with installation and/or removal of the stand.
Your TV is packaged with the stand and the cabinet separated. Before using the TV, install
the stand as described below, or if you want to mount it to a wall, see page 6 for mounting
advice; the wall mount itself is not supplied.
7
Attaching the stand
Step 1: Place a soft cushioned material on top of
a at surface to prevent damaging the
screen panel. Then place the TV monitor
at on top, with the screen side facing
down, as illustrated in Fig. 3, right.
Step 2: Align the stand with the neck of the TV, as
illustrated in Fig. 4, right.
Step 3: Tighten the screws (supplied) with a
screwdriver to ax the stand to the panel,
as illustrated in Fig. 5, below.
IMPORTANT!
• Make sure the TV set is unplugged from the power supply before
installing or removing the stand.
• The TV panel may be awkward to install on your own. We recommend
you ask someone to help with installation and/or removal of the stand.
Your TV is packaged with the stand and the cabinet separated. Before using the TV, install
the stand as described below, or if you want to mount it to a wall, see page 6 for mounting
advice; the wall mount itself is not supplied.
Fig. 5
Installation
Attaching the stand
Step 1: Place a soft cushioned material on top of
a at surface to prevent damaging the
screen panel. Then place the TV monitor
at on top, with the screen side facing
down, as illustrated in Fig. 3, right.
Step 2: Align the stand with the neck of the TV, as
illustrated in Fig. 4, right.
Step 3: Tighten the screws (supplied) with a
screwdriver to ax the stand to the panel,
as illustrated in Fig. 5, below.
IMPORTANT!
• Make sure the TV set is unplugged from the power supply before
installing or removing the stand.
• The TV panel may be awkward to install on your own. We recommend
you ask someone to help with installation and/or removal of the stand.
Your TV is packaged with the stand and the cabinet separated. Before using the TV, install
the stand as described below, or if you want to mount it to a wall, see page 8 for mounting
advice; the wall mount itself is not supplied.
Installation