4. Clean the vial with a no-lint cloth to remove contamination.
Keep contamination off the glass. Refer to Prevent vial contamination on page 18.
5. Dry the external surfaces of the vial with a no-lint cloth. Make sure to dry the bottom of the vial.
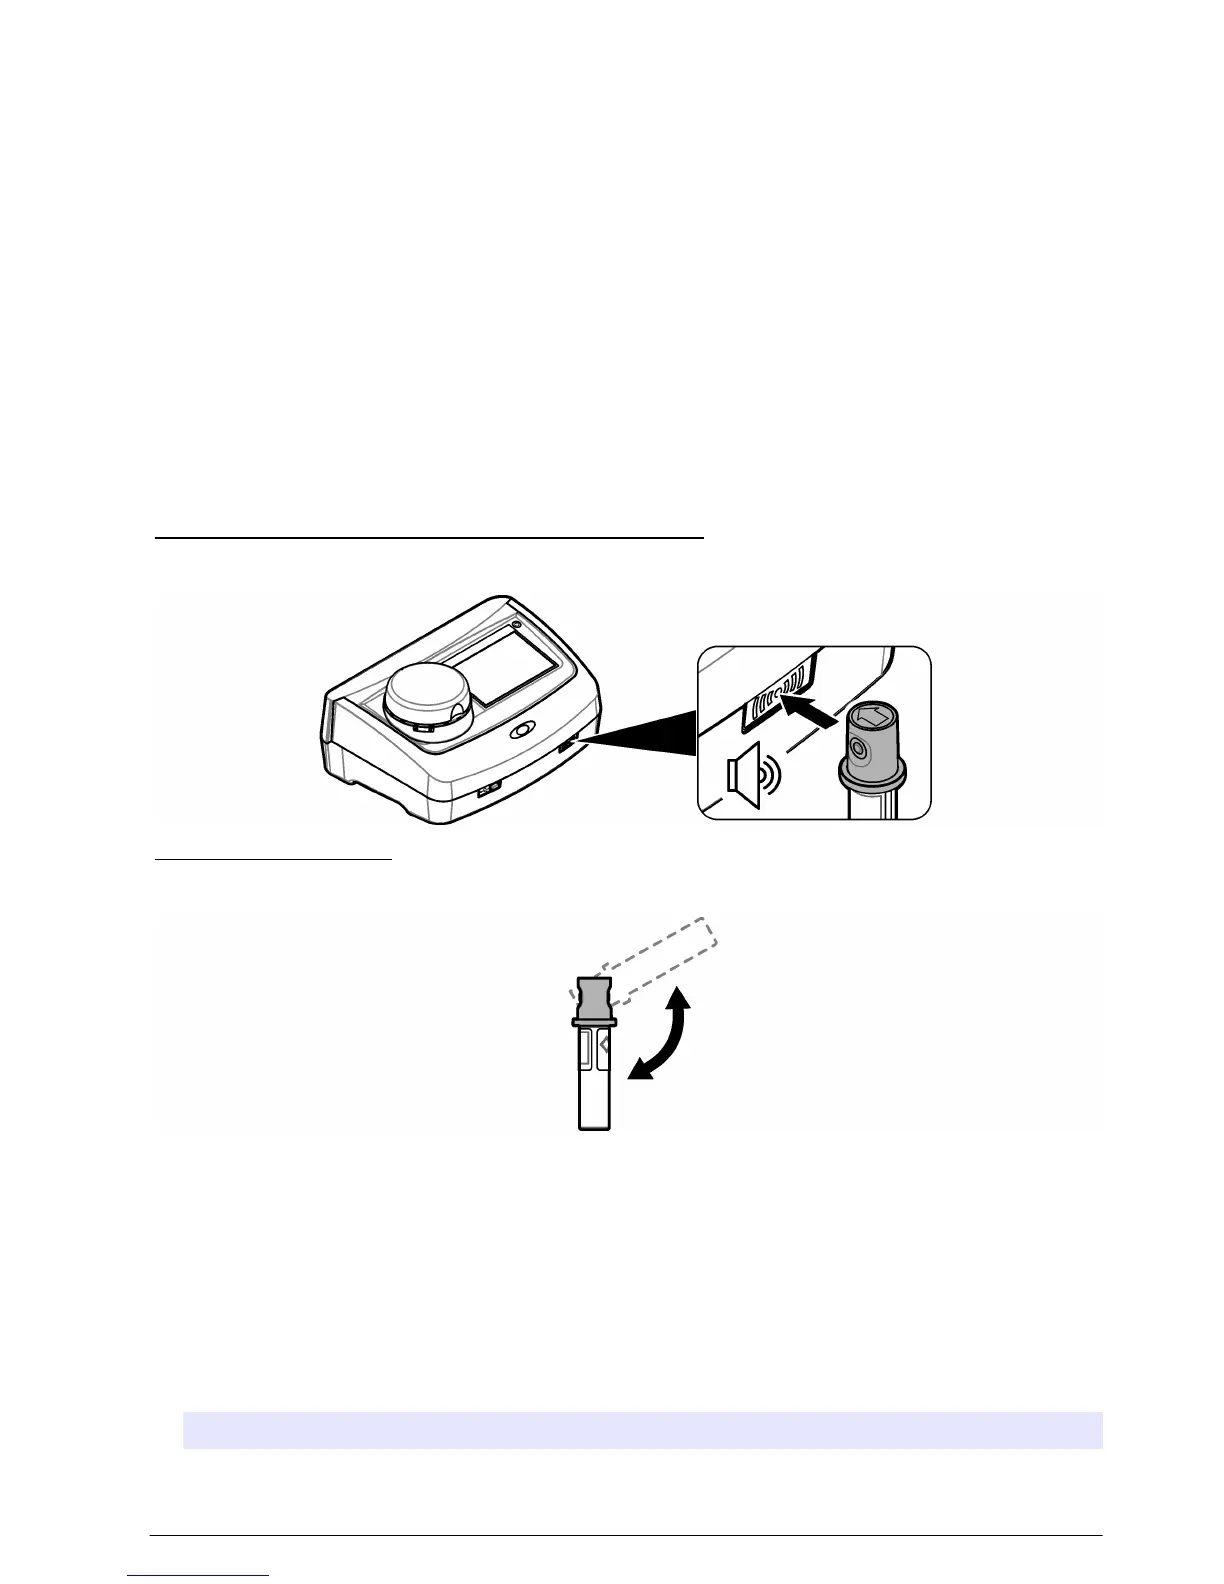
6. Carefully invert at least three times. Refer to Figure 6.
Note: For StablCal vials, refer to the documentation supplied with the StablCal vial to prepare the vials for use.
7. Put the vial in the vial compartment.
8. Push Start.
9. Confirm the value shown or enter the exact turbidity value of the standard. Push Read.
10. When the measurement is complete, remove the vial.
11. Do steps 2 to 10 again until all the standard values that show on the display are measured.
12. Push Store to complete the calibration and record the results to the calibration log.
13. To show the calibration log, push Options>Calibration Log. Refer to Show the recorded data
on page 24 for more options.
14. To send the calibration data to external devices that are connected to the instrument, push
Options> Send Data. Refer to Show the recorded data on page 24 for more options.
Figure 5 Put the RFID vial in front of the RFID module
Figure 6 Invert the vial
Verification
Configure the verification settings
Select the acceptance range and measurement units for calibration verification and more.
1. Push Verification.
2. Push Options>Verification Setup.
3. Select an option.
Option Description
Standard Value Measures the verification standard. The results are recorded to the instrument. For the
best results, measure the verification standard immediately after calibration.
English 27

 Loading...