• Glass sample bottle with a sample RFID sticker
• Operator RFID tag (optional)
1. At the process instrument, put the operator RFID tag (if available) near the RFID module.
2. Put a sample RFID sticker on the sample bottle.
3. Collect a grab sample. Refer to Collect a grab sample on page 21.
4. At the process instrument, put the RFID sticker that is on the sample bottle near the RFID
module.
The instrument gives a sound signal. The status indicator light changes to blue.
The turbidity reading, operator ID (if available), location of the process instrument and the date
and time are recorded on the RFID sticker.
5. Move the grab sample bottle to the laboratory instrument.
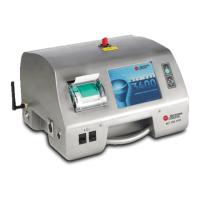
6. On the TU5200, push Options>Reading Setup.
7. Push Bubble Reject, then set bubble reject to on.
8. If the grab sample is 1 NTU or less, push Reading>Minimum Mode, then select 60 seconds.
Note: In minimum mode, readings are done continuously for 60 seconds when a measurement is done. The
smallest reading within 60 seconds is saved to the data log.
9. At the laboratory instrument, put the operator RFID tag (if available) near the RFID module to log
in. Refer to Figure 1 on page 8 for the location of the RFID module.
10. Put the RFID sticker that is on the sample bottle near the RFID module.
The instrument gives a sound signal. The turbidity reading from the process instrument shows on
the display.
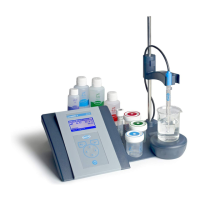
11. Prepare a grab sample vial. Refer to Prepare a sample vial on page 19.
12. Measure the turbidity of the grab sample with the laboratory instrument. Refer to the
TU5200 documentation.
If the difference between the process and laboratory measurements is not more than the selected
acceptance range, "Measurement values match." shows on the display. Refer to Set the
acceptance range on page 15 to select the acceptance range.
If "Measurement values do not match." shows on the display, click the link to show the
troubleshooting steps.
13. To show the compare log, push Options>Compare Log. Refer to the TU5200 documentation for
more options.
14. To send the verification data to external devices that are connected to the instrument, push
Options>Send Data. Refer to the TU5200 documentation for more options.
Compare measurements with Link2SC
When the process instrument and laboratory instrument do not have the optional RFID module,
compare the process and laboratory measurements with Link2SC.
Items to collect:
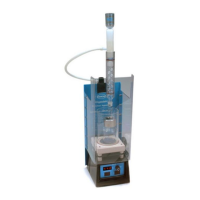
• TU5300 sc or TU5400 sc
• TU5200
• TU5200 sample vials
• SD card
5
(or a LAN connection at the SC controller
6
and the laboratory instrument
7
)
• USB adapter for the SD card (if used)
5
Refer to the SC controller documentation for the SD card requirements.
6
Refer to the SC controller documentation to set up a LAN connection at the SC controller.
7
Refer to the TU5200 documentation to set up a LAN connection at the laboratory instrument.
22 English