6
ONYX Electrostatic Discharge Simulator
4 Initial Operation
Persons with heart pacemakers must not be in the vicinity when the system is operating!
4.1 Visual Checks
During transport ONYX may be subjected to excessive shocks and vibrations, even though every care is taken by
Haefely Test AG to provide suitable packaging. Before operating the unit, check for signs of mechanical damage.
Damaged packing cases may by a sign of transport damage. Damage caused in transit must be reported to the
shipping agent immediately.
If damage to ONYX or its charging unit can be seen or is suspected, do not apply any voltage!
4.2 Installation
This equipment should only be operated in a Faraday cage or other suitable environment!
4.2.1 Connecting the ONYX
Before powering, fully charge battery using the supplied battery charger.
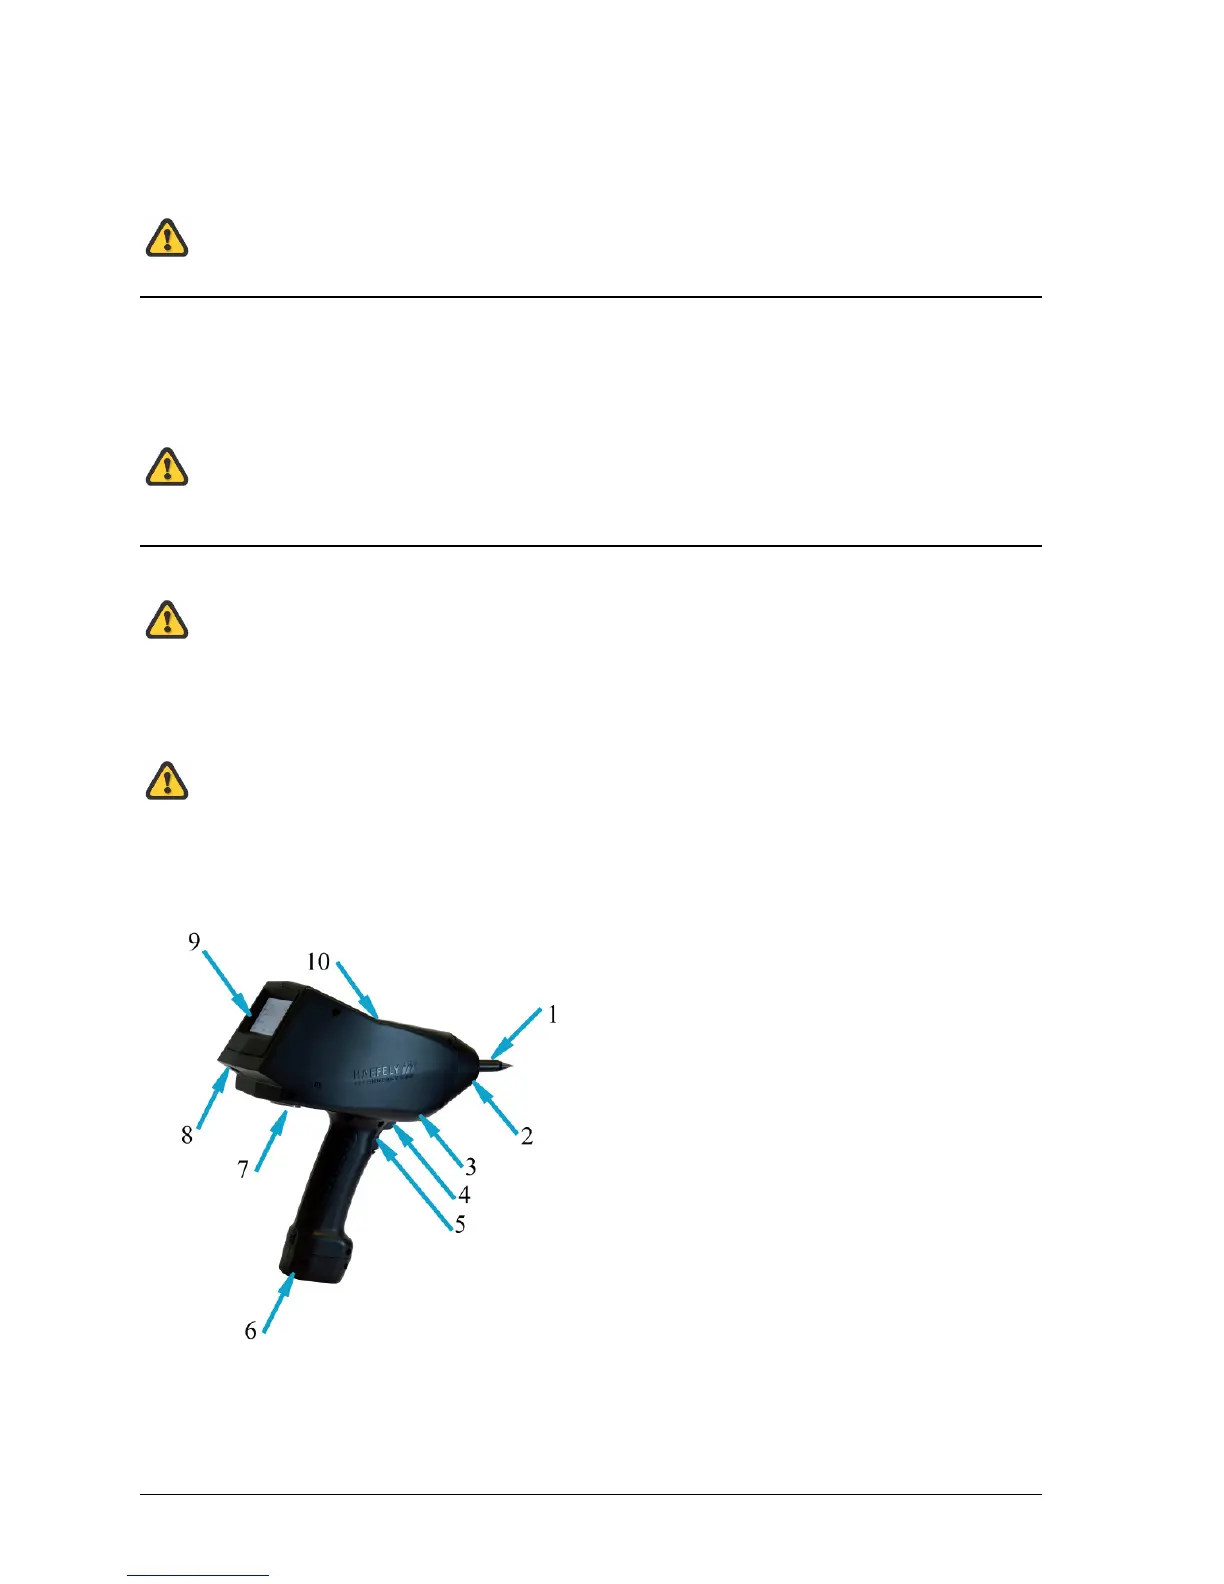
Connect one side of the black ground cable to earth connection (3) on the ONYX, located in front of
the trigger button, and the other to the ground system of your test setup.
Failure to make secure earth connection may result in electrical shock.
Securely place correct discharge tip (air or contact discharge, depending on your test requirement).
Power on by keeping the trigger key pressed for approx. 3 seconds.
(1) Exchangeable discharge tip
(2) LED light
(3) Earth cable connection
(4) Smart key
(5) Trigger
(6) Battery pack or mains adapter (optional)
(7) Tripod connection
(8) Optical interface
(9) Touch screen
(10) RC module port
Fig. 1 connecting the ONYX