53
9.21
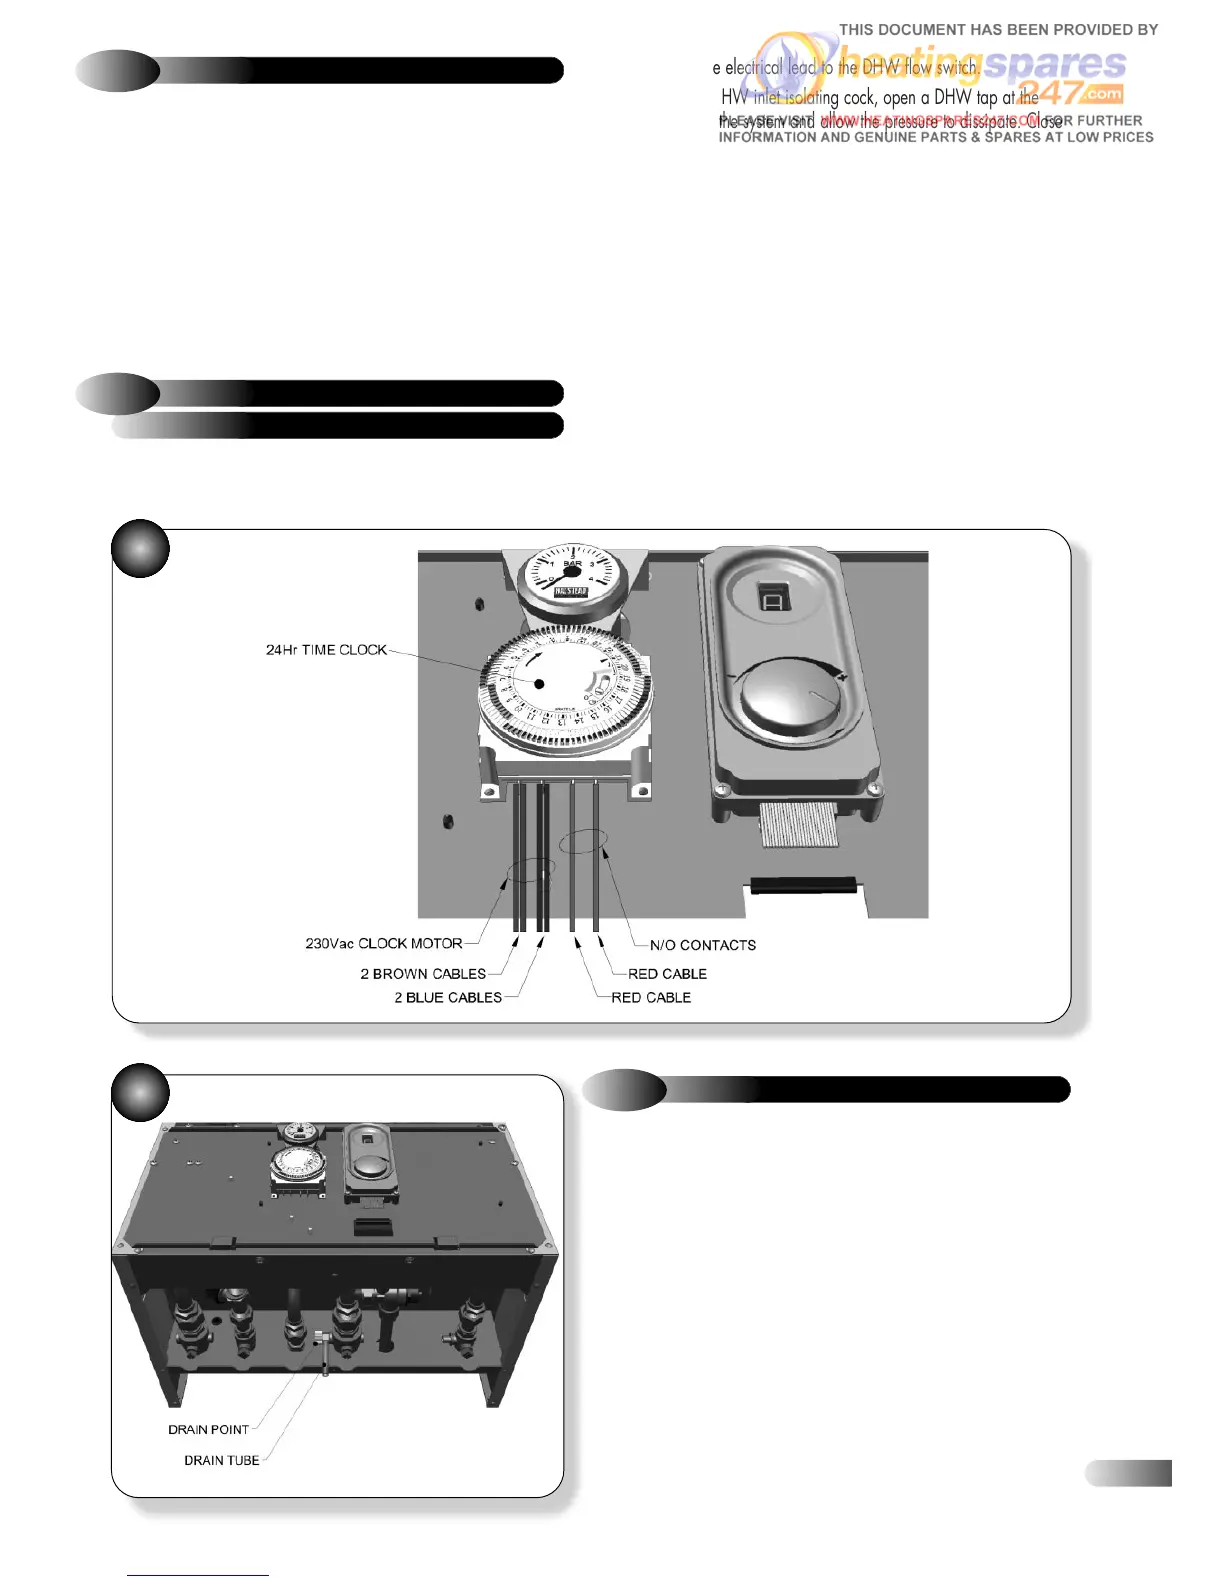
TIME CLOCK
Refer to Figures 53
a)
Ensure supply voltage is isolated.
b) Remove the decorative front panel, unscrew and lower the
control fascia panel.
c) Unplug the electrical leads from the PCB. Refer to section 7.
d) Unplug the four electrical leads from the back of the clock.
e) Remove the four retaining screws and withdraw the clock from
the control panel.
f) Fit the new clock and re-assemble in reverse order.
Refer to Figure 28
a)
Ensure supply voltage is isolated.
REGULATOR AND DHW FILTER
9.22
DHW FLOW SWITCH, DHW FLOW
54
9.23
DRAINING THE APPLIANCE
Refer to Figures 18, 44 & 54
a)
Before draining, give the appliance a brief CH demand, to
ensure the diverter valve is in the CH position.
b) Ensure supply voltage is isolated.
c) If not draining the entire CH system, close the CH flow and CH
return water isolating cocks.
d) Close the DHW return water-isolating cock.
e) Drain down the CH system from the external drain point, and
drain the boiler using the manual drain tap on the CH flow water
isolating cock (figure 18), in conjunction with the manual bleed
valve located on the top LHS of the heat exchanger; refer to Figures
44 and 54.
f) Where the DHW circuit is to be worked on, close the DHW inlet
isolating cock, open a DHW tap at the lowest point in the system
and allow the pressure to dissipate. Close this tap again.
b) Remove the electrical lead to the DHW flow switch.
c) Close the DHW inlet isolating cock, open a DHW tap at the
lowest point in the system and allow the pressure to dissipate. Close
this tap again.
d) Undo the nut connecting the DHW flow switch to the DHW inlet
isolating cock.
e) Undo the nut connecting the DHW flow switch to the water feed
pipe, and remove the DHW flow switch, (containing the DHW Flow
Regulator), and DHW Filter.
f) The assembly can now be flushed clean using water, and parts
replaced as necessary.
g) Re-assemble in reverse order, using a new fibre washer; ensure
that all joints and seals are correctly re-fitted.
h) Open the DHW inlet isolating cock and vent air from the system
by opening each hot water tap in the house in turn.
39