Hansa C40 O&M Manual – OM-013 Revision E 23/10/19
© Hansa Chippers 2019
Anvil adjustment
Whenever the chipper knives are inspected/sharpened, the condition of the anvil should also be checked. If the edge of the anvil
is significantly rounded and/or uneven, then it should be reversed or replaced. Typically, the anvil will maintain its sharp edge for
about 500 hours of operation.
Anvil replacement
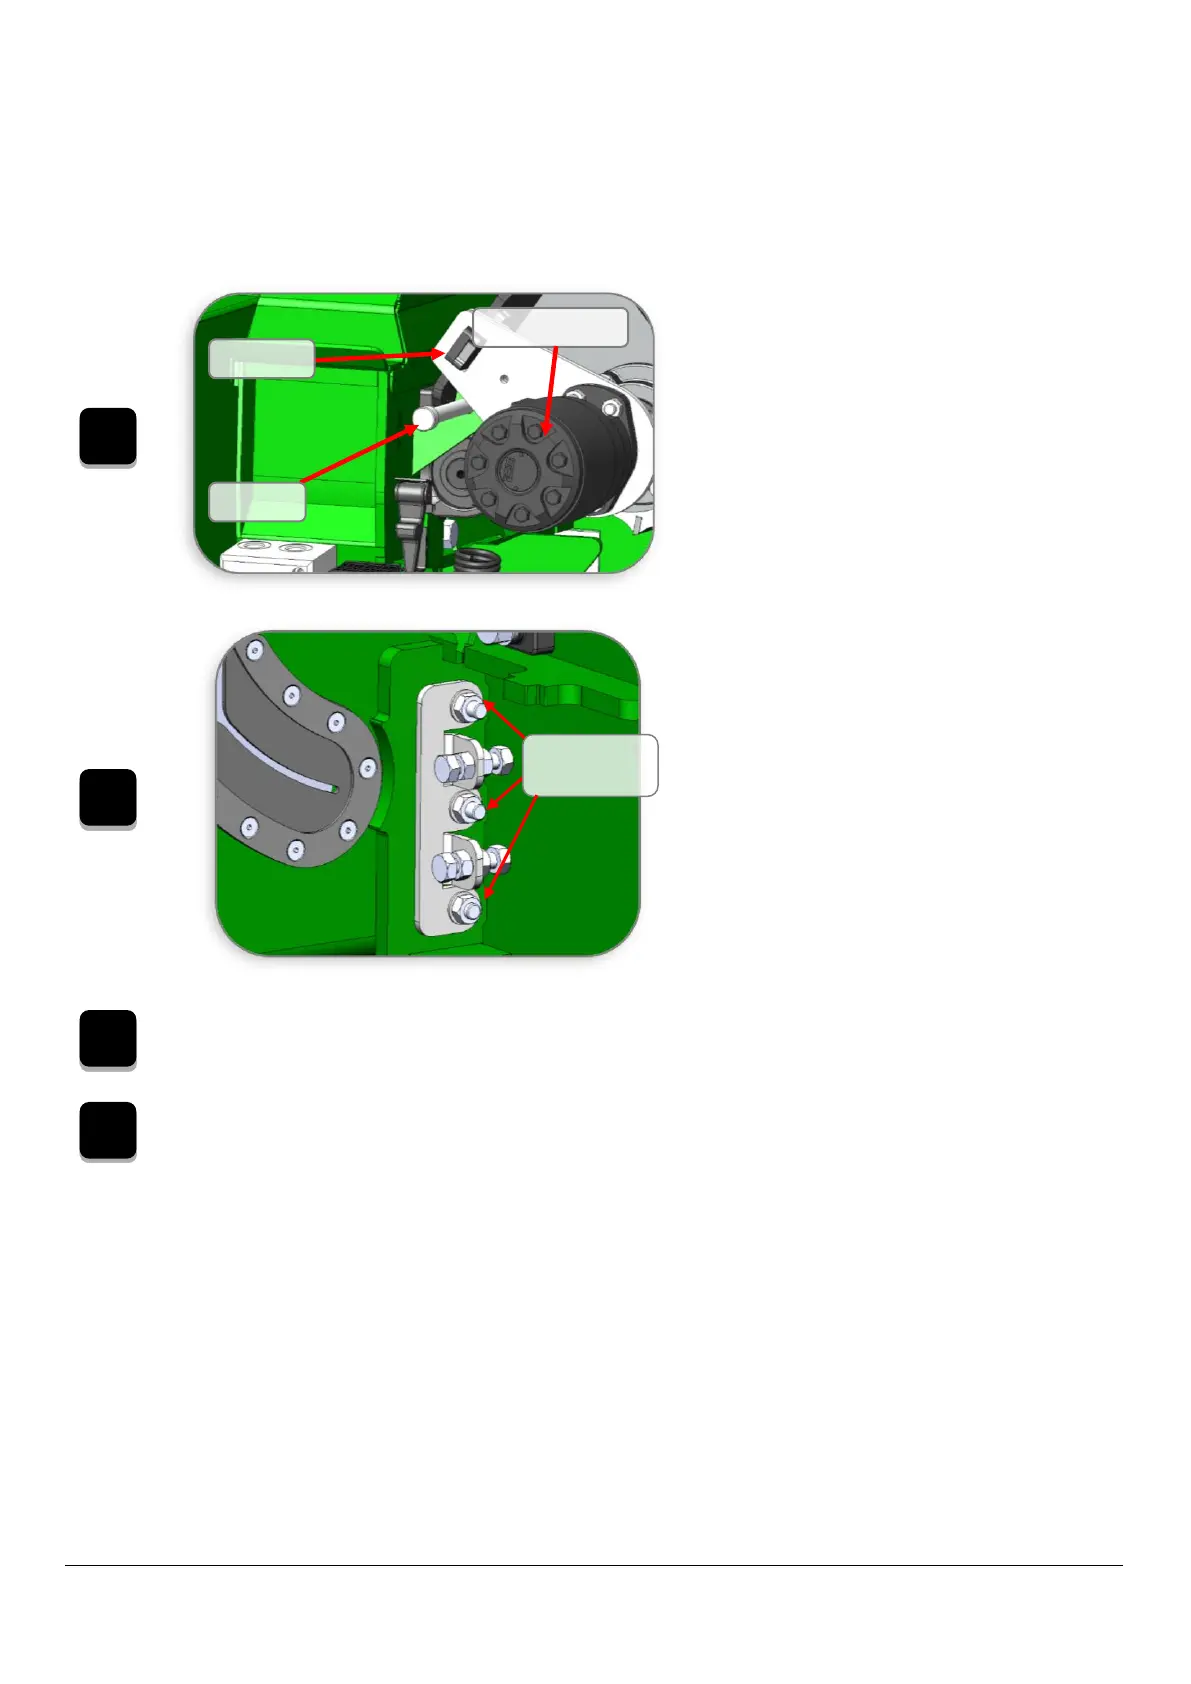
Remove the feed roller guard by unhooking the
four rubber latches. Unhook the springs from the
base of the chassis. Lift the swing arm up and
insert the rotor pin (located underneath the
control panel) into the tab on the housing to lock
the swing arm in place.
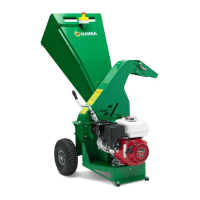
To remove the anvil, you must remove the three
countersink clamping bolts using a 16 mm socket
and extension. If the bolt head turns, hold it with
a 6 mm Allen key.
Note: Do NOT use the Allen key to turn the bolt;
turn only the nut.
Note: Ensure the gap between the knives and the
edge of the anvil is 3 mm. If not, then the anvil can
be adjusted via the two adjustment bolts between
the clamping bolts.
If the other side of the anvil hasn’t been used yet: rotate the anvil 180 degrees and place it back on the feed roller
housing wall. If both sides of the anvil are blunt: remove the anvil and replace it with a new one. Contact Hansa
if a replacement anvil is required.
Tighten the clamping bolts back up using a 16 mm socket, ensuring there is a spring washer between the clamping
plate and each nut. Torque the nuts to 44 Nm.
Countersink
clamping bolts