Fitting and installation
Page EN-31
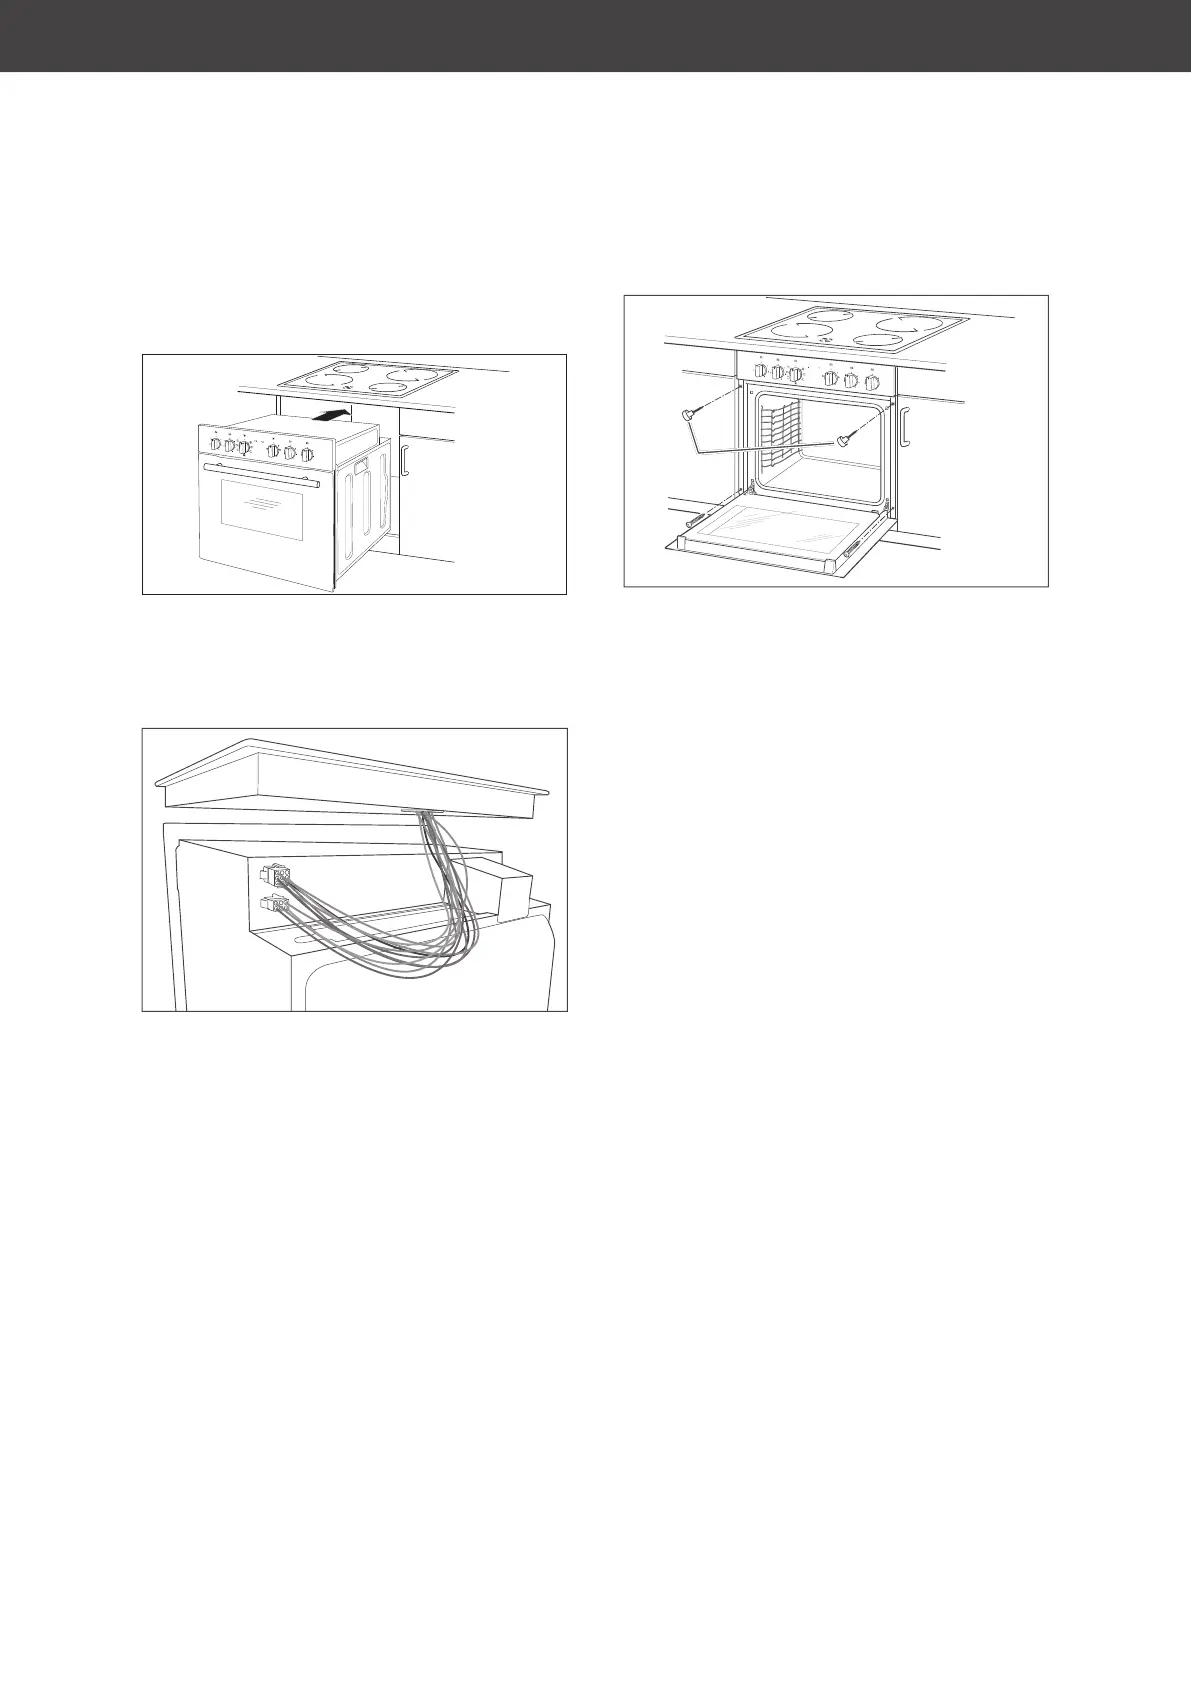
1. Brush the wood shavings away or vacu-
um out the base cabinet.
2. Position the appliance in front of the built-
in cabinet in such a way that the connec-
tion sockets for the hob remain easily ac-
cessible.
3. Insert the plugs of the hob into the sock-
ets on the back of the appliance. Do not
try to insert the plugs into the sockets by
force. They are coded. It is therefore not
possible to plug them in the wrong way.
4. Now push the appliance into the built-in
cabinet fully and centrally.
The mains connection must not be kinked,
pinched or otherwise damaged.
(30)
5. Screw the enclosed screws (30) through
the holes on the sides of the appliance
into the sides of the built-in cabinet.
Getting started
1. If you have not yet done so, remove all
transportation safety materials (card-
board strips etc.) and all adhesive strips/
films from the oven and hob.
2. Turn all the dials of the hob to “●”.
3. Switch on the fuses for the cooker’s elec-
trical circuit.
4. Switch the cooking zone and the oven on
briefly in order to check the functionality.