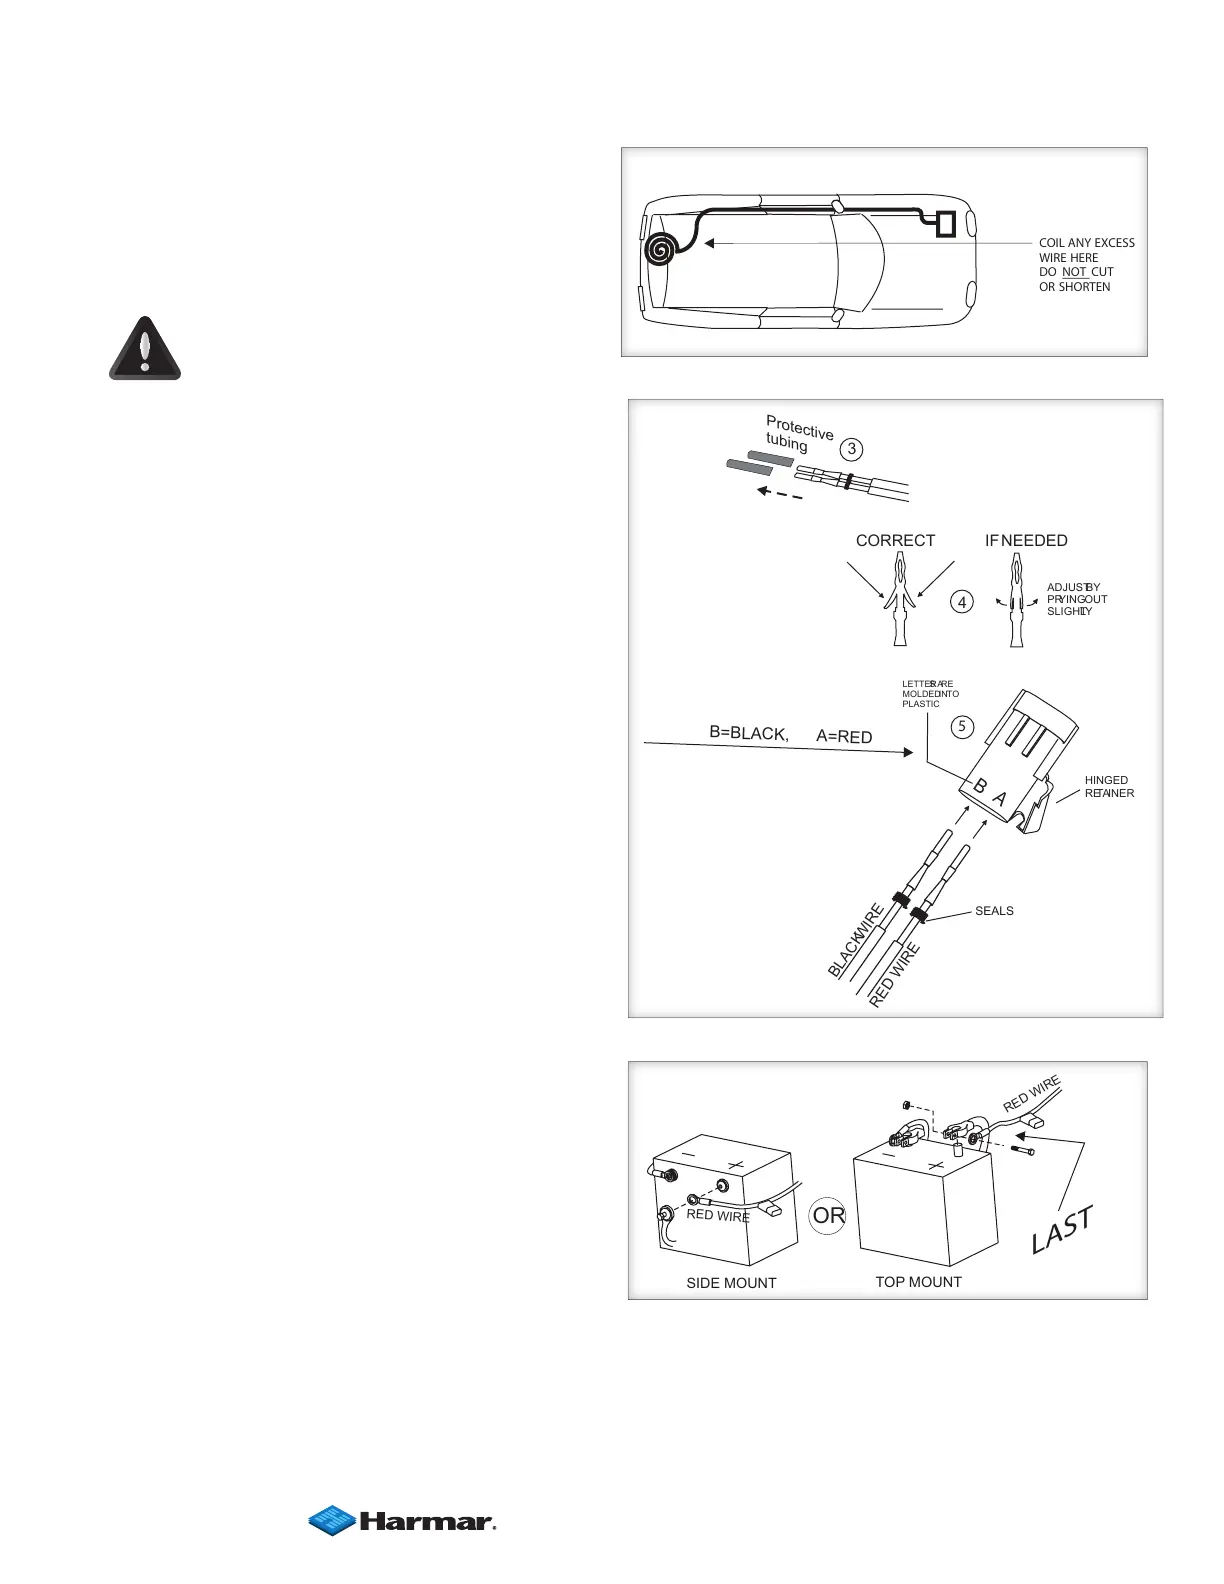
COIL ANY EXCESS
WIREHERE
DO CUT
OR SHORTEN
NOT
COIL ANY EXCESS
WIREHERE
DO CUT
OR SHORTEN
NOT
16
SECTION 2 : INSTALLER
Installation
CAUTION!
DO NOT cut or shorten the harness.
4. Once harness is run into the vehicle,
re
move the pin's protective tubing.
5. Inspect the pin's retaining flanges.
They may have become deformed while
run through the vehicle. These are critical
to secure the pins inside the connector.
Adjust as needed.
6. Flip open end connector's jigned
retainer, insert pins as shown. [Figure
16-2]
Verify the wires can not be pulled out by
moderately pulling on the wires.
Be sure rubber seals are inside back of
connector and close the hinged retainer.
7. Plug connector into t
he lift.
8. LAST…attach red wire to the positive
terminal on the battery. [Figure 16-3]
• If the harness is too long, coil the
excess wire and secure it to the
vehicle frame/bumper with the
supplied wire
ties. [Figure 16-1]
RED WIRE
RED WIRE
OR
LAST
SIDE MOUNT
TOPMOUNT
RED WIRE
RED WIRE
OR
LAST
SIDE MOUNT
TOPMOUNT
Figure 16-3
B
=B
L
A
C
K
,
A
=R
E
D
LETTERSARE
MOLDED INTO
PLASTIC
HINGED
RETAINER
A
B
BLACK WIRE
ERIWDER
Protective
tubing
CORRECT
ADJUST BY
PRYING OUT
SLIGHTLY
IF NEEDED
SEALS
3
4
5
B
=B
L
A
C
K
,
A
=R
E
D
LETTERSARE
MOLDEDINTO
PLASTIC
HINGED
RETAINER
A
B
BLACKWIRE
ERIWDER
Protective
tubing
CORRECT
ADJUSTBY
PRYINGOUT
SLIGHTLY
IFNEEDED
SEALS
3
4
5
Figure 16-2
Figure 16-1
| www.harmar.com | 800-833-0478