2900 Selma Highway, Montgomery AL 36108 USA
PH: +1.334.386.5400 (option 2) FAX: +1.334.386.5450 WEB: www.hartzell.aero
Page | 24
MM10001
Dated 1/1/08
Rev L dated 5/21/15
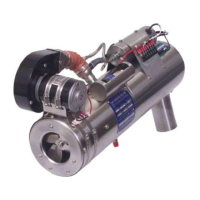
9 HEATER OVERHAUL
NOTE: Assemble per breakdown included with installation instructions for particular unit as this manual is
only typical. Components and configuration may vary.
NOTE: It is strongly recommended that overhaul of any combustion heater be performed by an approved
repair station. To ensure continued safe and reliable operation of the HET dash 1 series heater,
return the complete system including supporting components (fuel pump, regulator, thermostats,
etc.) to the PAH for the 2000hr/10 year overhaul.
Purpose: The heater assembly should be overhauled after 2,000 hours of operation, after 10 years or
whenever it fails to pass the pressure decay test. Whenever the heater requires overhaul, all
accessories should be removed and overhauled. Re-use of a sound combustion tube at the 2,000-hour
overhaul will require the repetitive 250-hour or 4-year inspection, including the pressure decay test.
If a new combustion tube is installed and a “0” time overhaul is completed per the most current
revision of the MM10001 Manual, the heater may once again to operate for a 1,000 hours before the
250-hour inspection intervals are re-instated.
9.1 CLEANING
Clean individual parts (metal) with a cleaning solvent such as Stoddard Solvent (Fed.Spec.
P-D-680) or any other suitable solvent. (Do not clean electrical switches with this solvent.)
Use a soft bristle brush if necessary to remove dirt. Dry thoroughly with compressed air.
Clean electrical components with electrical contact cleaner and wipe with a cloth.
Wipe dust off of switches.
9.2 CLEANING COMBUSTION TUBE AND JACKET ASSEMBLY
The inside of the combustion can and shroud assembly can be cleaned by submerging in a
solvent.
CAUTION: If a wire brush is to be used for cleaning (not recommended), make certain it is a
stainless steel brush. Ordinary steel may cause corrosion.
Wipe the jacket with a cloth dampened in dry-cleaning solvent and follow up with a clean, dry
cloth.
9.3 HEATER ASSEMBLY INSPECTION AND TESTING
9.3.1 INSPECT THE COMBUSTION TUBE FOR THE FOLLOWING CONDITIONS:
NOTE: Cracks or holes in the combustion tube will be detected in the pressure decay test as
described under ‘Pressure Decay Test’. A damaged heater caused by an overheating
condition is the result of a faulty component such as cycling switch, improper fuel
pressure, bad spray pattern, etc.
NOTE: Generally soft and spongy metal can be detected by tapping lightly with the end of a
screwdriver on the downstream end of the combustion tube. A dull sound will indicate a
soft spot as opposed to the solid ring of good metal. If a soft spot is found, the
combustion tube assembly must be replaced.
NOTE: Deformation as a result of backfiring or high altitude over heating will distort the wall of
the radiator near the end dome. This will be accompanied by evidence of extreme
oxidation and is cause for replacement of the combustion tube assembly. If detected,
replace the combustion tube.