EN
DE
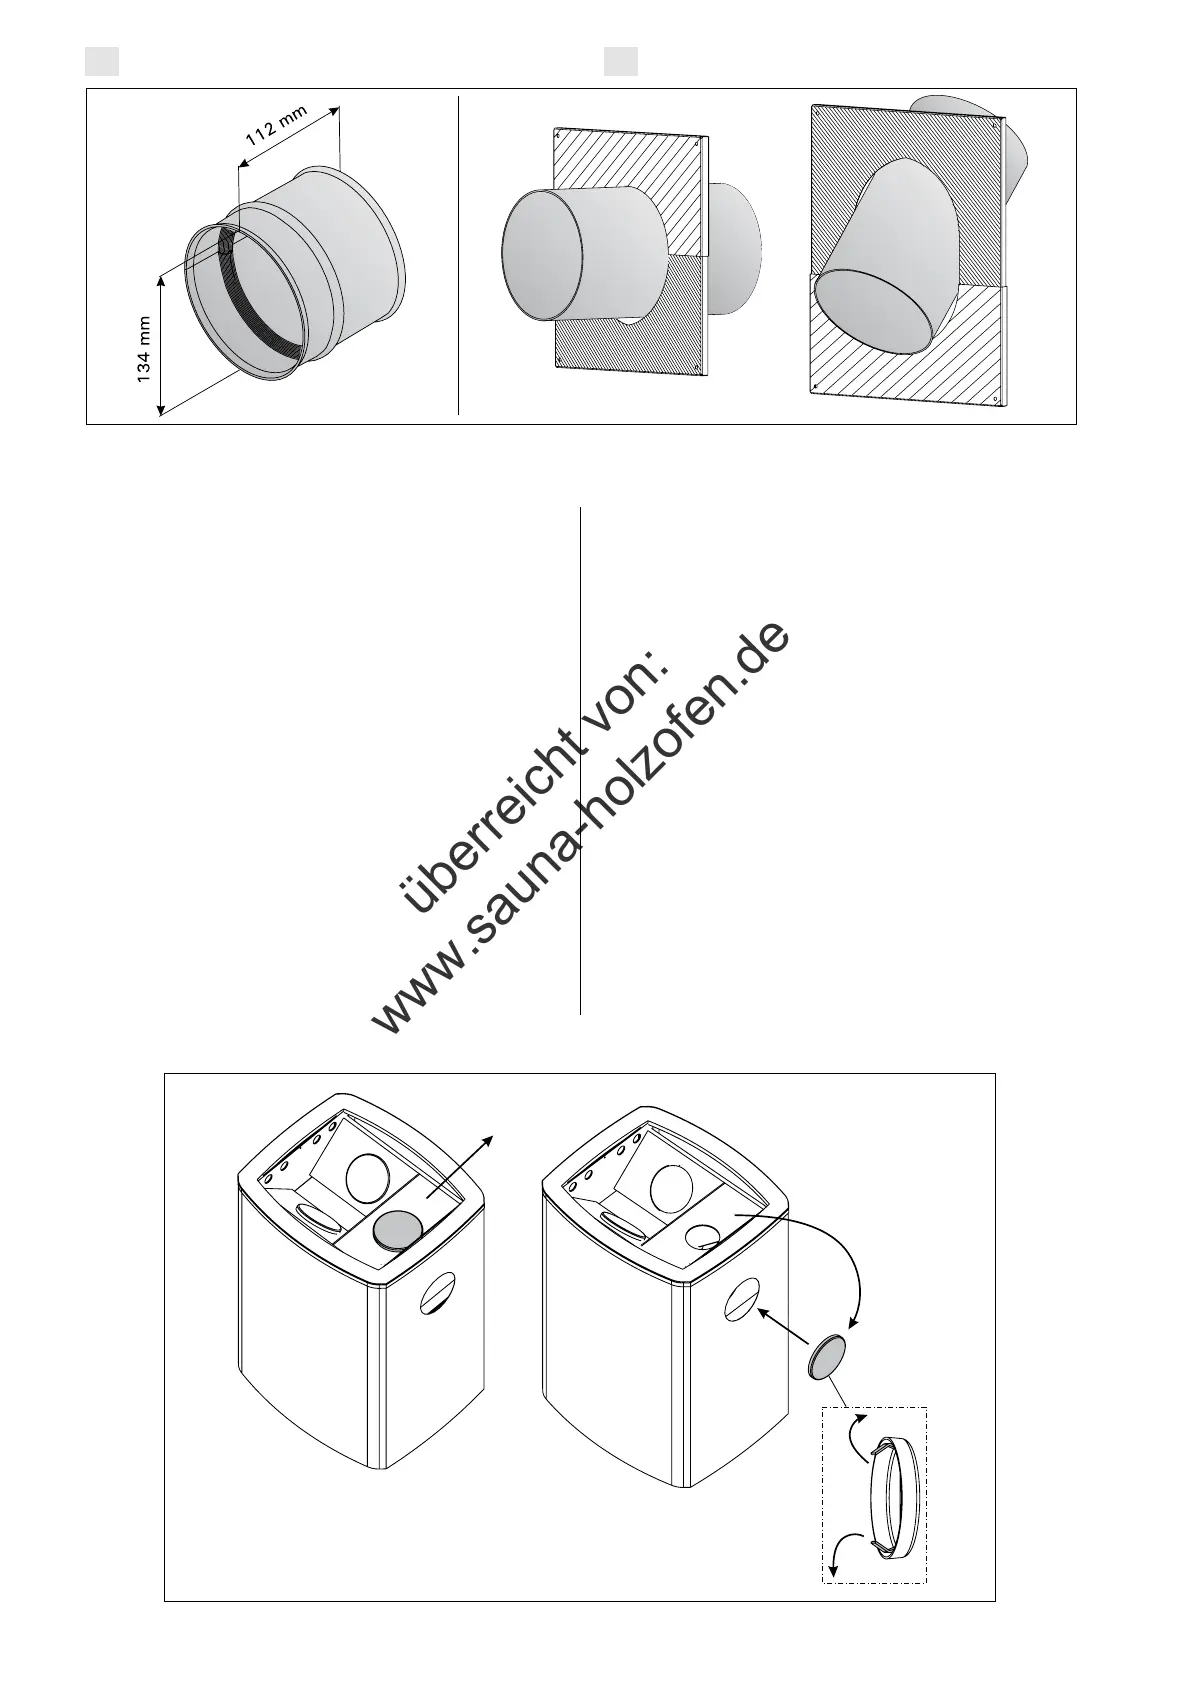
Ensure that the connecting pipe fits tightly in its place
(Figure 9). In the M3 model you must first open the
cover hatch in the back and bend the flap down.
Make an opening in the fireproof wall for the flue
connection. The hole should be slightly larger than
the flue connecting pipe. Notice that the opening has
to be at the correct height, if you intend to use, for
instance, a protective bedding. A suitable gap around
the pipe is ca. 10 mm. It is advisable to round off
the inner corners of the flue opening to ensure that
the combustion gases can flow freely to the flue.
The flue connecting pipe must not be positioned too
deep in the chimney. Shorten the pipe if necessary.
Move the stove to the flue opening and push it in its
place. The pipe will later be sealed to the hole in the
wall with, for example, fireproof mineral wool.
Make sure that the flue connection is tightly sealed
and add more fireproof mineral wool if necessary.
If the wool is pressed deeper than the surface of
the masonry (roughly 10 mm), it can be covered
with plaster or other similar material and hidden
from sight.
The stove can be attached to the flue using a
masonry connector (Figure 10) available as an
accessory. The connector is slightly larger in diameter
than the smoke outlet supplied with the stove, and it
Figure 10.
Abbildung 10.
dem Ofen mitgeliefert) an die Anschlussöffnung auf
der Rückseite an. Das Anschlussrohr muss dicht und
fest an seinem Platz sitzen (Abbildung 9). Beim Modell
M3 müssen Sie als erstes den Deckel auf der Rückseite
öffnen und die Klappe herunterbiegen. Stellen Sie in der
Brandmauer eine Öffnung für den Abzugsanschluss her.
Das Loch sollte etwas größer sein als der Durchmesser
des Abzugsanschlussrohres. Beachten Sie, falls Sie
z.B. eine Schutzplatte anzubringen gedenken, dass
sich die Öffnung auf der richtigen Höhe befinden
muss. Eine Dichtungslücke von etwa 10 mm um das
Rohr herum ist angemessen. Es ist ratsam, die inneren
Ecken der Rauchfangsöffnung abzurunden, damit die
Rauchgase frei in den Rauchfang abziehen können.
Das Abzugsanschlussrohr darf nicht zu weit in den
Rauchfang geschoben werden. Kürzen Sie das Rohr,
falls notwendig. Bringen Sie den Ofen an die Stelle der
Rauchfangsöffnung und schieben Sie ihn an seinen
Platz. Das Rohr wird zuletzt im Loch in der Brandmauer
abgedichtet, z.B. mit feuerfester Mineralwolle.
Sorgen Sie für eine feste Dichtung des
Abzugsanschlusses und führen Sie gegebenenfalls
mehr Mineralwolle hinzu. Wenn die Mineralwolle etwas
tiefer unter die Maueroberfläche gedrückt (etwa 10 mm)
wird, kann sie z. B. mit Mörtel verdeckt werden.
Der Ofen kann mit einem als Zubehör erhältlichen
Figure 12.
Abbildung 12.
Figure 11.
Abbildung 11.
überreicht von:
www.sauna-holzofen.de

 Loading...