27
4.2.2. Instrument panel
4.2.2.1. Front panel of instrument
panel (1)
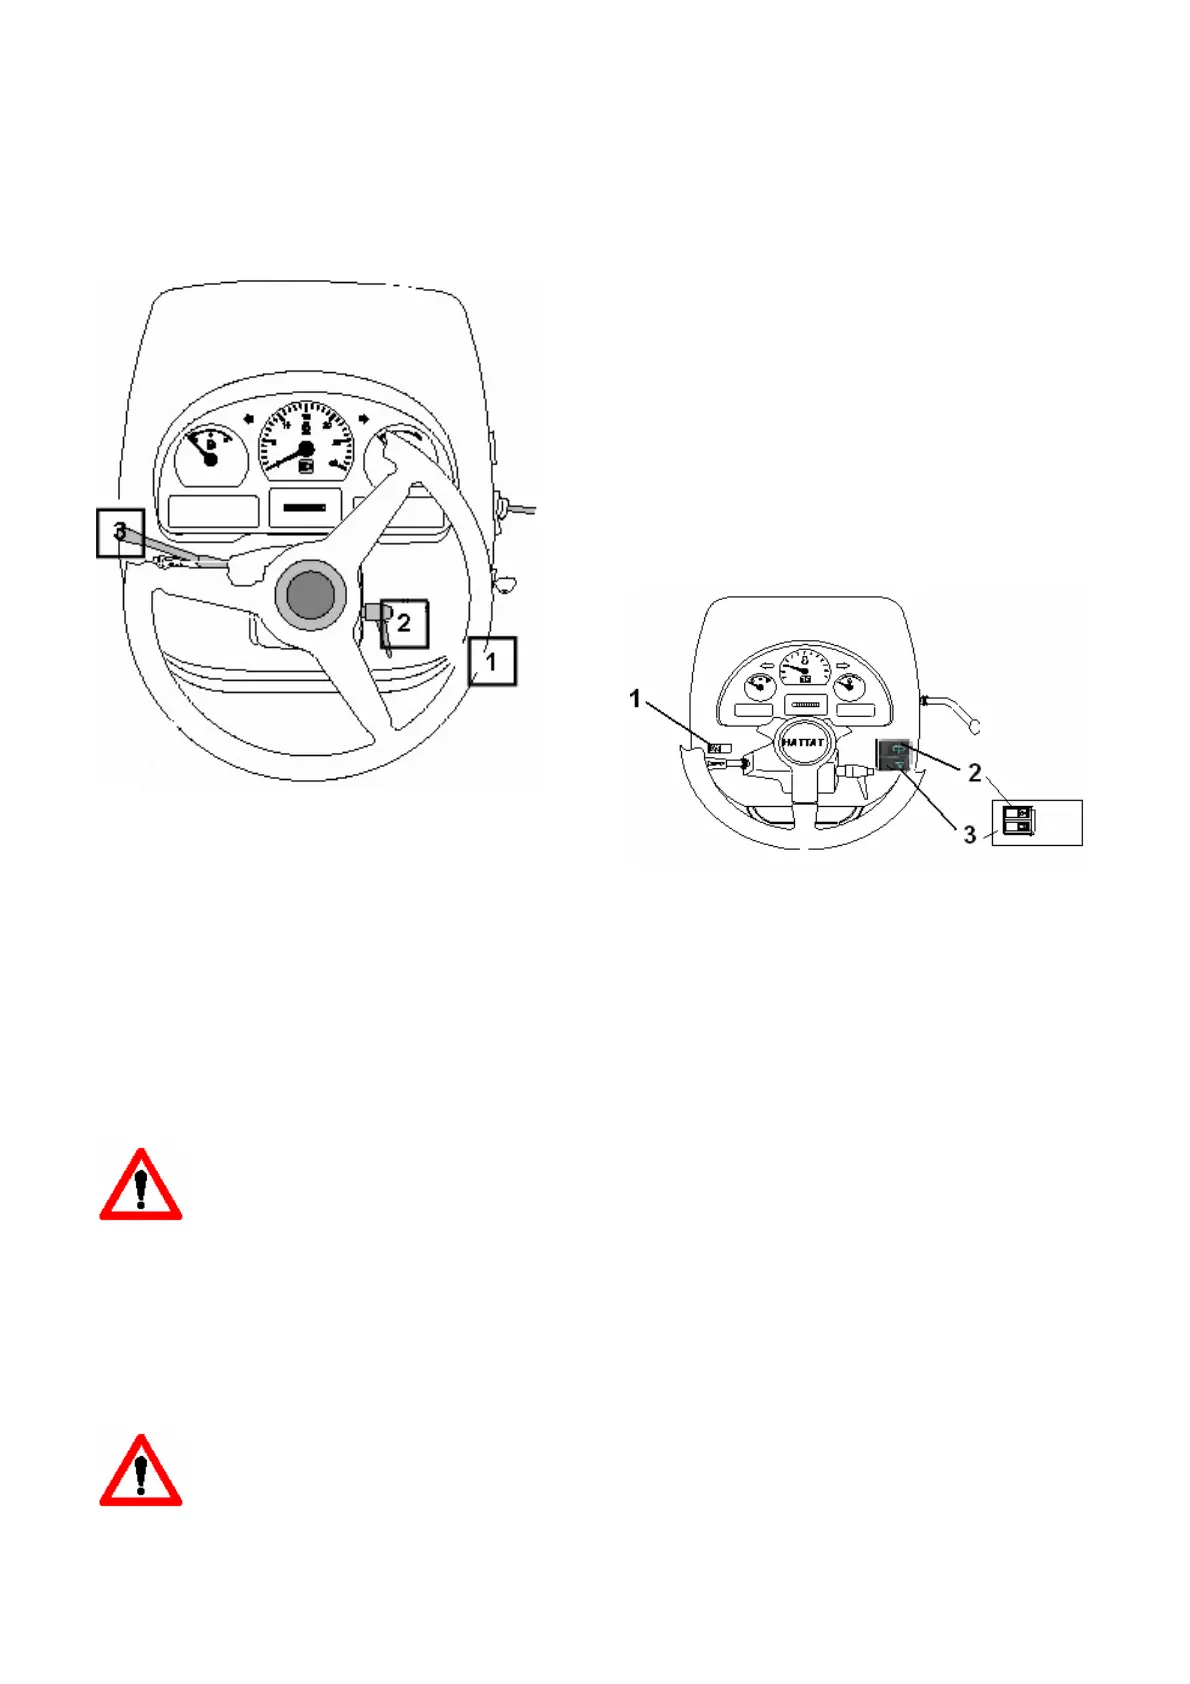
4.2.2.1.1. Steering wheel (1.1)
IMPORTANT: Do not hold the front wheels at full
steering lock for long periods as the oil temperature
quickly rises increasing the risk of damage to the
pump. If the oil supply from the hydraulic pump
should fail for any reason, the tractor can still be
steered manually with the steering wheel. Steering
is heavy to use and it operates slowly.
At full − lock it is possible to force the steering wheel
further manually. This slip of the steering wheel,
also noticeable when driving across a slope, is
normal and is caused by an internal flow of oil for
lubrication of the steering valve.
WARNING: If a malfunction occurs in
the steering system the tractor should
be stopped and the malfunction
corrected before restarting.
4.2.2.1.2. Steering wheel adjustment (2)
The steering wheel can be adjusted to different
driving positions by first opening the lock. After
adjusting tighten the lock.
WARNING: Do not adjust steering
wheel position while driving.
4.2.2.1.3. Main / dipped − beam headlights,
direction indicator flashers and horn (3)
Headlight dipper
Main beam, when pushing the lever to the
outermost position away from the driver.
Dipped beam, when pulling the lever into the middle
position towards the driver.
Direction indicators LH/RH: Lever in rear position/in
front position.
Horn: Push the button at the end of the lever.
Headlight flasher
Operates when moving the lever towards the driver
when the headlights on dipped beam are switched
on.
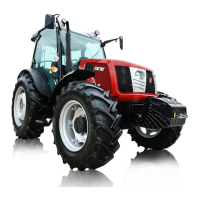
4.2.2.1.4. Light switch (4)
With the lights switched on, the rocker switches are
internally illuminated for ease of operation in the
dark.
Position 1: Marker lights switched on.
Position 2:Marker lights and full/dipped − beam
headlights switched on.
4.2.2.1.5. Switch for windscreen
washer (5)
When pressing the spring returned side of the
switch, the windscreen washer operates.
4.2.2.1.6. Switch for windscreen
wiper (6)
The switch has three positions.
Off position =the opposite side to the lens
depressed
Drizzle position = middle position
The wiper on = the lens side depressed