Heatilator • A36/42C, A36/42CH • Installers Manual • 4017-262 • Rev D • 10/07/13
24
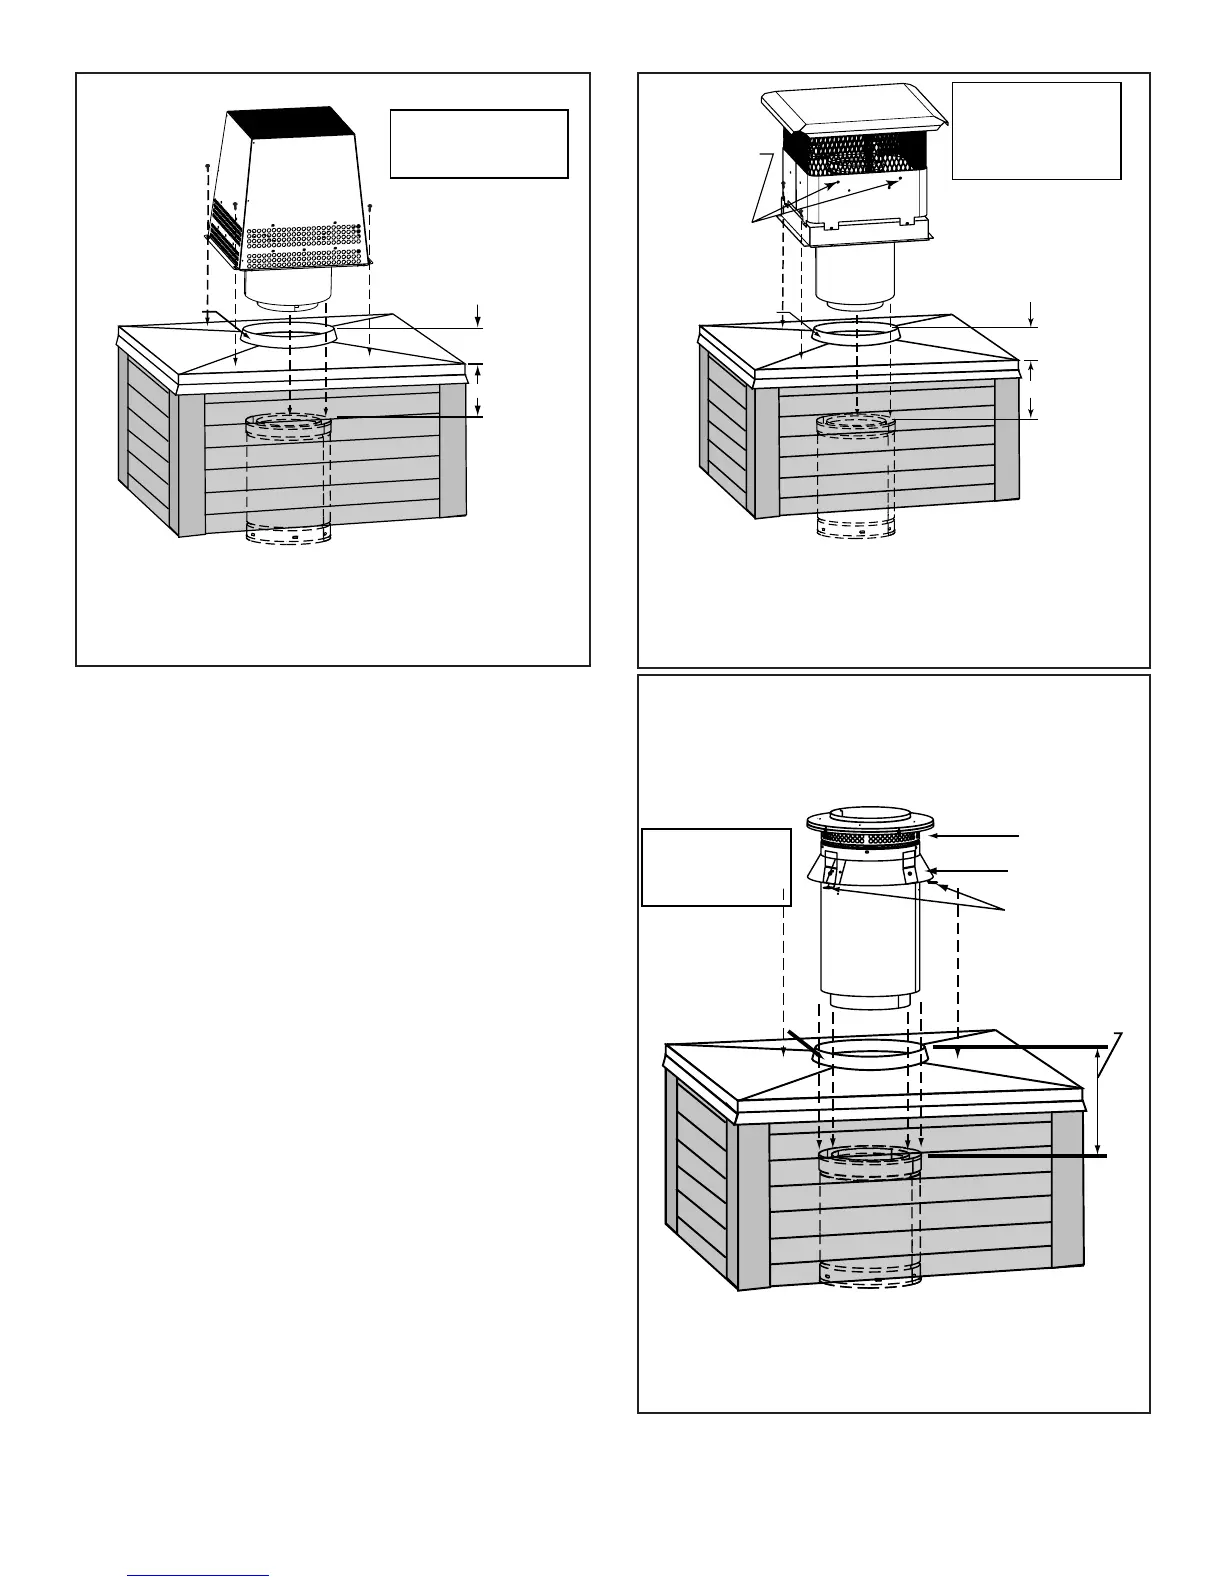
Figure 5.15 Installing a DTO134/DTO146/DTS134/DTS146 Cap
Chimney
Pipe
Chase Top
Termination Cap
Chase
Collar
2 in. (51 mm)
Minimum Height
Termination cap pipe and chimney section must overlap 1-1/2 in. (38 mm).
Place waterproof sealer under
each flange of the termination
cap and on top of each screw
to help prevent leaks.
2 in. (51 mm)
maximum
4 3/4 in. (121 mm)
maximum
The last section of pipe must
stop between 2 in. (51 mm)
above the top of the chase and
4 3/4 in. (121 mm) below the
top of the chase.
Figure 5.14 Installing a TCT375 Terra Cotta Cap
Storm Collar
Chimney
Pipe
Chase Top
Termination
Cap (not shown)
Chase
14 1/2 in. (368 mm)
Maximum
Collar
2 in. (51 mm)
Minimum Height
Caulk gaps between
storm collar & pipe,
and storm collar
& chase top.
Do NOT block
air holes
3 clip brackets.
Slip over chase collar
and attach with screws
provided.
Termination cap pipe and chimney section must overlap 1-1/2 in. (38 mm)
Assemble
storm collar
around extended
termination cap
pipe
once cap is
installed.
CT-3A
 Loading...